This free crochet elf pattern is a fun and easy crochet Christmas granny square pattern by Nana’s Crafty Home!

I am working on a series of large Christmas granny squares and this crochet elf square is the #6 granny square in my series. You can also check out the Snowman Granny square, Reindeer Granny Square, Gingerbread Man Granny Square, Penguin Granny Square, Polar Bear Granny Square, Santa Granny Square, Mrs. Claus Square and the Peppermint Candy Man Square which are also free crochet patterns on the blog.
Want to see the whole blanket together? You can now find the complete joining and border instructions now on the blog!
My Christmas Granny Square blanket would not be complete without a cute elf! And you know if Christmas elves are included then Santa will most certainly be making an appearance very soon 😉
This free crochet elf pattern is a fun square that would make a cute Christmas blanket with my other squares or on its own. Mix and match for the perfect Christmas granny square blanket!
I hope you have been enjoying my Christmas Granny Square free patterns. Let me know if you have any ideas for upcoming squares!
Free Crochet Elf Pattern Granny Square Pattern Details
The granny squares for this series of Christmas granny square patterns work up to a large 14″ square. Perfect for pillows or to mix-and-match for an adorable winter Christmas-themed throw! These squares would also make wonderful wall hangings for Christmas decoration.
This free crochet elf pattern granny square starts out as a circle using double crochet stitches and then the circle is squared off so you can easily join and sew squares together.

The face and hat color changes will be really easy to remember, too. The stitches for the first half of the circle will be in green for the hat, change to cream to work the second half of the circle for his face. So just remember that in the stitch count for each round first half in green, second half in cream.
I chose not to carry the non-working colors as I worked each round. Instead I fastened off the colors and pulled in new strands. I know this makes for a lot more ends to weave in but I really didn’t want any colors to bleed through. You could certainly opt to carry if you so choose. I hate to weave in ends, too!

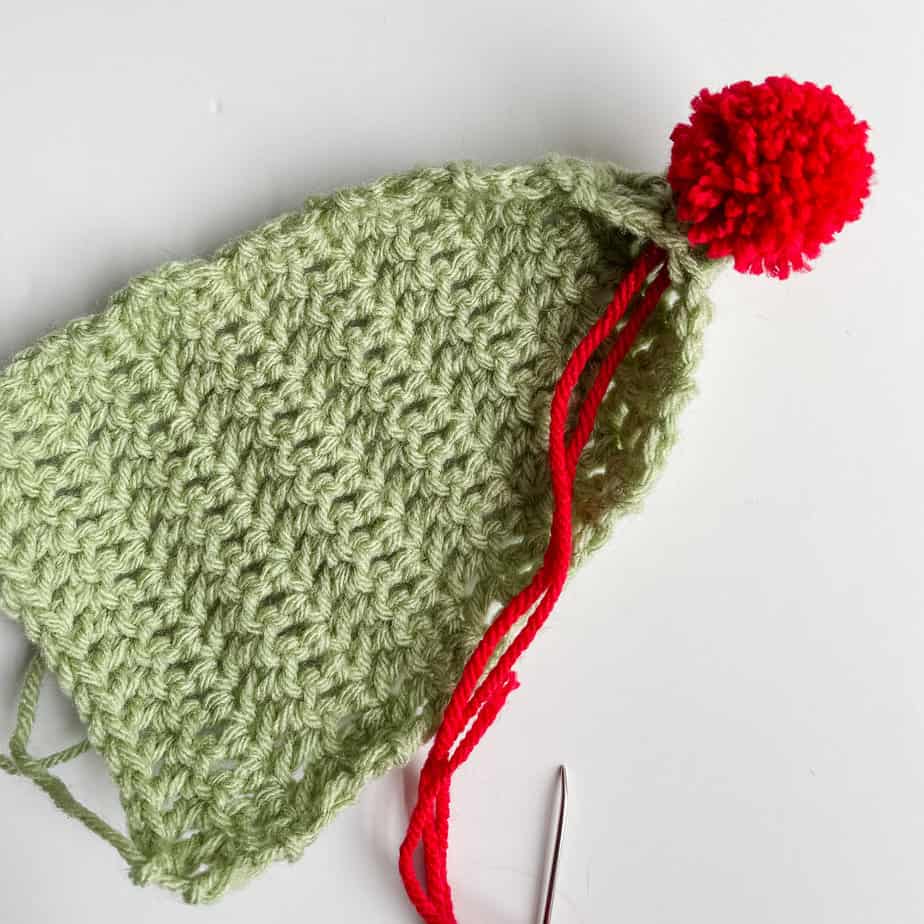
For the elf you will be crocheting the hat band, ears, eyes and stocking portion of his hat separately and then sewing them on to the front of the square. The stocking portion of his hat is worked as a triangle which is then sewn to the top of his hat and then folded and sewn to create a 3D effect to the square. I have an Instagram video reel that will show you how to sew the hat – really very easy! Add a pom pom to the bottom for a fun additional detail!
For all of you eagle eyes out there I changed up the stitch I used for the hat band but forgot to take a photo of the band after I redesigned it. 🤦🏻♀️ However, the photo below will give you an idea of the assembly process.

His smile is worked as a surface slip stitch across several stitches. You can see me work this same technique on my Gingerbread Man Square on Instagram if you would like to see that technique.
I am using a combination of Red Heart With Love* yarn and Red Heart Super Saver yarn which are both a medium weight #4 acrylic worsted weight yarn. I don’t generally like combining two different yarns together in the same project. However, I couldn’t find a green shade in With Love that paired up well with the Iced Aqua blue color way. So I ended up picking the Frosty Green color way from Red Heart Super Saver. I think these yarns actually play nicely together and didn’t have an issue with it. This pattern is a great way to use up your stash, too!
*This post contains affiliate links. You can click on any yarn or material highlighted to purchase. I will receive a small commission if you purchase but it won’t cost you any extra! As an Amazon Associate I earn from qualifying purchases.
This crochet elf granny square pattern is also available as an ad-free, printable PDF! You can purchase the individual pattern, or if you love PDFs, you might want to check out my Lifetime Membership. It’s an awesome deal! Never pay for one of my PDFs again!! (Or, scroll down for the free version!)
The complete pattern is now available as 1 PDF! The Christmas Crochet Granny Square Blanket is also available as an ad-free, printable PDF! You can purchase the individual pattern, or if you love PDFs, you might want to check out my Lifetime Membership. It’s an awesome deal! Never pay for one of my PDFs again!! (Or, scroll down for the free version!)
This PDF will contain all 9 squares + joining and border instructions all for 1 low price! Each of the 9 Christmas granny square patterns are also available for purchase.

Purchase the ad-free pdf of my Crochet Elf Granny Square Pattern for a small fee. Thank you so much for supporting my work!

If you would like daily crochet inspiration be sure to follow me on Facebook, Instagram, Pinterest, YouTube, Twitter and Tumblr!
To get notified of my free crochet patterns and future giveaways, sign up for my newsletter. I never share or sell your information to third parties — it stays private!
You may also like the following free Christmas crochet patterns by Nana’s Crafty Home:


- 1. Snow Globe Towel Topper free crochet pattern
- 2. Santa Gnome Christmas Tree Ornament free crochet pattern
- 3. Gnome for Christmas C2C Blanket free crochet pattern

Free crochet Elf pattern Granny Square
Pattern written in US crochet terminology
Supplies:
- Red Heart With Love Weight 4 / Medium (100% acrylic, 7 oz / 370 yds)
- Aran 0.7 oz / 37 yds (Cream)
- Holly Berry 0.3 oz / 16 yds (Red)
- Iced Aqua 1.5 oz / 80 yds (Blue)
- Black 0.2 oz / 8 yds (Black)
- White 0.05 oz / 3 yds (White)
- Red Heart Super Saver Weight 4 / Medium (100% acrylic, 7 oz / 364 yds)
- Frosty Green 1.2 oz / 63 yds (Green)
Size I (5.5 mm) crochet hook
Scissors
Stitch marker (optional)
Tapestry needle
Approximate finished size: 14” square
Gauge: First 4 rounds = 4” / 4 dc sts = 1”
Abbreviations:
MC = magic circle
ch = chain
sc = single crochet
dc = double crochet
hdc = half double crochet
tr = treble crochet
sp = space
st(s) = stitch(es)
sk = skip
sl st = slip stitch
WS = wrong side
RS = right side
Pattern Notes:
- Ch 3 at beginning of each round counts as first dc stitch.
- Ears, eyes, hat band and stocking portion of hat are worked separately and then sewn to front of panel.
- When changing colors on face, do not carry colors. Instead, drop yarn and fasten off colors each round.
Pattern Instructions
With Green, make MC.
Round 1: ch 3, 5 dc in MC, switch to cream, 6 dc in MC, switch to green, join with sl st in top of ch-3 and tighten ring. (12)
Round 2: ch 3, 1 dc in same st, 2 dc in next 5 sts, switch to cream, 2 dc in next 6 sts, switch to green, sl st in top of ch-3. (24)
Round 3: ch 3, 1 dc in same st, 1 dc in next st, *2 dc in next st, 1 dc in next st,* repeat from * to * 4 times, switch to cream, repeat from * to * 6 times, switch to green, sl st in top of ch-3. (36)
Round 4: ch 3, 2 dc in next st, *1 dc in next 2 sts, 2 dc in next st,* repeat from * to * 4 times, 1 dc in next st, switch to cream, 1 dc in next st, 2 dc in next st, repeat from * to * 5 times, 1 dc in last st, switch to green, sl st in top of ch-3. (48)
Round 5: ch 3, 1 dc in same st, 1 dc in next 3 sts, *2 dc in next st, 1 dc in next 3 sts,* repeat from * to * 4 times, switch to cream, repeat from * to * 6 times, switch to green, sl st in top of ch-3. (60)
Round 6: ch 3, 1 dc in next st, 2 dc in next st, *1 dc in next 4 sts, 2 dc in next st,* repeat from * to * 4 times, 1 dc in next 2 sts, switch to cream, 1 dc in next 2 sts, 2 dc in next st, repeat from * to * 5 times, 1 dc in last 2 sts, switch to green, sl st in top of ch-3. (72)
Round 7: ch 3, 1 dc in same st, 1 dc in next 5 sts, *2 dc in next st, 1 dc in next 5 sts,* repeat from * to * 4 times, switch to cream, repeat from * to * 6 times, switch to green, sl st in top of ch-3. (84)
Round 8: ch 3, 1 dc in next 2 sts, 2 dc in next st, *1 dc in next 6 sts, 2 dc in next st,* repeat from * to * 4 times, 1 dc in next 3 sts, switch to cream, 1 dc in next 3 sts, 2 dc in next st, repeat from * to * 5 times, 1 dc in last 3 sts, switch to green, sl st in top of ch-3. (96)
Round 9: ch 3, 1 dc in same st, 1 dc in next 7 sts, *2 dc in next st, 1 dc in next 7 sts,* repeat from * to * 4 times, switch to cream, repeat from * to * 6 times, sl st in top of first st. (108)
Fasten off Cream.
Round 10: Join Blue in first st, ch 1, sc in same st, sc in next st, hdc in next 4 sts, dc in next 4 sts, tr in next 4 sts, *(2 tr, ch 2, 2 tr) in next st, tr in next 4 sts, dc in next 4 sts, hdc in next 4 sts, sc in next 2 sts, hdc in next 4 sts, dc in next 4 sts, tr in next 4 sts,* repeat from * to * two times; (2 tr, ch 2, 2 tr) in next st, tr in next 4 sts, dc in next 4 sts, hdc in next 4 sts, sl st in first st. (120 + 4 ch-2 corner sp)
Round 11: ch 1, sc in same st, sc in next st, hdc in next 4 sts, dc in next 6 sts, tr in next 4 sts, *(2 tr, ch 2, 2 tr) in ch-2 sp, tr in next 4 sts, dc in next 6 sts, hdc in next 4 sts, sc in next 2 sts, hdc in next 4 sts, dc in next 6 sts, tr in next 4 sts,* repeat from * to * two times; (2 tr, ch 2, 2 tr) in ch-2 sp, tr in next 4 sts, dc in next 6 sts, hdc in next 4 sts, sl st in first st. (136 + 4 ch-2 corner sp)
Round 12 – 13: ch 3 (counts as first st), *dc in each st to next ch-2 sp, (2 dc, ch 2, 2 dc) in ch-2 sp,* repeat from * to * to end, sl st top of ch-3. (152 row 12, 168 row 13)
Fasten off. Weave in ends.
Hat Band
With Red, chain 36.
Row 1: (RS) 1 sc in second ch from hook and in each ch to end. Turn. (35)
Row 2: ch 1, 1 sc in each st. Turn.
Row 3: ch 1, hdc in same st, *(1 dc, ch 3, sl st in third ch from hook, 1 dc) in next st, hdc in next st, sl st in next st, hdc in next st,* repeat from * to * to last 2 stitches, (1 dc, ch 3, sl st in third ch from hook, 1 dc) in next st, 1 hdc in last st. (9 ch-3 crowns)
Fasten off, leaving a long tail for sewing.
Stocking Hat
With Green, make a MC.
Round 1: (RS) ch 3, 5 dc in MC, join with sl st in top of ch-3. Turn. (6)
Row 2: ch 3, dc in same st, dc in each st to last st, 2 dc in last st. Turn. (8)
Row 3: repeat row 2. (10)
Row 4: repeat row 2. (12)
Row 5: repeat row 2. (14)
Row 6 – 9: ch 3, dc in each st. Turn. (14)
Row 10: repeat row 2. (16)
Row 11 – 15: ch 3, dc in each st. Turn. (16)
Fasten off, leaving a long tail for sewing.
Make one small pom pom approximately 1 3/8” size with red yarn. Attach pom pom to end of hat.
Eyes (make 2)
With Black, make MC.
Round 1: (RS) ch 3, 10 dc in MC, join with sl st in top of ch-3, tighten ring. (11)
Fasten off Black, leaving a long tail for sewing.
Row 2: Join Blue in first st of round 1, sl st in next 5 sts.
Fasten off Blue, leaving a long tail for embroidery of eye.
Row 3: Join White in first st of round 1 (behind slip stitches of row 2), sl st in next 5 sts.
Fasten off White.
With long tail of Blue, embroider center of eye.
Weave in remaining ends not left for sewing.
Ear 1
With Cream, ch 4.
Row 1: (WS) 2 sc in first st, 1 sc in next st, 2 sc in last st. Turn. (5)
Row 2: (RS) ch 1, 2 sc in first st, 1 sc in each st to last st, 2 sc in last st. Turn. (7)
Row 3: repeat row 2. (9)
Row 4: ch 1, 2 sc in first st, 1 sc in each st to last st, 2 sc in last st. Do NOT turn, ch 2, sc long edge of rows 4-1, sc in unused loops from foundation ch. (18)
Fasten off, leaving a long tail for sewing. Weave in remaining ends not left for sewing.
Ear 2
Repeat rows 1 – 3 of Ear 1.
Row 4: ch 1, 2 sc in first st, 1 sc in each st to last st, 2 sc in last st. (11)
Fasten off.
With RS of ear facing, attach cream to unused loop of foundation ch; sc in each unused loop, sc along edge of rows 1-4, ch 2, sl st in first st of row 4.
Fasten off, leaving a long tail for sewing.
Weave in remaining ends not left for sewing.
Assembly
Note: Sew following pieces to RS of square.
With long tail, sew hat band to face.
With long tail, sew eyes to face.
With long tails, sew ears to face.

With long tail, sew stocking hat to top of head by placing last row of stocking hat to top of round 9. Sew in place then fold down to place stocking hat and sew remainder of hat into place as desired. Note: do not push the hat flat when sewing but leaving some space under it to create a 3D effect.
Smile
Join Black to top of round 6 with sl st by inserting hook below stitch of round 7 and around stitch of round 6, yarn over and pull through loop on hook to create a sl st, continue working surface slip stitches around next 11 stitches of round 6 for a total of 12 slip stitches. With ends, embroider sides of smile. Note: evenly space smile below eyes. You can mark center and then count over 6 stitches to begin smile.
Weave in remaining ends.
Copyright 2022 Tonya Bush/Nana’s Crafty Home
Social Media links:
Facebook: https://www.facebook.com/nanascraftyhome
Instagram: https://www.instagram.com/nanascraftyhome/
Pinterest: https://www.pinterest.com/nanascraftyhome/
YouTube: https://www.youtube.com/c/TonyaBush
Twitter: https://twitter.com/nanascraftyhome
Facebook Group: https://www.facebook.com/groups/829792060522798
Sign up for my Newsletter: https://nanascraftyhome.com/sign-up-for-my-free-newsletter/
 Hi! Thank you so much for being here! I am Tonya the designer behind Nana's Crafty Home. As a wife, mother, Nana of 9 & with 2 fur babies, my days are filled with love, laughter, hugs and yarn! Here you will find colorful and creative crochet designs for yourself or loved ones. My hope is that you will be inspired to learn and create along with me!