The Christmas Gnome C2C Pillow is a free crochet pattern for a super cute pillow! This Gnome Pillow will be a wonderful addition to your holiday home decor this year!

I have had this cute Gnome pillow design in my head since Christmas last year and I knew it would be a perfect Christmas in July pattern! And since I am seriously addicted to gnomes it seemed perfect. You can find all of my free gnome crochet patterns on the blog – the Gnome for Christmas C2C Blanket is a particular favorite but I can’t forget the original viral Gnome Towel Topper, Gnome Christmas Ornament, Gnome Christmas Tree Towel Topper, Gnome Couch Pillow, Gnome Bottle Topper, and the Gnome Tissue Box Cover. If you love year-round gnomes, check out all of my free crochet gnome patterns for every season!

Christmas Gnome C2C Pillow Pattern Details
This Gnome Pillow is worked in the mini half double crochet corner to corner (c2c) stitch. If you have never worked a c2c (corner to corner) crochet project before and would like to learn how I have ALL the tutorials you need to master this wonderful technique and make your very own Christmas Gnome C2C pillow!
Ready to dig deeper into corner to corner crochet and master this versatile technique? Our Ultimate Guide to C2C Crochet: Techniques and Tips is the foundational c2c resource on the blog, packed with everything beginners and for those that need a c2c refresher! From standard DC and mini-HDC C2C basics to seamless color changes, efficient yarn carrying, custom graph design with Stitch Fiddle, and troubleshooting common issues, this comprehensive C2C crochet guide includes step-by-step tutorials, video links, and free pattern ideas to get you started. Whether you’re tackling your first C2C project or refining your skills, head over to the guide now for all the FREE essential C2C crochet tips and resources in one place!
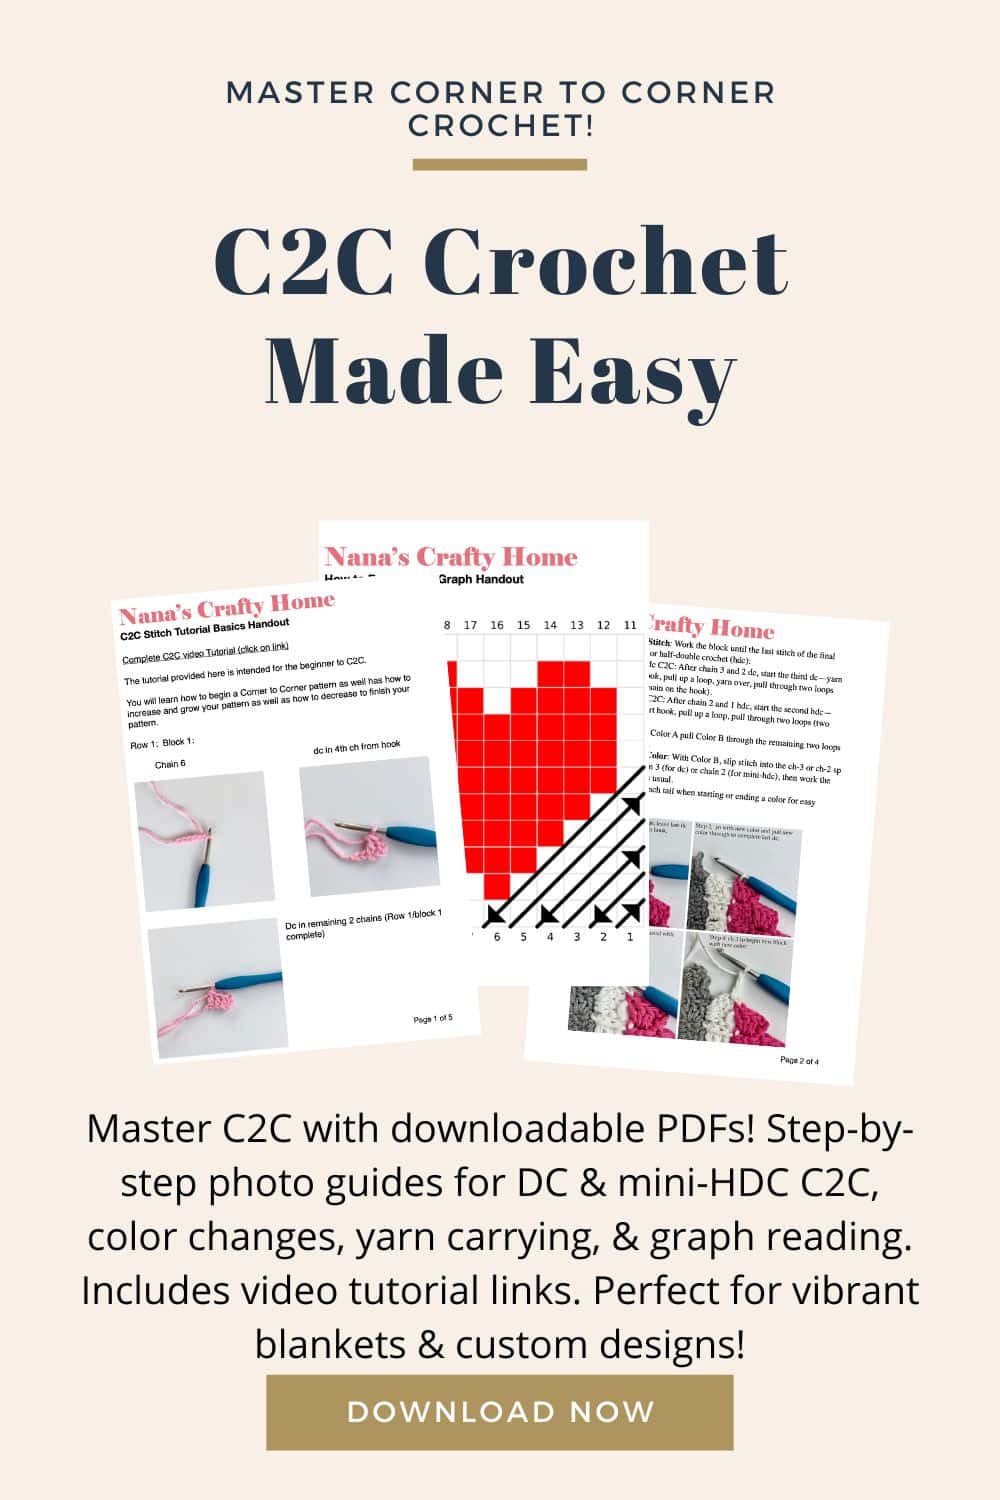
Elevate your C2C crochet skills with our C2C Crochet PDF Tutorial Bundle! This handy guide is a must-have for crocheters wanting to create stunning blankets and custom designs with ease. Packed with step-by-step photo tutorials for standard DC, mini-HDC, color changes, yarn carrying, graph reading, and making a rectangle shape in c2c, plus links to helpful videos, it’s perfect for beginners. Save time, avoid mistakes, and unlock your creativity—grab your downloadable PDFs now and start crocheting pixel-perfect projects! Includes beginner-friendly patterns to practice your new skills!
And, if you need help in learning how to make a C2C Crochet Rectangle shape I have a complete photo and video tutorial for you that will show you how to decrease on one side while continuing to increase on the other!
I made this pillow in the mini (hdc) half double C2C technique for an approximate finished size of 17” x 28” which is the size of a standard pillow. Perfect for snuggles on the couch! If you made this with the standard c2c (double crochet) crochet technique your pillow would be larger. You can learn more about the mini hdc c2c technique at the following:

I used a combination of textures for this pillow using two different yarns. I used Bernat Pipsqueak yarn* for the white portions and Red Heart With Love for the rest of the pillow. Bernat Pipsqueak is a fuzzy, textured yarn which makes the pillow so soft and snuggly – I can’t stop touching it! Red Heart With Love is the perfect pairing as it is soft with beautiful and vibrant colors. Note: Red Heart With Love seems to now be discontinued but you could use your favorite medium worsted weight acrylic yarn as a substitute – Red Heart Super Saver, I Love This Yarn!, Vanna’s Choice, Big Twist Value, Bernat
This post contains affiliate links. You can click on any yarn or material highlighted to purchase. I will receive a small commission if you purchase but it won’t cost you any extra!
No sewing needed to attach panels together – I worked single crochet and chains between the blocks of corner to corner around the outside edge of the panels. If you would like to see a photo tutorial for this you can head on over to my Harvest Pumpkin Red Trunk C2C Pillow pattern which will show you how to do this.

For the pom pom, I made a c2c square with the Pipsqueak yarn, left a long tail for creating the pom pom and sewing to the top of the pillow. Quick, easy – and matches the pillow! The pom pom is absolutely optional but I love the extra dimension you get with it.
I have a complete video tutorial to help you with making this easy pom pom as well!

I’m participating in the Christmas in July Make Along with Underground Crafter. Come join the fun! 31 bloggers have teamed up to bring you a month full of free patterns to kick start the handmade holiday season — including crochet, knitting, sewing, and crafting projects. There’s something new to make every day in July. Each week will have a theme.
This Crochet Gnome Pillow pattern is also available as an ad-free, printable PDF! You can purchase the individual pattern, or if you love PDFs, you might want to check out my Lifetime Membership. It’s an awesome deal! Never pay for one of my PDFs again!! (Or, scroll down for the free version!)

Purchase the ad-free pdf of the Gnome Christmas C2C Pillow pattern for a small fee. Thank you so much for supporting my work!
To get notified of free crochet patterns and get notified of future giveaways, sign up for my newsletter. I never share or sell your information to third parties — it stays private!
If you would like daily crochet inspiration be sure to follow me on Facebook, Instagram, Pinterest, YouTube, Twitter and Tumblr!


Christmas Gnome C2C Pillow free crochet pattern
Pattern written in US crochet terminology
Supplies:
Red Heart With Love Blue Hawaii 8.1 oz / 430 yds (b)
Bernat Pipsqueak Whitey White 4.5 oz / 130 yds (w)
Red Heart With Love Pewter .20 oz / 11 yds (g)
Red Heart With Love Holly Berry 2.9 oz / 155 yds (r)
Red Heart With Love Sweet Pink .15 oz / 8 yds (p)
Size J/10 (6.0 mm) crochet hook
1 Standard Pillow insert 17” x 28”
small amount of poly-fil for stuffing Pom Pom
Tapestry needle
Scissors
Approximate finished size: 17” x 28”
Gauge: 7 blocks = 4”
Abbreviations:
b = blue
w = white
r = red
g = grey
p = pink
WS = wrong side
RS = right side
ch = chain
sc = single crochet
sl st = slip stitch
sp = space
Notes about pattern: Pattern is worked in mini hdc (half double crochet) Corner to Corner (C2C) Crochet technique. Pillow could easily be made larger by using the dc (double crochet) C2C (hdc) crochet technique. Written row by row instructions follow with color pixel graph on last page of pdf.
Recommended tutorials:
Mini hdc c2c crochet technique tutorial
And, if you need help in learning how to make a C2C Crochet Rectangle shape I have a complete photo and video tutorial for you that will show you how to decrease on one side while continuing to increase on the other!
Front Panel:
r: Red / b: Blue / w: White / g: Grey / p: Pink
→ Row 1 (WS): 1w
← Row 2 (RS): 2w
→ Row 3: 3w
← Row 4: 4w
→ Row 5: 5w
← Row 6: 2w, 4g
→ Row 7: 1w, 4g, 1w, 1r
← Row 8: 2r, 6w
→ Row 9: 6w, 3r
← Row 10: 4r, 5w, 1g
→ Row 11: 3g, 3w, 5r
← Row 12: 3w, 3r, 2w, 2g, 2w
→ Row 13: 6w, 4r, 3w
← Row 14: 3r, 1w, 4r, 5w, 1g
→ Row 15: 1w, 2g, 3w, 5r, 1w, 3r
← Row 16: 4r, 3w, 3r, 2p, 1w, 1g, 2w
→ Row 17: 1g, 1w, 1g, 1w, 3p, 3r, 3w, 3r, 1w
← Row 18: 2w, 5r, 1w, 3r, 3p, 3w, 1g
→ Row 19: 1w, 1g, 2w, 4p, 3r, 1w, 4r, 2w, 1r
← Row 20: 2r, 2w, 4r, 3w, 1r, 4p, 1w, 1g, 2w
→ Row 21: 2w, 1g, 2w, 3p, 2r, 3w, 3r, 2w, 3r
← Row 22: 4r, 2w, 5r, 1w, 2r, 3p, 1w, 1g, 2w, 1g
→ Row 23: 1w, 1g, 4w, 2p, 3r, 1w, 4r, 2w, 4r, 1b
← Row 24: 1b, 5r, 2w, 4r, 3w, 3r, 4w, 1g, 1w
→ Row 25: 2w, 1g, 3w, 4r, 3w, 3r, 2w, 5r, 1w, 1b
← Row 26: 2b, 1w, 5r, 2w, 5r, 1w, 4r, 3w, 1g, 2w
→ Row 27: 3w, 1g, 2w, 5r, 1w, 4r, 2w, 5r, 2w, 2b
Corner (begin decreasing)
← Row 28: 2b, 1r, 2w, 5r, 2w, 4r, 3w, 3r, 2w, 1g, 2w
→ Row 29: 2w, 1g, 1w, 4r, 3w, 3r, 2w, 5r, 2w, 1r, 3b
← Row 30: 3b, 2r, 2w, 5r, 2w, 5r, 1w, 4r, 3w
→ Row 31: 2w, 5r, 1w, 4r, 2w, 5r, 2w, 3r, 3b
← Row 32: 4b, 3r, 2w, 5r, 2w, 4r, 3w, 3r, 1w
→ Row 33: 4r, 3w, 3r, 2w, 5r, 2w, 4r, 4b
← Row 34: 4b, 5r, 2w, 5r, 2w, 5r, 1w, 3r
→ Row 35: 3r, 1w, 4r, 2w, 5r, 2w, 5r, 5b
← Row 36: 5b, 1w, 5r, 2w, 5r, 2w, 4r, 3w
→ Row 37: 3w, 3r, 2w, 5r, 2w, 5r, 2w, 5b
← Row 38: 6b, 2w, 5r, 2w, 5r, 2w, 5r
→ Row 39: 4r, 2w, 5r, 2w, 5r, 2w, 1r, 6b
← Row 40: 6b, 2r, 2w, 5r, 2w, 5r, 2w, 3r
→ Row 41: 2r, 2w, 5r, 2w, 5r, 2w, 2r, 7b
← Row 42: 7b, 3r, 2w, 5r, 2w, 5r, 2w, 1r
→ Row 43: 2w, 5r, 2w, 5r, 2w, 4r, 7b
← Row 44: 8b, 4r, 2w, 5r, 2w, 5r, 1w
→ Row 45: 5r, 2w, 5r, 2w, 5r, 8b
Corner (begin decreasing)
← Row 46: 7b, 1w, 5r, 2w, 5r, 2w, 4r
→ Row 47: 3r, 2w, 5r, 2w, 5r, 1w, 7b
← Row 48: 6b, 2w, 5r, 2w, 5r, 2w, 2r
→ Row 49: 1b, 2w, 5r, 2w, 5r, 2w, 1r, 5b
← Row 50: 5b, 1r, 2w, 5r, 2w, 5r, 2b
→ Row 51: 3b, 3r, 2w, 5r, 2w, 2r, 4b
← Row 52: 4b, 2r, 2w, 5r, 2w, 1r, 4b
→ Row 53: 5b, 1w, 5r, 2w, 3r, 3b
← Row 54: 2b, 4r, 2w, 4r, 6b
→ Row 55: 7b, 2r, 2w, 4r, 2b
← Row 56: 1b, 5r, 2w, 8b
→ Row 57: 9b, 5r, 1b
← Row 58: 1w, 2r, 11b
→ Row 59: 13b
← Row 60: 12b
→ Row 61: 11b
← Row 62: 10b
→ Row 63: 9b
← Row 64: 8b
→ Row 65: 7b
← Row 66: 6b
→ Row 67: 5b
← Row 68: 4b
→ Row 69: 3b
← Row 70: 2b
→ Row 71: 1b
Back Panel:
b: Blue
→ Row 1 (WS): b
← Row 2 (RS): b2
→ Row 3: b3
← Row 4: b4
→ Row 5: b5
← Row 6: b6
→ Row 7: b7
← Row 8: b8
→ Row 9: b9
← Row 10: b10
→ Row 11: b11
← Row 12: b12
→ Row 13: b13
← Row 14: b14
→ Row 15: b15
← Row 16: b16
→ Row 17: b17
← Row 18: b18
→ Row 19: b19
← Row 20: b20
→ Row 21: b21
← Row 22: b22
→ Row 23: b23
← Row 24: b24
→ Row 25: b25
← Row 26: b26
→ Row 27: b27
Corner (begin decreasing)
← Row 28: b27
→ Row 29: b27
← Row 30: b27
→ Row 31: b27
← Row 32: b27
→ Row 33: b27
← Row 34: b27
→ Row 35: b27
← Row 36: b27
→ Row 37: b27
← Row 38: b27
→ Row 39: b27
← Row 40: b27
→ Row 41: b27
← Row 42: b27
→ Row 43: b27
← Row 44: b27
→ Row 45: b27
Corner (begin decreasing)
← Row 46: b26
→ Row 47: b25
← Row 48: b24
→ Row 49: b23
← Row 50: b22
→ Row 51: b21
← Row 52: b20
→ Row 53: b19
← Row 54: b18
→ Row 55: b17
← Row 56: b16
→ Row 57: b15
← Row 58: b14
→ Row 59: b13
← Row 60: b12
→ Row 61: b11
← Row 62: b10
→ Row 63: b9
← Row 64: b8
→ Row 65: b7
← Row 66: b6
→ Row 67: b5
← Row 68: b4
→ Row 69: b3
← Row 70: b2
→ Row 71: b
Attaching Panels Together
Once panels are complete, with WS of panels facing each other and RS of front panel facing you, attach color r between 2 blocks and through both panels with sl st, sc in same sp, ch 2, *sc in next sp between hdc blocks, ch 2,* repeat between * * to corner, sc in each corner and continue repeating between * * around through 3 sides of panel. With final side of pillow still open, insert fiber fill or pillow insert and then continue repeating through last side of panel to end, sl st to 1st st.
Fasten off. Weave in ends.
Pom Pom (make 1)
With Color w, make a c2c square (see graph below), leave long tail for creating pom pom and sewing to pillow. With long tail on tapestry needle, weave along edge between hdc blocks, tightening as you go. After weaving long tail around outside edge of square, pull together leaving a hole for stuffing. Stuff pom pom with poly fil. Once filled, pull together tightly and sew hole shut with remaining tail. Do not fasten off. Sew pom pom to top of pillow with remaining tail. Weave in end.


 Hi! Thank you so much for being here! I am Tonya the designer behind Nana's Crafty Home. As a wife, mother, Nana of 9 & with 2 fur babies, my days are filled with love, laughter, hugs and yarn! Here you will find colorful and creative crochet designs for yourself or loved ones. My hope is that you will be inspired to learn and create along with me!
0 Comments