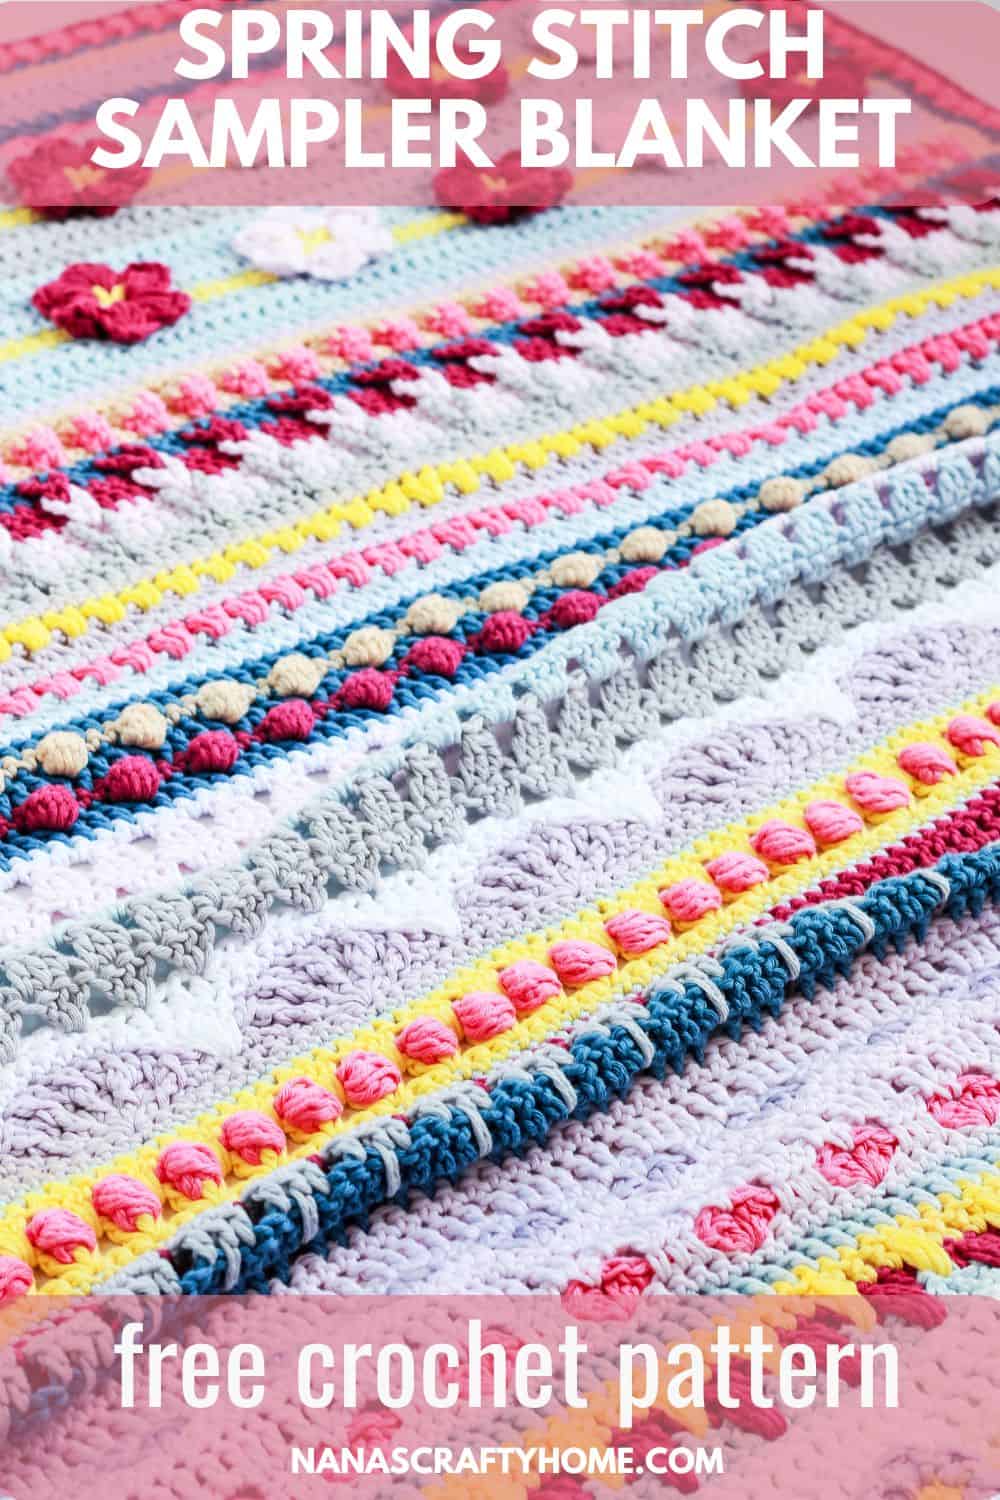
A Crochet Spring Blanket Stitch Sampler free crochet pattern that you can make and display for the spring and Easter season!
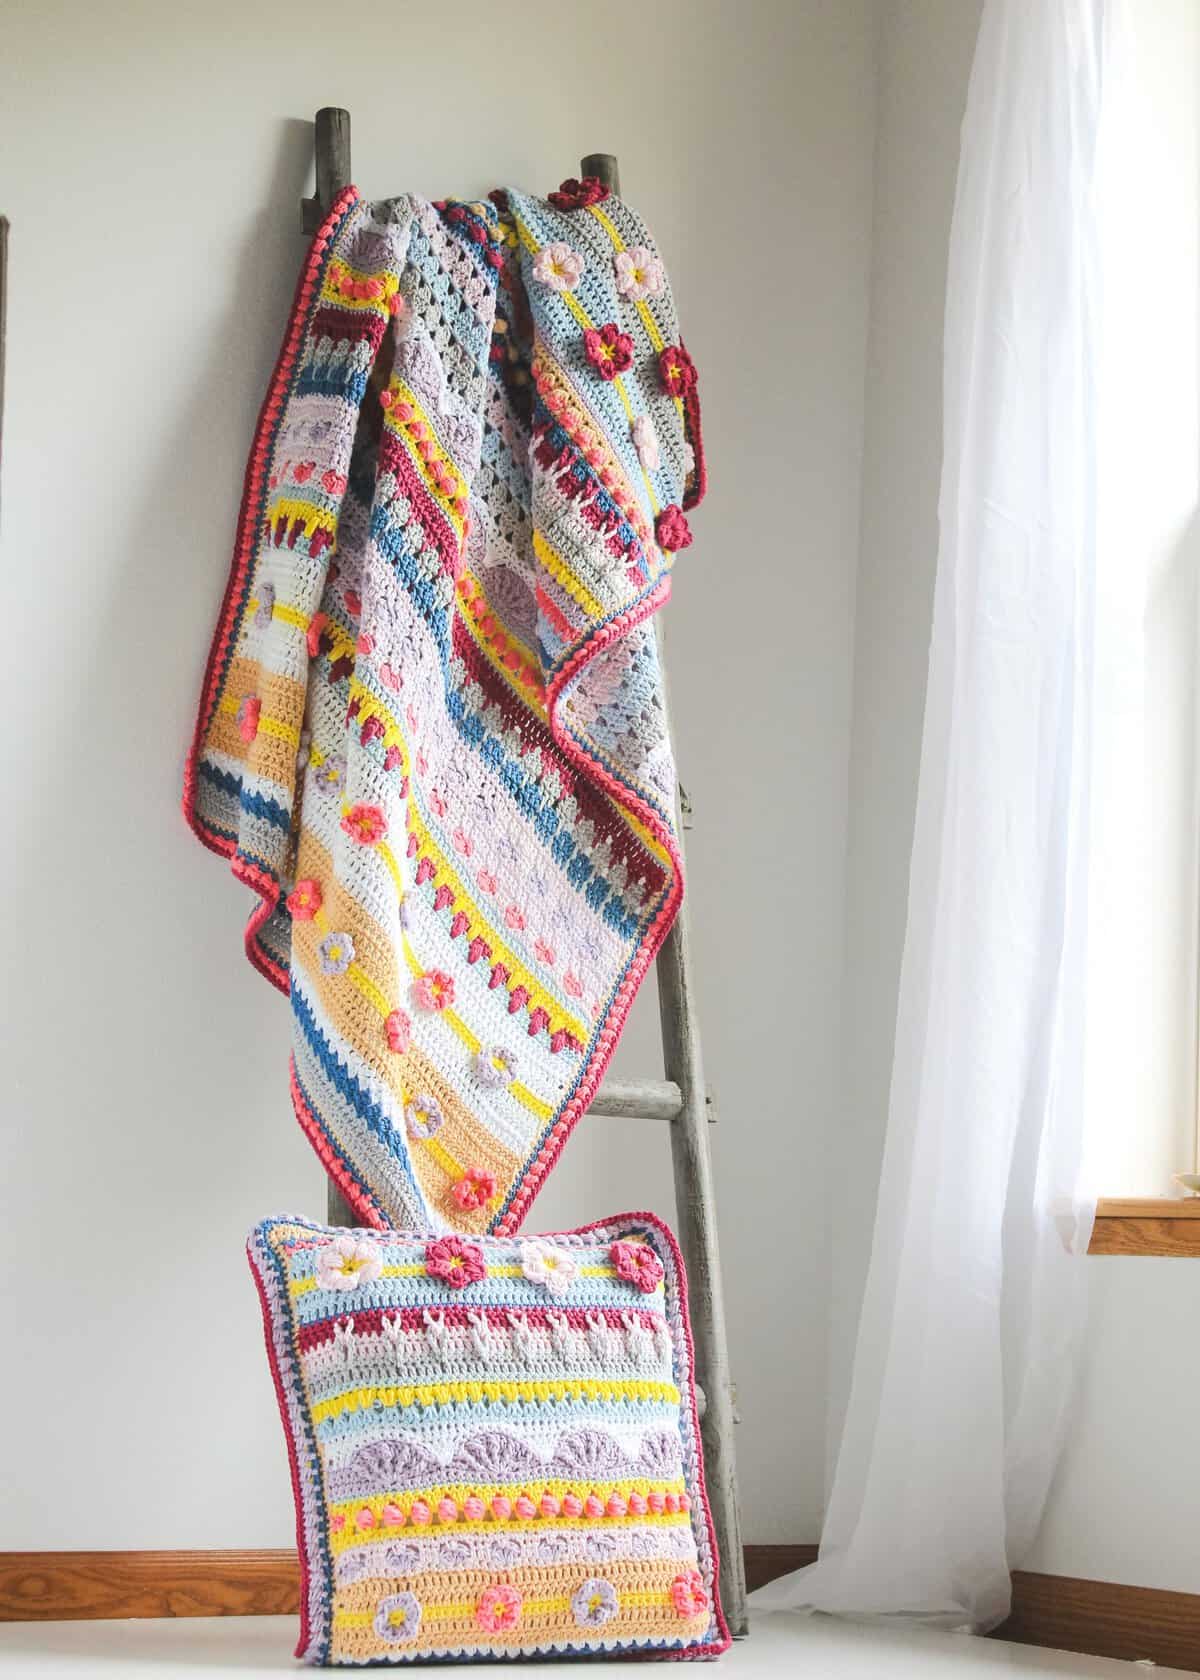
As the world awakens with the vibrant colors and the gentle breezes of spring, it’s the perfect time to cozy up with a handmade treasure that captures the feeling of spring. The Spring Rhapsody Blanket is a stunning crochet spring blanket that brings the beauty of blooming flowers and fresh beginnings into your home. This free crochet spring blanket pattern is a delightful stitch sampler style, showcasing a variety of spring-themed stitches, including the brand-new Cherry Blossom Stitch and the Magnolia Flower Puff Stitch. Get ready to hook your way into spring!

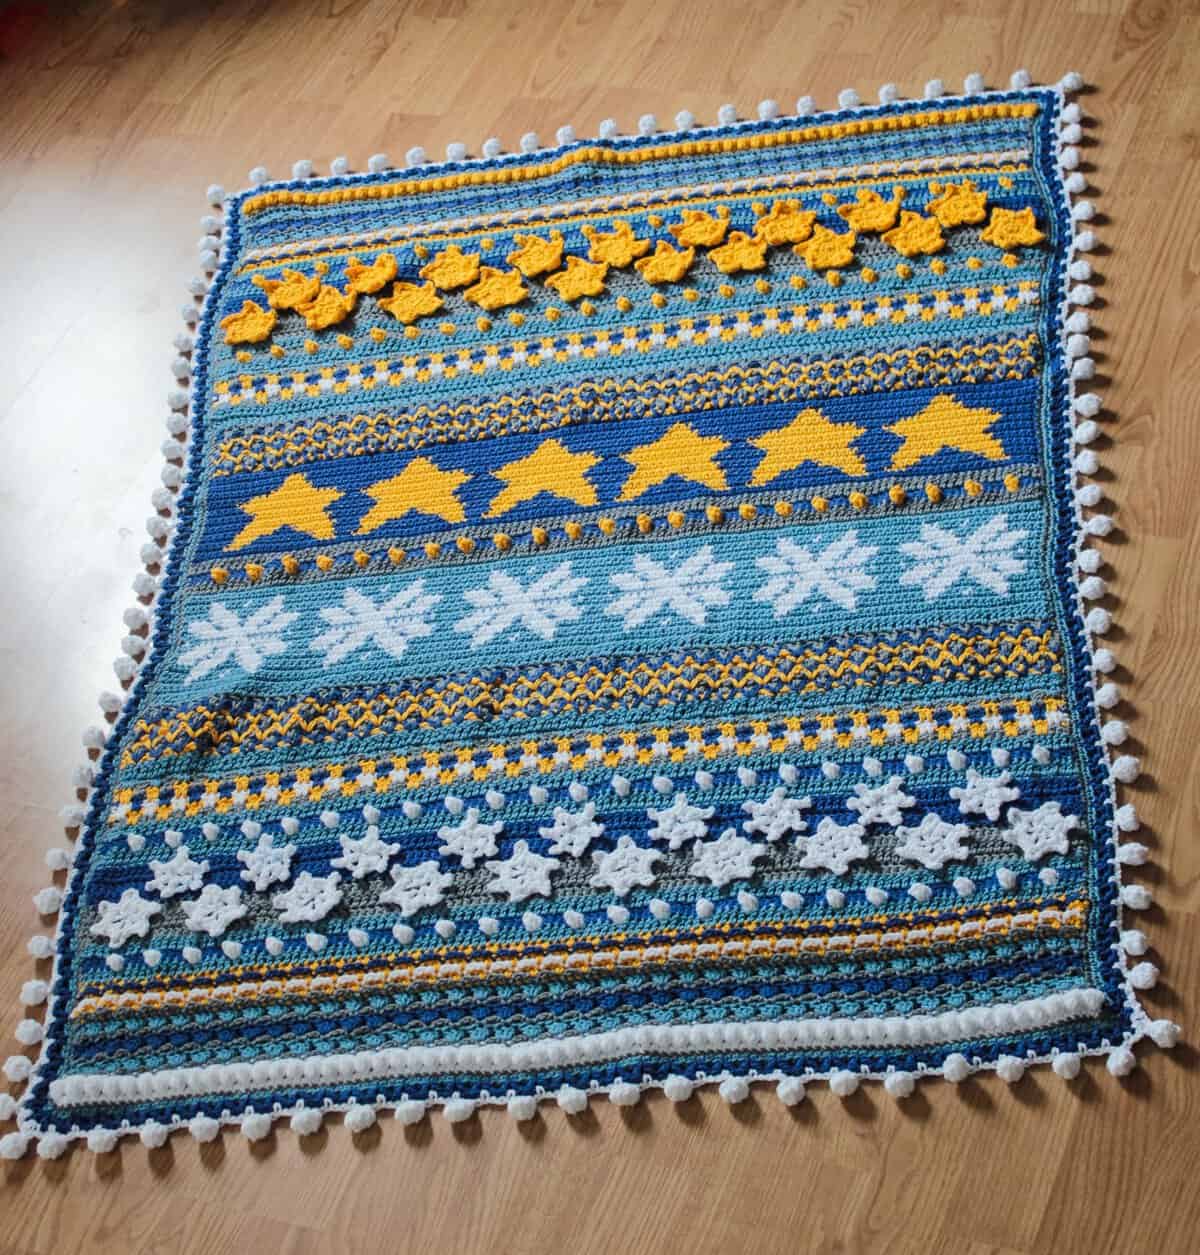
The Spring Rhapsody crochet spring blanket is the third seasonal stitch sampler style blanket on the blog! If you love stitch sampler blankets you might want to check out the others as well – the Autumn Rhapsody Blanket and the Winter’s Night Rhapsody Blanket. Both are free crochet patterns on the blog!

The palette I used for my crochet spring blanket is a joyful mix of pastel pinks, soft yellows, blues, purples and whites, with tan, grey and maroon colors as well. Perfect as a lap blanket, baby gift, or decorative throw, the Spring Rhapsody Blanket combines functionality with artistry for a stunning make! Pair with the matching Spring Rhapsody Pillow for the perfect spring combo!
How to Make a Crochet Spring Blanket
For the full written pattern instructions for this crochet spring stitch sampler blanket, scroll down below. You can purchase the ad-free PDF of Spring Rhapsody Blanket for a small fee. Or, become a Lifetime Member and never pay for a PDF again!
1. Just like the other two stitch sampler season blankets on the blog, the Spring Rhapsody Blanket is made from the bottom-up with several different stitches used throughout the pattern. I have photo and video tutorials for each special stitch highlighted in this spring themed throw!
2. There are a couple of brand NEW stitches designed for this throw – the Cherry Blossom Flower Stitch and the Magnolia Flower Puff Stitch! These stitches are both worked into the blanket – now sewing skills necessary for these stitches!
3. There are so many different things you could do with this base blanket pattern – pick your favorite stitches and repeat, replace stitches with other stitches from the blanket or simple make one giant Cherry Blossom Blanket! Such a fun way to make your very own unique spring themed throw!
If you need any help with the stitches used in this blanket, I have all the tutorials you need! I have photo tutorials on the blog and video tutorials on YouTube. Subscribe to my YouTube Channel to get notified whenever I post a new video.
Chainless Starting DC Stitch Tutorial
Suzette Stitch Tutorial
Cherry Blossom Stitch Tutorial
Drop Puff Stitch Tutorial
Heart Stitch Tutorial
Larksfoot Stitch Tutorial
Flower Puff Stitch Tutorial
Large Shell Stitch Tutorial
Granny Triangle Stitch Tutorial
Blackberry Salad Stitch Tutorial
Triads Puff Stitch Tutorial
Braided Loops Stitch Tutorial
Strawberry Stitch Tutorial
Magnolia Stitch Photo & Video Tutorial
Wattle Crochet Stitch Tutorial
Puff Edge Border Tutorial
I would definitely consider this an intermediate pattern with lots of more interesting complex stitches throughout. If you are feeling a bit intimidated even with all of those tutorials, you might want to start out with the matching Spring Rhapsody Pillow which is a much smaller project to tackle and a great way to try out some of these stitches!
I hope you enjoy making your very own spring themed throw!
Tonya 💕🌸

Yarn Supplies for the Spring Rhapsody Blanket
*This post contains affiliate links. You can click on any yarn or material highlighted to purchase. I will receive a small commission if you purchase but it won’t cost you any extra! As an Amazon Associate I earn from qualifying purchases.
I used the same yarn choice as my other two Rhapsody blankets – Paintbox Cotton Aran. I love the stitch definition in this yarn – perfect way to display these fabulous stitches. However, if you aren’t a big fan of cotton – the Paintbox Simply Aran yarn is really soft and lovely with the same color packs available.
If you would like to make your blanket in the same yarn and colors as mine you can find it on LoveCrafts. You will need 3 packs of the 10 ball Color Pack called Tudor Garden in Cotton Aran to make the Lap size blanket. You will also have enough left over to make the matching pillow as well. The Cotton yarn comes in small balls of just 1.7 oz so if you decide to go with the Acrylic Simply Aran yarn the balls have 3.5 oz so you will need a lot less in the Simply Aran. The individual colors I used are listed below in the supply list.
Pick the 10 ball color pack that you like best – I think I would like to make another Spring Rhapsody in the Festival color pack as it has my favorite color green included.
However, this blanket is intended to be a happy stash scrap buster – bust out those tubs of yarn and find the colors that work best for you!
To get free crochet patterns and get notified of future giveaways, sign up for my newsletter. I never share or sell your information to third parties — it stays private!


Purchase the complete Spring Rhapsody Blanket pattern PDF in my shop today and get started on your own beautiful stash busting blanket!
You may also like the following free crochet patterns at Nana’s Crafty Home:


- Autumn Rhapsody Blanket free crochet pattern
- A Winter’s Night Rhapsody Blanket
- Spring Rhapsody Pillow free crochet pattern

Spring Rhapsody Stitch Sampler Blanket Free Crochet Pattern
Pattern written in US crochet terminology
Supplies:
Total yarn needs: 33.7 oz / 1870 yds
Size H (5.0 mm) crochet hook
Stitch Markers
Tapestry Needle
Scissors
Approximate finished size: 49” tall x 38” wide (pattern as written)
Resizing approximate sizes:
Lap: 38” wide
Throw: 48” wide
Twin: 68 1/2” wide
Full: 85 1/2” wide
Queen: 92” wide
King: 109” wide
Resizing info approximate total yardage needs
Note: In order to make your blanket longer (taller) to the below specifications, you will be choosing your own rows to repeat. As this is a stitch sampler blanket, the stitches will vary in yarn needs. For example, a row of standard double crochet will not use as much yarn as a row of puff stitches. So, the totals provided below are approximate. I used 10 colors fairly evenly throughout the pattern so divide yardage by 10 to approximate individual color usage.
As written: Lap: 38” wide x 49” tall = 1870 yds
Throw: 48” wide x 60” tall = 3066 yds
Twin: 68 1/2” wide x 85” tall = 3600 yds
Full: 85 1/2” wide x 90” tall = 3900 yds
Queen: 92” wide x 90” tall = 4200 yds
King: 109” wide x 109” tall = 4700 yds
Gauge: 8 rows dc st = 4” / 14 dc st = 4”
Abbreviations:
ch = chain
RS = right side
st = stitch
CL = cluster (see special stitches section below) dc = double crochet
sc = single crochet
sl st = slip stitch
yo = yarn over
sk = skip
sp = space
blo = back loop only
FPP = Front Post Puff Stitch (See Special Stitches Section Below)
dc group = 3 dc st worked in same st
hdc = half double crochet
BPdc = back post double crochet (See Special Stitches Section Below)
FPdc = front post double crochet (See Special Stitches Section Below)
Pst = Post stitch
dc3tog = double crochet 3 together (See Special Stitches Section Below)
dc5tog = double crochet 5 together (See Special Stitches Section Below)
tpst = triads puff stitch (see special stitches section below)
dps = double puff stitch (see special stitches section below)
hdc = half double crochet
hdc5tog = half double crochet 5 together (see special stitches section below)
FP = flower puff (see special stitches section below)
hdc3tog = half double crochet 3 together (see special stitches section below)
Special stitches:
Flower center: working in front and back loops separately: 3 sc in back loop of next st, rotate work slightly and place 3 sc in front loop of same st, sl st to 1st st, sl st in blo of next 2 st of flower center.
Drop Puff Stitch: *yo, insert hook into base of next dc st, yo, pull up a loop,* repeat between * * 3 times (9 loops on hook), yo, pull through 8 loops, yo, pull through remaining 2 loops.
Cluster (CL): *yo, insert hook into st indicated, yo, pull up a loop, yo, pull through 2 loops,* repeat between * * 2 times (4 loops on hook), yo, pull through all 4 loops on hook.
Long dc: dc st worked below into st of previous row indicated.
FPP (front post puff stitch): *yo, insert hook around middle dc of dc group, yo, pull up a loop,* repeat between * * 3 times (9 loops on hook), yo, pull through 8 loops, yo, pull through remaining 2 loops.
FPdc (front post double crochet stitch): yo and insert your hook from front to back around the dc stitch post indicated from the row below, yo, pull up a loop (3 loops on hook), yo, pull through 2 loops, yo, pull through remaining 2 loops.
BPdc (back post double crochet stitch): yo and insert your hook from back to front around the dc stitch post indicated from the row below, yo, pull up a loop (3 loops on hook), yo, pull through 2 loops, yo, pull through remaining 2 loops.
dc3tog: *yo, insert hook in next stitch, yo and pull up loop, yo, pull through 2 loops* repeat between * * 2 more times (4 loops on hook), yo, pull through all loops on hook.
dc5tog: *yo, insert hook in st indicated, yo and pull up a loop, yo, pull through 2 loops* repeat between * * 4 more times (6 loops on hook), yo, pull through all loops on hook.
Triads Puff Stitch (tpst): yo, insert hook into st indicated, yo, pull up a tall loop, *yo, insert hook into next st, yo, pull up a tall loop,* repeat between * * 1 time (7 loops on hook), yo, pull through 6 loops, yo, pull through remaining 2 loops.
Double Puff Stitch (dps): [*yo, insert hook into sp indicated, yo, pull up a loop,* repeat between * * 1 time (5 loops on hook), yo, pull through all loops on hook,] repeat between [ ] in same sp. Note: 1 dps is counted as 2 stitches.
Half Double Crochet 5 Together (hdc5tog): *yo, insert hook into next st, yo, pull up a loop,* repeat between * * 4 times (11 loops on hook), yo, pull through all loops on hook.
Magnolia Center: working in front and back loops separately: *1 hdc in back loop of next st, ch 1* repeat between * * 2 times in back loop, rotate work slightly and repeat between * * 3 times in front loop of same st, sl st to 1st st, *sl st in ch 1 sp, sl st in next st,* repeat between * * 2 times.
Flower Puff (FP): *yo, insert hook into sp indicated, yo, pull up a tall loop,* repeat between * * 4 times (11 loops on hook), yo, pull through 10 loops (2 loops on hook), yo, pull through remaining 2 loops.
hdc3tog: *yo, insert hook where indicated, yo, pull up a loop,* repeat between * * 2 more times (7 loops on hook), yo, pull through all loops on hook.
Pattern Instructions

With Color A, ch 122.
Row 1: dc in 4th ch from hook (skipped chs count as first st), and 1 dc in each ch to end. Turn. (120)
Row 2: ch 3 (chainless starting dc – counts as 1st st), 1 dc in each st to end. Turn.
Fasten off Color A.
Row 3: With Color B, ch 1, sc in same st, (1 sc, 1 dc) in next st, *sk 1 st, (1 sc, 1 dc) in next st,* repeat between * * to last 2 st, sk next st, 1 sc in last st. Turn.
Row 4: ch 1, (1 sc, 1 dc) in same st, *sk next st, (1 sc, 1 dc) in next st (sc from previous row)* repeat between * * to last st, 1 sc in last st. Turn. (121)
Fasten off Color B.
Row 5: With Color C, ch 1, 1 sc in same st, *sk next st, (1 sc, 1 dc) in next st,* repeat between * * to last 2 st, 1 sc in last st. Turn. (120)
Row 6: ch 1, 1 sc in same st, *sk next st, (1 sc, 1 dc) in next st,* repeat between * * to last st, 1 sc in last st. Turn.
Fasten off Color C.
Row 7 – 9: With Color D, repeat row 2.
Fasten off Color D.
Row 10: With Color E, ch 1, 1 sc in same st and in each st to end. Turn.
Row 11: Round 1 of Cherry Blossom: ch 1, 1 sc in same st, 1 sc in next 4 st, flower center in next st, [flower center: working in front and back loops separately: 3 sc in back loop of next st, rotate work slightly and place 3 sc in front loop of same st, sl st to 1st st, sl st in blo of next 2 st of flower center] *sc in next 11 st, flower center in next,* repeat between * * to last 6 st, 1 sc in last 6 st. (See photo tutorial pdf). Turn.
Fasten off Color E
Row 11a: Round 2 of Cherry Blossom: with Color F or G, (Note: I used Color F for the 1st flower of the row, Color G for the 2nd flower and then alternated colors for the rest of the row) working on RS of first flower center, attach yarn to any back loop of flower center with sl st, (1 hdc, 3 dc) in same st, *(1 sl st, 1 hdc, 3 dc) in next blo,* repeat between * * in each st, sl st to 1st st. Fasten off. Repeat for each Cherry Blossom alternating Colors F & G for each flower.
Row 12: With Color D, ch 3, dc in each st of row. In order to maintain stitch count of 120, pick up a stitch behind flowers or work 2 dc in last st before each flower. Turn. (120)
Row 13: ch 3, dc in each st to end. Turn. Row 14: repeat row 13.
Fasten off Color D
Row 15 – 17: With Color C, repeat row 13. Fasten off Color C
Row 18: With Color E, repeat row 10.
Row 19: ch 1, 1 sc in same st, 1 sc in next 10 st, *flower center in next st, 1 sc next 11 st,* repeat between * * to last 12 st, sc in last 12 st. Turn.
Fasten off Color E.
Row 19a: With Color F & G, repeat row 11a (flower petals). (Note: I used Color G for the 1st flower of the row, Color F for the 2nd flower and then alternated colors for the rest of the row)
Row 20: With Color C, repeat row 12.
Row 21 – 22 repeat row 13.
Fasten off Color C
Row 23: With Color H, ch 1, 1 sc in same st and in each st to end. Turn.
Row 24: Repeat row 13.
Fasten off color H
Row 25: With Color I, ch 3, dc in next 3 st, *1 Drop Puff Stitch (see special stitches section) in next st (base of next dc st), dc in next 3 st,* repeat between * * to end. Turn.
Fasten off Color I
Row 26: With Color E, ch 3, dc in next 4 st, *1 Drop Puff Stitch in next st, dc in next 3 st,* repeat between * * to last 3 st, dc in last 3 st. Turn.
Fasten off Color E
Row 27: With Color H, repeat row 13.
Fasten off Color H
Row 28: With Color J, repeat row 23.
Fasten off Color J
Row 29: With Color F, ch 2 (counts as 1st st of CL), 1 CL in same st, *ch 2, sk 5 st, (1 CL, ch 2, 1 CL) in next st,* repeat between * * to last 5 st, ch 2, sk next 4 st, 1 CL in last st. Turn.
Fasten off Color F
Row 30: With Color J, ch 1, 1 sc in same st, ch 1, *1 hdc in the 2nd, 3rd & 4th skipped sts from the previous row (working around the ch 2 sp), ch 2, sk next CL, 1 sc in next ch 2 sp, ch 2, skip next CL,* repeat between * * to last ch 2 sp, 1 hdc in the 2nd, 3rd & 4th skipped sts from the previous row, ch 1, sc in last CL. Turn.
Row 31: ch 3, 1 dc in next ch 1 sp, *1 dc in next 3 st, 1 dc in next ch 2 sp, 1 dc in next st, 1 dc in next ch 2 sp,* repeat between * * to last 4 st, 1 dc in next 4 st. Turn.
Row 32: repeat row 23.
Fasten off Color J
Row 33: With Color G, repeat row 29. Fasten off Color G
Row 34: With Color J, repeat row 30.
Row 35: repeat row 31.
Row 36: repeat row 23.
Fasten off Color J

Row 37: With Color B, ch 3, 1 dc in next 2 st, ch 1, sk next st, *1 dc in next 3 st, ch 1, sk next st,* repeat between * * to last 5 st, 1 dc in last 4 st. Turn. (91 dc st + 29 ch 1 sp)
Row 38: ch 3, *1 dc in next 3 st, ch 1, sk next ch 1 sp,* repeat between * * to last 3 st, 1 dc in last 3 st. Turn. (91 dc st + 29 ch 1 sp)
Fasten off Color B
Row 39: With Color A, ch 4 (counts as 1st st + ch 1) OR chainless starting dc, ch 1, sk next st, *1 dc in next st, 1 long dc st into ch sp below in row 37, 1 dc in next st, ch 1 , sk next st,* repeat between * * to last 3 st, 1 dc in last 2 st. Turn. (90 dc st + 30 ch 1 sp)
Row 40: ch 3, 1 dc in next st, *ch 1, sk next ch 1 sp, 1 dc in next 3 st,* repeat between * * to last ch 1 sp, ch 1, sk ch 1 sp, 1 dc in last st. Turn. (90 dc st + 30 ch 1 sp)
Fasten off Color A
Row 41: With Color I, ch 3, *1 long dc st into ch sp below in Row 39, 1 dc in next st, ch 1, sk next st, 1 dc in next st,* repeat between * * to last ch 1 sp, 1 long dc in next ch sp, 1 dc in last 2 st. Turn. (91 dc st + 29 ch 1 sp)
Row 42: ch 3, 1 dc in each st & ch 1 sp to end. Turn. (120)
Fasten off Color I
Row 43: With Color H, ch 1, 1 sc in same st, 1 sc in each st. Turn.
Fasten off Color H
Row 44: With Color E, repeat row 43.
Row 45: ch 3, 1 dc in next st, *sk 2 st, 3 dc group in next st,* repeat between * * to last 4 st, sk 2 st, 1 dc in last 2 st. DO NOT turn. (118)
Fasten off Color E
Row 46: attach Color F to 1st st of row 45, ch 3, 1 dc in next st, ch 2, FPP over middle dc of dc group from row 45, *ch 3, FPP over middle dc of next dc group,* repeat between * * to last 2 st, ch 2, 1 dc in last 2 st. Turn. (38 FPP + 4 st)
Fasten off Color F
Row 47: With Color E, turn, ch 2 (counts as 1st st), 1 hdc in same st, 1 hdc in next st, 2 long dc over ch 3 from previous row & between dc group from row 45, 3 long dc between each dc group to last ch sp, 2 long dc over ch sp from previous row, 1 hdc in last 2 st. Turn. (120)
Fasten off Color E
Row 48: With Color H, repeat row 43.
Fasten off Color H
Row 49: With Color G, repeat row 43.
Row 50: (shell row) ch 1, 1 sc in same st, 1 sc in next 3 st, sk 2 st, 5 dc in next st, *sk 2 st, 1 sc in next 7 st, sk 2 st, 5 dc in next st,* repeat between * * to last 5 st, sk 2 st, 1 sc in last 3 st. Turn. (120)
Row 51: ch 1, 1 sc in same st, 1 sc in next 2 st, [*1 BPdc in next st, 1 dc between 2 dc posts from row below,* repeat between * * 3 times, 1 BPdc in next st, sk next st, 1 sc in next 5 st, sk next st,] repeat between [ ] to last 8 st, repeat between * * 4 times, 1 Bpdc in next st, sk next st, 1 sc in last 3 st. Turn. (141)
Row 52: ch 1, 1 sc in same st, [1 sc in next st, sk next st, *1 FPdc over Pst, 1 dc in sp between Pst and dc from row below, 1 dc in sp between dc and Pst,* repeat between * * 3 times, 1 FPdc over last Pst, sk next st, 1 sc in next 2 st,] repeat between [ ] to end. Turn. (161)
Fasten off Color G
Row 53: With Color C, ch 3, 1 dc in next st, sk 3 st, 1 sc in next 7 st, *sk 4 st, 5 long dc into middle sc sp from row 50 (shell row), sk 4 st, 1 sc in next 7 st,* repeat between * * to last 5 st, sk next 3 st, 1 dc in last 2 st. Turn. (119)
Row 54: ch 2 (counts as 1st st), 1 hdc in same st, 1 hdc in next 2 st, 1 sc in next 6 st, *1 hdc in next 6 st, 1 sc in next 6 st,* repeat between * * to last 3 st, 1 hdc in last 3 st. Turn. (120)
Fasten off Color C.
Row 55: With Color A, ch 3, 1 dc in next st, *sk next 2 st, 3 dc in next st,* repeat between * * to last 4 st, sk next 2 st, 1 dc in last 2 st. Turn. (118)
Row 56: ch 3, 1 dc in next st, *ch 2, dc3tog over next 3 st,* repeat between * * to last 2 st, ch 2, 1 dc in last 2 st. Turn. (42 st + 39 ch 2 sp)
Fasten off Color A.
Row 57: With Color H, ch 3, sk next st, *3 dc in ch 2 sp,* repeat between * * to last 2 st, sk next st, 1 dc in last st. Turn. (119)
Row 58: ch 3, dc3tog over next 3 st, *ch 2, dc3tog,* repeat between * * to last st, 1 dc in last st. Turn. (41 st + 38 ch 2 sp)
Fasten off Color H
Row 59: With Color F, ch 3, 1 dc in same st, *3 dc in ch 2 sp,* repeat between * * to last 2 st, sk next st, 2 dc in last st. Turn. (118)
Row 60: repeat row 56. (42 st + 39 ch 2 sp)
Fasten off Color F
Row 61: With Color C, ch 1, 1 sc in same st, *1 sc in next st, 2 sc in ch 2 sp,* repeat between * * to last 2 st, 1 sc in last 2 st. Turn. (120)
Fasten off Color C
Row 62: With Color B, ch 3, 1 dc in each st to end. Turn.
Fasten off Color B
Row 63: With Color I, ch 1, 1 sc in same st, 1 sc in next 2 st, *dc5tog in next st, 1 sc in next 3 st,* repeat between * * to last st, 1 sc in last st. Turn.
Fasten off Color I
Row 64: With Color B, repeat row 62.
Fasten off Color B
Row 65: With Color D, ch 1, 1 sc in same st, 1 sc in next 4 st, *dc5tog in next st, 1 sc in next 3 st,* repeat between * * to last 3 st, 1 sc in last 3 st. Turn.
Fasten off Color D
Row 66: With Color B, repeat row 62.
Fasten off Color B
Row 67: With Color C, repeat row 43.
Fasten off Color C

Row 68: With Color H, ch 3, tpst over next 3 st, *ch 1, 1 tpst beg in last st of previous tpst,* repeat between * * to end, 1 dc in last st (same st as ending of last tpst). Do NOT Turn. ( 59 tpst + 2 st)
Fasten off color H
Row 69: Attach Color F to 1st st of row 68, ch 3, 1 dps in each tpst from previous row (work dps in sp above loops – see photo 1a on last page of PDF for placement), to end, 1 dc in last st. Turn. (120)
Fasten off Color F
Row 70: With Color H, ch 1, 1 sc in each st. Turn.
Fasten off Color H
Row 71: With Color G, repeat row 68.
Fasten off Color G
Row 72: Attach Color E to 1st st of row 71, repeat row 69.
Fasten off Color E
Row 73: With Color G, repeat row 70.
Fasten off Color G
Row 74: (Note: If you are resizing your blanket see instructions below)
Lap size: With Color A, ch 3, 1 dc in next 4 st, *ch 10, 1 dc in next 5 st,* repeat between * * to end. Turn.
Resizing instructions for row 74:
Throw: ch 3, 1 dc in next 6 st, *ch 10, 1 dc in next 5 st,* repeat between * * to last st, 1 dc in last st. Turn. Twin: same as original lap size
Full: same as original lap size
Queen: ch 3, 1 dc in next 6 st, *ch 10, 1 dc in next 5 st,* repeat between * * to last 2 st, 1 dc in last 2 st. Turn.
King: same as Queen instructions
Row 75: (pushing ch 10 loops to RS of work), ch 1, 1 sc in each st. Turn.
Fasten off Color A
Row 76: With Color J, repeat row 74.
Row 77: repeat row 75.
Fasten off Color J
Row 78: With Color I, repeat row 74.
Row 79: repeat row 75.
Fasten off Color I
Pull each chain loop through the one below to connect them.
Row 80: With Color B, ch 3, dc in each st to end. Turn.
Row 81: ch 1, 1 sc in same st, *1 sc in next 3 st, working over the ch 10 loop of row 79, 1 sc in next 2 st,* repeat between * * to last 4 st, 1 sc in last 4 st. Turn.
Fasten off Color B
Row 82: With Color D, repeat row 70.
Row 83: Note: you will be using both Color D & Color F for this row. Carry non-working yarn throughout row. ch 1, 1 hdc in same st, 1 hdc in next st (change to Color F at the end of this st and carry Color D), *5 hdc in next st, (change to Color D on the 5th hdc), 1 hdc in the next 2 sts (change to Color F at the end of last st),* repeat between * * to last st, 1 hdc in last st. Turn. (276)
Fasten off Color F
Row 84: With Color D, ch 1, 1 hdc in same st, 1 hdc in next 2 st, *1 hdc5tog, 1 hdc in next 2 sts,* repeat between * * to end. (120)
Row 85: repeat row 70.
Fasten off Color D
Row 86 – 87: With Color G, repeat row 70.
Fasten off Color G
Row 88: With Color H, ch 3, 1 dc in each st to end. Turn. Row 89 – 90: repeat row 88.
Fasten off Color H
Row 91: With Color E, repeat row 70.
Row 92: ch 1, 1 sc in same st, 1 sc in next 4 st, magnolia center in next st, [magnolia center: working in front and back loops separately: *1 hdc in back loop of next st, ch 1* repeat between * * 2 times in back loop, rotate work slightly and repeat between * * 3 times in front loop of same st, sl st to 1st st, *sl st in ch 1 sp, sl st in next st,* repeat between * * 2 times,] *sc in next 11 st, magnolia center in next st,* repeat between * * to last 6 st, 1 sc in last 6 st. Turn. (110 sc + 10 magnolia centers)
Fasten off Color E
Note: I recommend working row 93 before working your flower petals for row 92.
Row 93: With Color H, ch 3, dc in each st of row. In order to maintain stitch count of 120, pick up a stitch behind flowers or work 2 dc in last st before each flower. Turn. (120)
Row 92a: (magnolia flower petals) With Color I or J, attach yarn to any ch 1 sp of magnolia center from row 92, *ch 3, FP in same sp, ch 3, sl st in next ch 1 sp,* repeat between * * in each ch 1 sp of magnolia center (6 total petals). Fasten off. Repeat for each magnolia flower alternating Colors I & J for each flower.
Row 94 – 95: With Color H, repeat row 88.
Fasten off Color H
Row 96 – 98: With Color A, repeat row 88.
Fasten off Color A
Row 99: With Color E, repeat row 70.
Row 100: ch 1, 1 sc in same st, 1 sc in next 10 st, *magnolia center in next st, 1 sc next 11 st,* repeat between * * to last 12 st, sc in last 12 st. Turn. (111 sc + 9 magnolia centers)
Fasten off Color E
Row 101: With Color A, repeat row 93.
Row 100a: With Color I or J, repeat row 92a.
Row 102 – 103: With Color A, repeat row 88.
Fasten off Color A
Row 104: With Color F, ch 1, (1 sc, ch 1, 1 dc) in same st, *sk next 2 st, (1 sc, ch 1, 1 dc) in next st* repeat between * * to last 2 st, sk next st, 1 sc in last st. Turn. (81 st + 40 ch 1 sp)
Row 105: ch 1, sk the 1st sc and the 1st dc, (1 sc, ch1, 1 dc) in ch 1 sp from previous row, *sk next 2 st, (1 sc, ch 1, 1 dc) in next ch 1 sp,* repeat between * * to end, 1 sc in last st (last sc). Turn. (81 st + 40 ch 1 sp)
Fasten off Color F
Row 106 – 107: With Color B, repeat row 105.
Fasten off Color B
Row 108: With Color G, ch 2 (does not count as st), *1 dc in next 2 st, 1 dc in next ch 1 sp,* repeat between * * to end. Turn. Note: make sure to have a st count of 120 at end of row.
Row 109: repeat row 88.
Fasten off Color G
Row 110: With Color D, repeat row 88.
Fasten off. Weave in ends.
Border Instructions

Round 1: With RS of blanket facing, attach Color D with a sl st to a stitch right after any corner of the blanket. With Color D, ch 1, sc evenly around outside edge of blanket, work (1 sc, ch 1, sc) in each corner, sl st to 1st st. Do not turn.
Fasten off Color D
Round 2: With Color B, ch 1, sc in each st to corner, work (1 sc, ch 1, 1 sc) in each ch 1 corner sp from previous round, sl st to 1st st.
Fasten off Color B
Round 3: With Color F, ch 2, hdc in same st, *sk next st, 1 hdc in next st, hdc3tog around hdc post just made,* repeat between * * around to end, sl st to top of 1st hdc, hdc3tog around 1st st.
Fasten off Color F
Round 4: With Color I, sl st to next st, ch 1, *1 sc in each st to corner, (1 sc, ch 1, 1 sc) in corner,* repeat between * * to end, sl st to 1st st. Fasten off. Weave in ends.
Copyright 2025 Tonya Bush / Nana’s Crafty Home
Social Media links:
Facebook: https://www.facebook.com/nanascraftyhome
Instagram: https://www.instagram.com/nanascraftyhome/
Pinterest: https://www.pinterest.com/nanascraftyhome/
YouTube: https://www.youtube.com/c/TonyaBush
Twitter: https://twitter.com/nanascraftyhome
Facebook Group: https://www.facebook.com/groups/829792060522798
Sign up for my Newsletter: https://nanascraftyhome.com/sign-up-for-my-free-newsletter/
Disclaimer: This pattern is for personal use or small-scale crafting. If you intend to sell the finished product in the EU, ensure it complies with the General Product Safety Regulation (EU) 2023/988, including safety, labeling, and traceability requirements.
 Hi! Thank you so much for being here! I am Tonya the designer behind Nana's Crafty Home. As a wife, mother, Nana of 9 & with 2 fur babies, my days are filled with love, laughter, hugs and yarn! Here you will find colorful and creative crochet designs for yourself or loved ones. My hope is that you will be inspired to learn and create along with me!