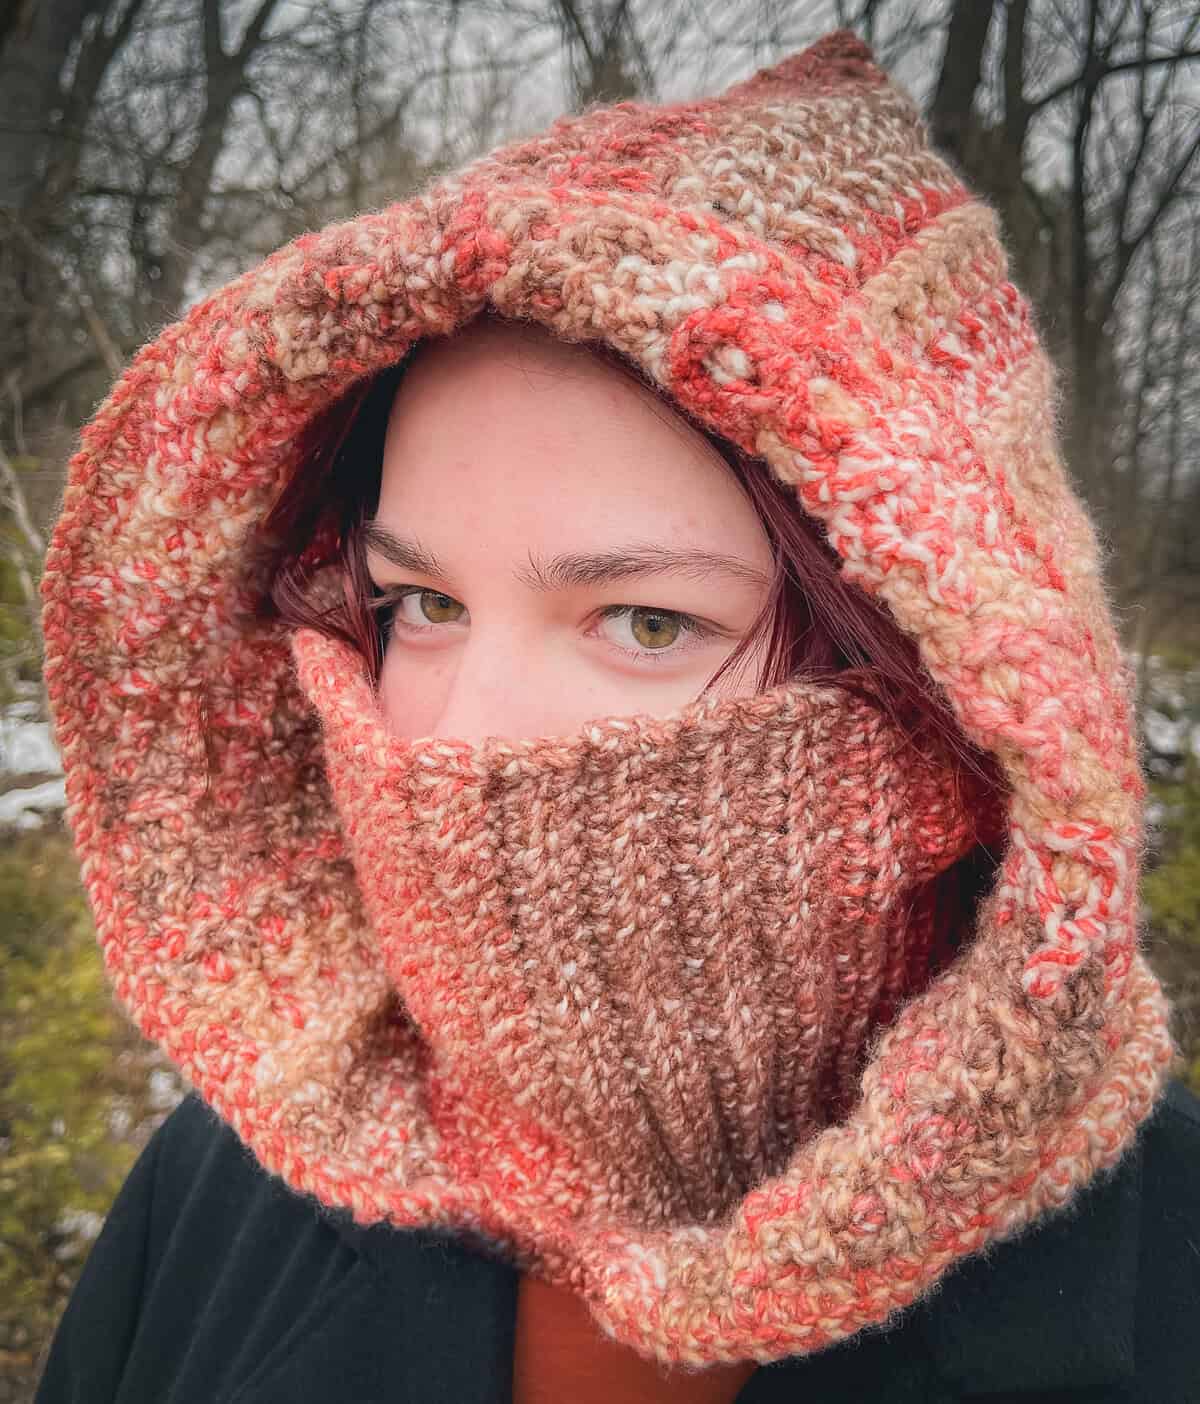
Wrap yourself in cozy, rugged elegance with the Mountain Trail Crochet Hooded Cowl – the perfect blend of hood, scarf, and statement piece all in one gloriously squishy package!
This free pattern was inspired by crisp hikes through the mountains, where the air turns sharp and you want something substantial to pull up over your head without fussing with separate pieces. Worked entirely in one piece from the bottom up, it eliminates seaming drama and lets you finish in just a few satisfying evenings.
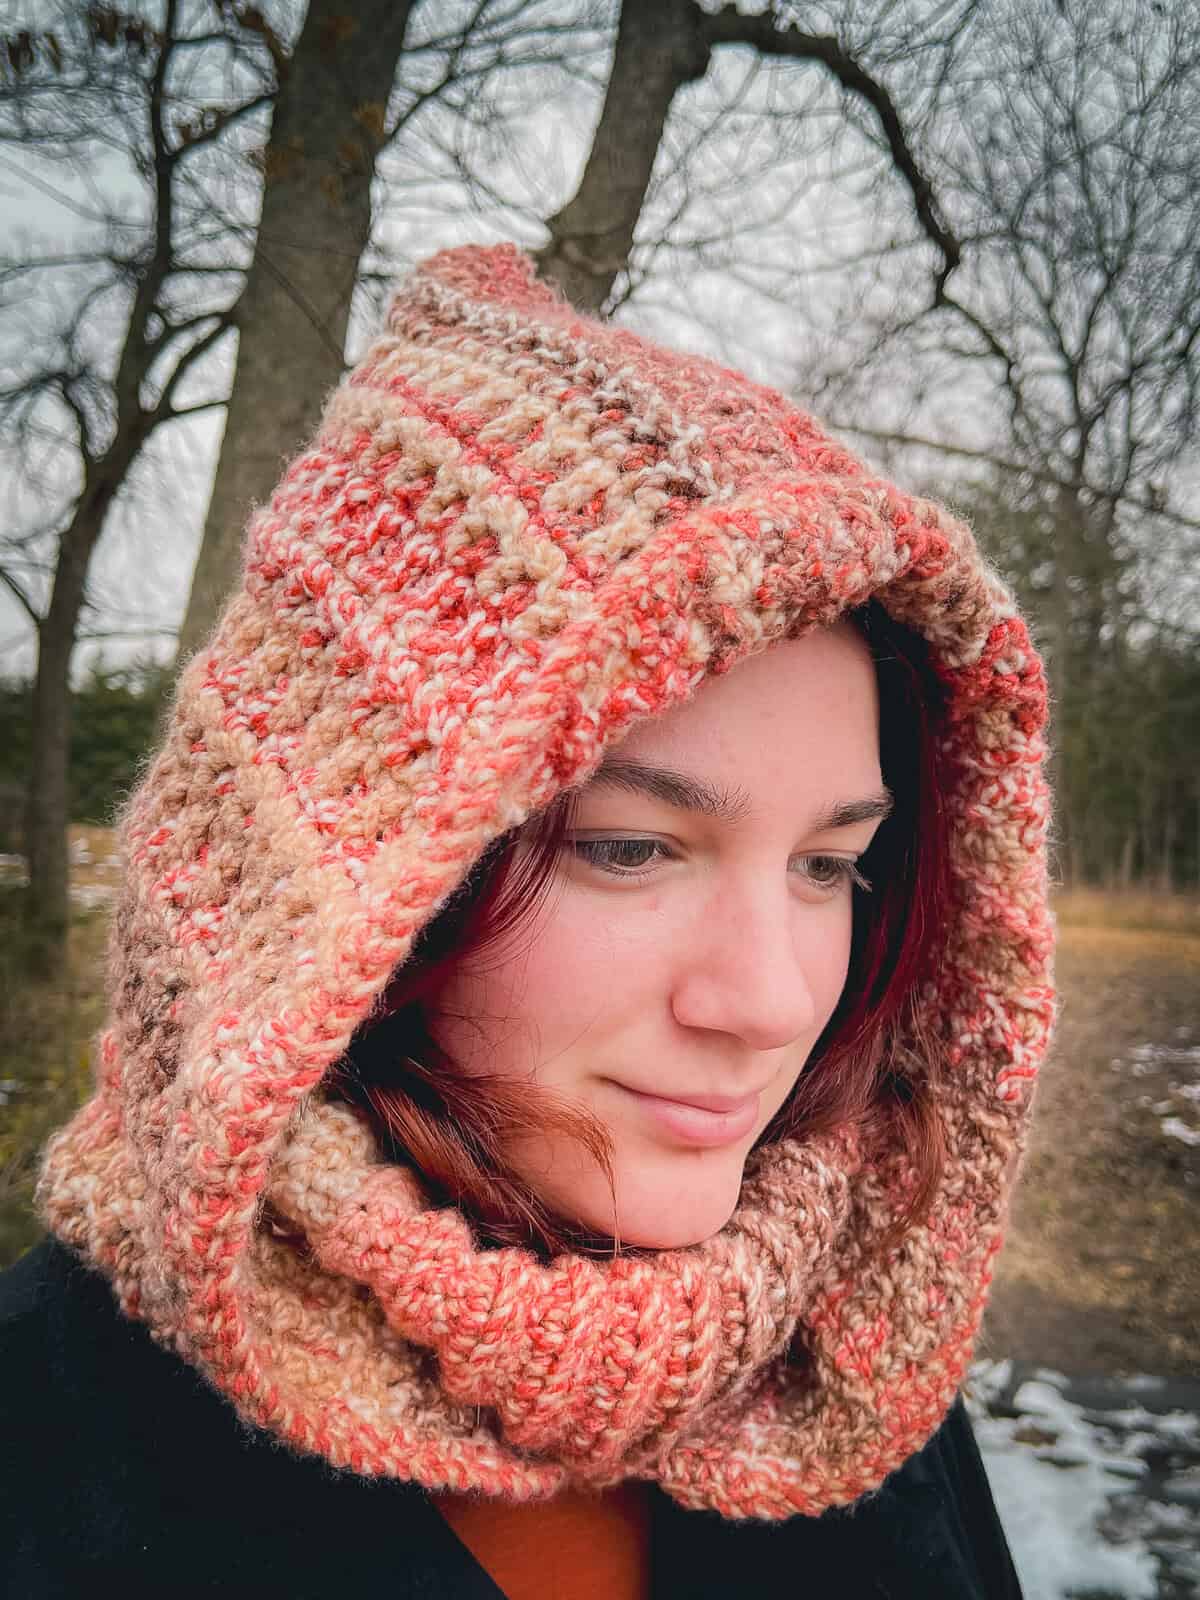
The magic is in the unique woven-look stitch that creates a dense, textured fabric reminiscent of hand-woven baskets or rustic cabin blankets, yet it’s surprisingly simple once you get into the rhythm. Paired with bulky yarn, the stitch pops beautifully and gives the cowl that coveted chunky, luxurious feel that keeps the wind out and the compliments coming.
Whether you’re braving a winter trail, running weekend errands, or just want to feel like a cozy woodland mystic, this hooded cowl has you covered – literally.
Grab your hook and your bulky yarn stash… let’s make something warm, wonderful, and wonderfully fast!


How to Make a Crochet Hooded Cowl
For the full free written pattern instructions for the Mountain Trail Hooded Cowl, scroll down below. You can also purchase the ad-free PDF of this pattern for a small fee. Or, become a Lifetime Member and never pay for a PDF again!
1. This crochet hooded cowl is worked from the bottom-up in one piece!
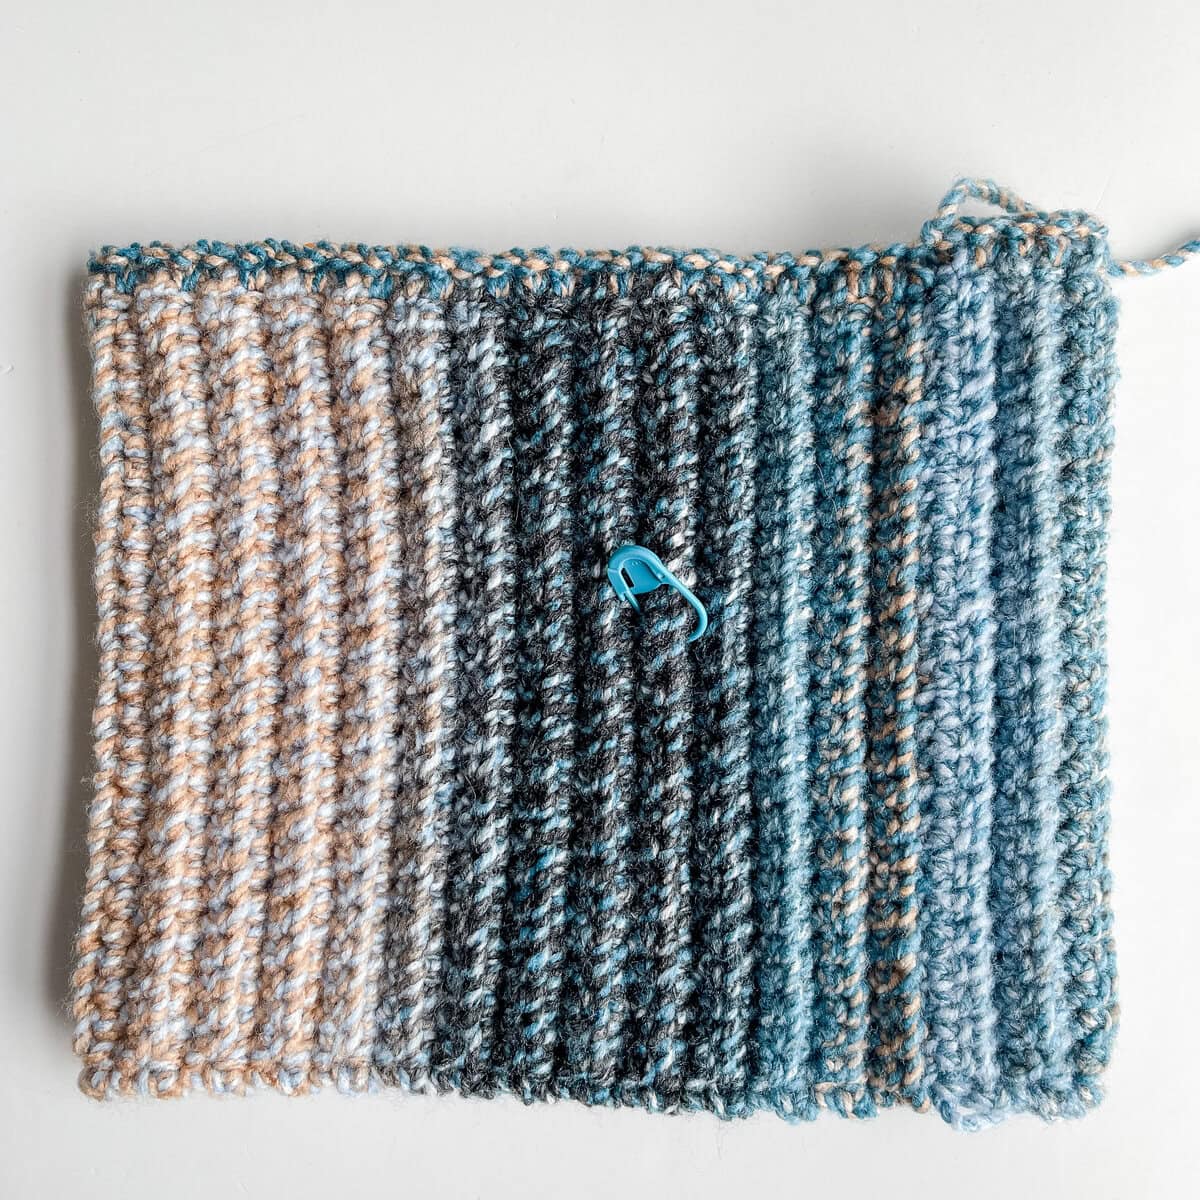
2. Begin by working the ribbed cowl portion of the hood by working single crochet stitches in the back loops only to create a stretchy ribbed cowl.

3. Once the cowl is the length you wish – I worked to 20″ long for an adult size, fasten off, fold, and seam the ends together.
4. Now you will begin working on the hood portion. Work a round of single crochet stitches along the top edge of the ribbing.
5. The main body of the hood is worked in my Interlocking Arches Crochet Stitch. This stitch is part of my Mountain Trail pattern series but is the first pattern worked with bulky yarn. If you love this stitch you can find all of the other patterns on the blog as well. The other patterns in this series are the Mountain Trail Blanket, Mountain Trail Beanie Hat, Mountain Trail crochet cowl pattern, Mountain Trail Infinity Scarf pattern, Mountain Trail Twisted Headband, Mountain Trail Arm Warmers, Mountain Trail Pocket Scoodie as well as the Mountain Trail Triangle Shawl! I also used this stitch in the Coastal Haven Blanket which is a center-out square throw and the Sunrise Serenade Blanket which is a center-out rectangle blanket.
6. I am working the hood with a color work technique that really allows this stitch to shine – by working from 2 different cakes or by working from both ends of the same cake creates an interesting woven appearance. All you need to do is drop and pick up as indicated in the pattern – no need to fasten off!
7. Once the hood is the height you wish, fasten off, fold the top portion of the hood together and seam. So easy!
8. To wear you will simply fold the ribbed cowl inside the hood, pull on over your head and fold the top edge of the ribbed cowl down (or not!).
I have a complete video tutorial for this chunky crochet hooded cowl as well to help with any tricky bits – or to simply follow along as you crochet!
I hope you enjoy making and wearing this warm winter cowl. I would love to see your variations – tag your photos on social media or send me an email. I love to see your creations!
Tonya 💕
Supplies for the Mountain Trail Hood
*This post contains affiliate links. You can click on any yarn or material highlighted to purchase. I will receive a small commission if you purchase but it won’t cost you any extra! As an Amazon Associate I earn from qualifying purchases.
I am using Premier Puzzle* yarn which is a bulky acrylic yarn that is so soft! It is my new favorite self-striping bulky yarn! Each ball is made with 4 coordinating colors that combine to create ever-changing, softly blended stripes. I love the tweed-like effect of this yarn as well. I really need to make my Mountain Trail Blanket in this yarn. I think it would look amazing!
Purchase the ad-free PDF
You can purchase the ad-free printable PDF of this Mountain Trail Hood for a small fee. You can purchase the individual pattern, or if you love PDFs, you might want to check out my Lifetime Membership. It’s an awesome deal! Never pay for one of my PDFs again!!


If you would like daily crochet inspiration be sure to follow me on Facebook, Instagram, Pinterest, YouTube, Twitter and Tumblr!
To get notified of my free crochet patterns and future giveaways, sign up for my newsletter. I never share or sell your information to third parties — it stays private!
You may also like the following free crochet patterns by Nana’s Crafty Home that can be found on the blog:


- 1. Mountain Trail Cowl Pattern
- 2. Fairy Tale Pocket Scoodie free crochet pattern
- 3. Mountain Trail Pocket Scarf free crochet pattern
Mountain Trail Hooded Cowl free crochet pattern
Pattern written in US crochet terminology
Supplies:
Premier Puzzle, Weight 5 Bulky (100% acrylic)
(2) Color Kickball 9 oz/425 yards
Crochet hook size J (6.0 mm)
Stitch marker(s)
Scissors
Tapestry Needle
Approximate finished size:
Adult: Approximately 12” wide x 21” height before folding
Gauge: 13 sts in ribbing pattern x 13 rows = 4” x 4”
Abbreviations:
- ch(s) = chain(s)
- BLO = back loop only
- dc = double crochet
- sk = skip(ped)
- st = stitch
- sc = single crochet
- sl st = slip stitch
- RS = right side
- WS = wrong side
Pattern Notes:
- Hat is worked from the bottom up.
- Main body of hat is worked by alternating colors from two yarn cakes, switching colors every second row.
- Do not cut yarn when changing between yarn cakes – gently pull dropped yarn into your work. Yarn “floats” will be covered by adding a single crochet edge.
- Chain 4 at beginning of a row counts as first dc + ch 1 throughout.
Recommended Tutorial:
Mountain Trail Hooded Cowl Complete Video Tutorial
Interlocking Arched Columns Stitch Tutorial
Pattern Instructions
Ribbing
Ch 27.
Row 1: Sc in second ch from hook and in ch to end. Turn. (26)
Row 2: Ch 1, sc in both loops of first st, then sc in BLO of each st to last st, sc in both loops of last st. Turn.
Row 3 – 67: Repeat row 2. Note: Will measure approximately 20” before seaming.
Fasten off, leaving a long tail for seaming.
Fold long ends of rectangle together, and with long end left for sewing, sew together with mattress stitch using loop left from foundation chain and front top loop of last row. This is now the wrong side of the cowl.
Due to pattern, row numbers will now restart at 1.
Main Body
Row 1: (RS) With RS of cowl facing, attach yarn to top edge of ribbing at seam, ch 1, sc evenly around top edge of ribbing placing one stitch at end of each row, sl st in first st. (67)
Fasten off.
Count over 33 stitches from first st of row 1 and place a stitch marker.
Turn your work so that the WS of work is facing. I suggest placing a stitch marker or tie a piece of yarn to the RS of your work so you will know which is the RS of your work.
Row 2: (WS) With wrong side facing, join Cake A with sl st in marked st, ch 4, (counts as first dc + ch 1), *sk next st, dc in next st, ch 1;* repeat from * to * to last 2 sts, sk next st, 1 dc in last st. Do not join. Turn. Do not fasten off. Switch to Cake B.
(34 dc sts + 33 ch-1 sps)
Row 3: (RS): Ch 1, sc in same st, *working in front of ch-1 sp work dc in skipped st from previous row, sc in next st; repeat from * across working last sc in top of ch-3. Turn. (67)
Row 4: (WS) Ch 4 (counts as first dc + ch 1), sk next st, *dc in sc, ch 1, sk next st;* repeat from * to * to last st, dc in last st. Turn. Do not fasten off. Switch to Cake A.
Row 5: Ch 1, sc in same st, *working behind ch-1 sp from previous row, dc in skipped st one row below, sc in next st from previous row,* repeat from * to * to end, sc in last st (work sc in the dc of dc + 1). Turn.
Row 6: Ch 4, sk next st, *dc in sc, ch 1, sk next st* repeat from * to * to last st, dc in last st. Turn. Do not fasten off. Switch to Cake B.
Rows 7 – 35: Repeat rows 3-6 ending after row 3.
Fasten off leaving a long tail for seaming.
Fold top edge of hat together, and with long end left for sewing, sew together with mattress stitch.
Edge
With WS facing, join yarn to bottom edge of face opening with sl st, ch 1, sc evenly around edge of face opening.
Fasten off. Weave in ends.
Copyright 2025 Tonya Bush / Nana’s Crafty Home, LLC.
Social Media links:
Facebook: https://www.facebook.com/nanascraftyhome
Instagram: https://www.instagram.com/nanascraftyhome/
Pinterest: https://www.pinterest.com/nanascraftyhome/
YouTube: https://www.youtube.com/c/TonyaBush
Twitter: https://twitter.com/nanascraftyhome
Facebook Group: https://www.facebook.com/groups/829792060522798
Sign up for my Newsletter: https://nanascraftyhome.com/sign-up-for-my-free-newsletter/

 Hi! Thank you so much for being here! I am Tonya the designer behind Nana's Crafty Home. As a wife, mother, Nana of 9 & with 2 fur babies, my days are filled with love, laughter, hugs and yarn! Here you will find colorful and creative crochet designs for yourself or loved ones. My hope is that you will be inspired to learn and create along with me!
0 Comments