A crochet turkey pattern the Turkey Towel Topper is a free crochet pattern by Nana’s Crafty Home!

I took a deep dive into Christmas already this year with the release of the Christmas Granny Square Blanket pattern but I didn’t want to completely skip over Thanksgiving! And this cute little turkey would make the perfect addition to your kitchen Thanksgiving decor.
Since this cute and easy pattern works up quickly in scrap amounts of yarn you can make one (or several!) before the Thanksgiving holiday.
Crochet Turkey Pattern Details
Can you believe that this is #17 in my towel topper pattern series??! I had to go back and count because I had completely lost track! The only holiday I didn’t have a towel topper for was Thanksgiving so now you can have a towel topper for every season of the year.

If you are familiar with all of my other crochet towel toppers you know that they all feature a hidden 3″ ring* which allows the towel to be removable for easy washing. I purchase my rings from Amazon* but you can substitute with inexpensive plastic shower rings, wood rings or even elastic hair ties. All have been used successfully by other makers.

*This post contains affiliate links. You can click on any yarn or material highlighted to purchase. I will receive a small commission if you purchase but it won’t cost you any extra! As an Amazon Associate I earn from qualifying purchases.
You will be crocheting a round circle in single crochet for a separate front and back panel. You will be crocheting over the ring while working the back panel. The panels are then sewn together at the end with the ring inside the front and back panels which means it is hidden inside!

I am using a Red Heart Super Saver yarn which is a medium weight #4 acrylic worsted weight yarn. This is a fantastic scrap basket project. I am using very small amounts for his feathers and legs so you can use whatever colors you have on hand.
The legs are completely optional but I think they add a fun whimsical touch to this cute little crochet turkey pattern.
I typically like to buy a fun kitchen towel to go with my topper but time got away from me. However, I found these cute turkey towels on Amazon that would be perfect – I especially love the one that says, “Pour Some Gravy On Me”. Perfect! I may have to order a set!

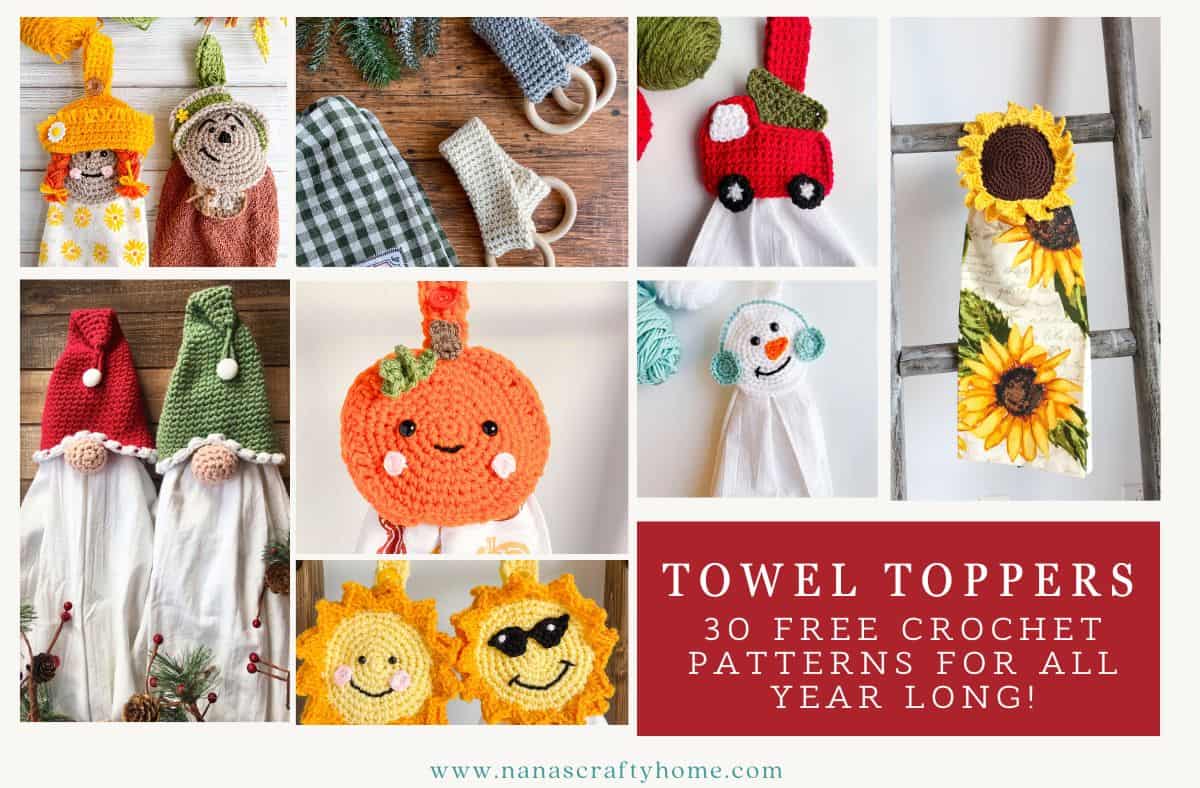
Get ready to infuse your kitchen with a explosion of handmade charm! My FREE crochet towel topper patterns are here to dazzle, with irresistible designs for every season! Featuring a clever hidden 3″ ring for easy towel changes and washing, these super fun patterns include festive Christmas, vibrant spring, sunny summer, and adorable gnome styles. Perfect for crocheters of any skill level, they’ll make your kitchen the coziest spot in the house. Check out the full pattern roundup and start hooking your new obsession now!
This crochet turkey pattern is also available as an ad-free, printable PDF! You can purchase the individual pattern, or if you love PDFs, you might want to check out my Lifetime Membership. It’s an awesome deal! Never pay for one of my PDFs again!! (Or, scroll down for the free pattern version!)

Purchase the ad-free pdf of my Thanksgiving Turkey Towel Topper for a small fee. Thank you so much for supporting my work!

If you would like daily crochet inspiration be sure to follow me on Facebook, Instagram, Pinterest, YouTube, Twitter and Tumblr!
To get notified of my free crochet patterns and future giveaways, sign up for my newsletter. I never share or sell your information to third parties — it stays private!
You may also like the following free crochet patterns by Nana’s Crafty Home:


- 1. Wacky Waddles Turkey Hat free crochet pattern
- 2. Checked Crochet Pumpkin free crochet pattern
- 3. Grateful C2C Table Runner free crochet pattern

Crochet Turkey Towel Topper free written pattern instructions
Pattern written in US crochet terminology
Supplies:
- Red Heart Super Saver Weight 4 Medium (100% acrylic, 7 oz / 364 yards)
- Oatmeal 1.7 oz / 90 yards (Brown)
- Carrot 0.5 oz / 26 yards (Orange)
- Saffron 0.2 oz / 10 yards (Gold)
- Lemon 0.1 oz / 5 yards (Yellow)
- Cherry Red 0.1 oz / 5 yards (Red)
Size J (6.0 mm) crochet hook
1 – 3” plastic ring purchase from Amazon (affiliate)
1 – 3/4” button
Embroidery floss for sewing on button
Poly-fil stuffing
2 – 6 mm safety eyes
Scissors
Tapestry Needle
Stitch Markers
Approximate finished size: 5” round (not including towel or hanging tab)
Gauge: 5” = 9 rounds of sc
Abbreviations:
- WS = wrong side
- RS = right side
- MC = magic circle
- ch(s) = chain(s)
- sc = single crochet
- sl st = slip stitch
- st(s) = stitch(es)
- sk = skip
- hdc = half double crochet
- dc = double crochet
- sc2tog = single crochet 2 sts together (see special stitches section below)
- Special Stitches:
sc2tog = (insert hook into next st, yo and pull up a loop) twice, yo and pull through all 3 loops on hook.
Pattern Notes:
- Work in continuous rounds, do not join, instead use a stitch marker to mark the first stitch of each round.
- Towel topper is worked in two panels which are then joined together at the end.
- Plastic ring is crocheted over while working back panel.
Recommended Tutorials:
How to crochet a perfect circle in single crochet
Front Panel
Round 1: (RS) With Brown, make a MC, ch 1, 6 sc in MC. (6)
Round 2: 2 sc in each st. (12)
Round 3: *2 sc in next st, 1 sc in next st,* repeat from * to * to end. (18)
Round 4: 1 sc in next st, 2 sc in next st, *1 sc in next 2 sts, 2 sc in next st* repeat from * to * to last st, 1 sc in last st. (24)
Round 5: *2 sc in next st, 1 sc in next 3 sts,* repeat from * to * to end. (30)
Round 6: 1 sc in next 2 sts, 2 sc in next st, *1 sc in next 4 sts, 2 sc in next st,* repeat from * to * to last 2 sts, 1 sc in last 2 sts. (36)
Round 7: *2 sc in next st, 1 sc in next 5 sts,* repeat from * to * to end. (42)
Round 8: 1 sc in next 3 sts, 2 sc in next st, *1 sc in next 6 sts, 2 sc in next st,* repeat from * to * to last 3 sts, 1 sc in last 3 sts. (48)
Round 9: *2 sc in next st, 1 sc in next 7 sts,* repeat from * to * to end, sl st to first st. (54)
Fasten off Brown.
Feathers
Join Orange to last stitch, ch 1, *hdc in next st, (1 dc, ch 3, sl st in third ch from hook, 1 dc) in next st, hdc in next st, sl st in next st, switch to new color*, repeat from * to * 7 times. *Note: change colors in order Gold, Yellow, Red, Orange, Gold, Yellow and Red.
Fasten off. Weave in ends.
Back Panel
Round 1 – 5: repeat rounds 1 – 5 of Front Panel.
Round 6: repeat round 6 of Front Panel, except work the first 5 sc stitches over the plastic ring. See Photo 1 & 2 at bottom of PDF Note: Keep ring to WS of panel.
Round 7 – 9: repeat rounds 7 – 9 of Front Panel.
Fasten off. Weave in ends.
Turkey Neck/Face (make 2)

With Brown, ch 6.
Row 1: (RS) 1 sc in second ch from hook and in each ch. Turn. (5)
Row 2: ch 1, 2 sc in same st, 1 sc in each st to last st, 2 sc in last st. Turn. (7)
Row 3: repeat row 2. (9)
Row 4 – 5: ch 1, 1 sc in each st. (9)
Row 6: ch 1, sc2tog, 1 sc in each st to last 2 sts, sc2tog. Turn. (7)
Row 7: ch 1, 1 sc in each st. Turn.
Row 8: ch 1, sc2tog, 1 sc in each st to last 2 sts, sc2tog. Turn. (5)
Row 9: ch 1, sc2tog, 1 sc in next st, sc2tog. Turn. (3)
Row 10 – 11: ch 1, 1 sc in each st. Turn.
Row 12: ch 1, 2 sc in same st, 1 sc in next st, 2 sc in last st. Turn. (5)
Row 13 – 14: ch 1, 1 sc in each st. Turn.
Row 15: ch 1, sc2tog, 1 sc in next st, sc2tog. (3)
Do not turn, work a round of sc evenly around outside edge of face, sl st to first st.
Fasten off, leaving a long tail for sewing. Weave in remaining end.
Beak
With Orange, ch 2, 1 sc in second ch from hook.
Fasten off leaving a long tail for sewing.
Turkey Legs (make 2)
With Gold, ch 3.
Row 1: 1 sc in second ch from hook and in last ch. Turn. (2)

Row 2: ch 3, sc in second ch from hook and next ch, sl st in sc at base of ch, ch 3, sc in second ch from hook and next ch, sl st in next sc from row 1, ch 3, sc in second ch from hook and next ch, using orange sl st in unused loop from foundation ch on st at base of ch.

Row 3: ch 1, 1 sc in same foundation ch loop, sc in next unused loop from foundation ch. Turn. (2)
Row 4 – 13: ch 1, 1 sc in each st. Turn. (2)
Fasten off, leaving a long tail for sewing. Weave in remaining ends.
Hanging Tab
With Brown, (leaving a long tail for sewing), ch 5.
Row 1: sc in second ch from hook and in each ch. Turn. (4)
Row 2 – 30: ch 1, sc in each st. Turn. (4)
Row 21 (button hole row): ch 1, sc in first st, ch 2, sk next 2 sts, sc in last st. Turn. (2 st + 2 ch)
Row 22: ch 1, sc in first st, 2 sc in ch-2 sp, 1 sc in last st. (4)
Fasten off. Weave in end.
With embroidery thread, sew button to non-button hole end of tab.
With long tail left for sewing, sew button side of tab at top RS of back panel. Weave in end.
Assembly
Attach safety eyes to RS of face.
With long tail, sew beak to face below eyes.
With a long tail of red, embroider red snood next to beak. Weave in ends.
With WS of turkey neck panels facing, use long tail of front panel to sew panels together. Stuff with poly-fil before completely sewing shut.
Note that in the photos below I have stitch markers in both panels already even though I don’t give that direction until later in the pattern. Placing stitch markers in the panels simple helped me with placement during the design process.

With long tail of back panel of turkey neck, sew to RS of front panel evenly spacing between feathers.

With long tail, sew legs to bottom RS of front panel.

With WS of panels facing (ring to inside of panels, open part of ring at bottom of face), use stitch markers to count 37 sts from one side of panel to the other. Attach front and back panels together with stitch markers through both panels. With a long length of brown yarn, sew panels together from first stitch marker to the next stitch marker.

Fasten off. Weave in remaining ends.
Copyright 2022 Tonya Bush / Nana’s Crafty Home
Social Media links:
Facebook: https://www.facebook.com/nanascraftyhome
Instagram: https://www.instagram.com/nanascraftyhome/
Pinterest: https://www.pinterest.com/nanascraftyhome/
YouTube: https://www.youtube.com/c/TonyaBush
Twitter: https://twitter.com/nanascraftyhome
Facebook Group: https://www.facebook.com/groups/829792060522798
Sign up for my Newsletter: https://nanascraftyhome.com/sign-up-for-my-free-newsletter/

 Hi! Thank you so much for being here! I am Tonya the designer behind Nana's Crafty Home. As a wife, mother, Nana of 9 & with 2 fur babies, my days are filled with love, laughter, hugs and yarn! Here you will find colorful and creative crochet designs for yourself or loved ones. My hope is that you will be inspired to learn and create along with me!