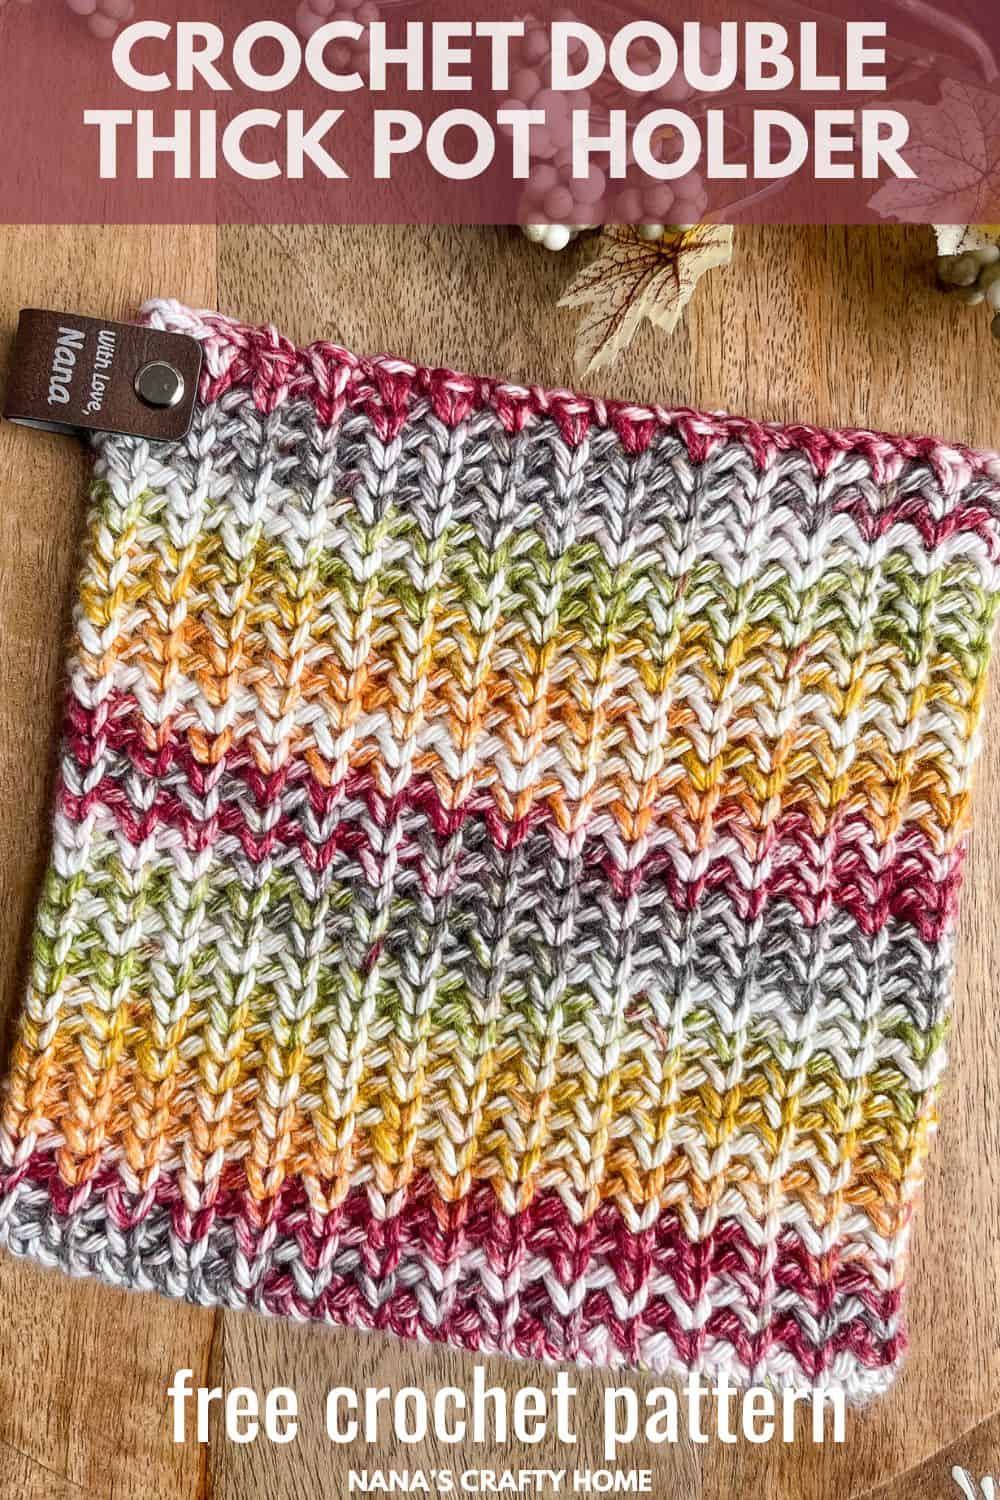
I’m thrilled to share my latest creation with you today – a brand new free crochet hot pad pattern that’s perfect for adding a pop of color and serious functionality to your kitchen.
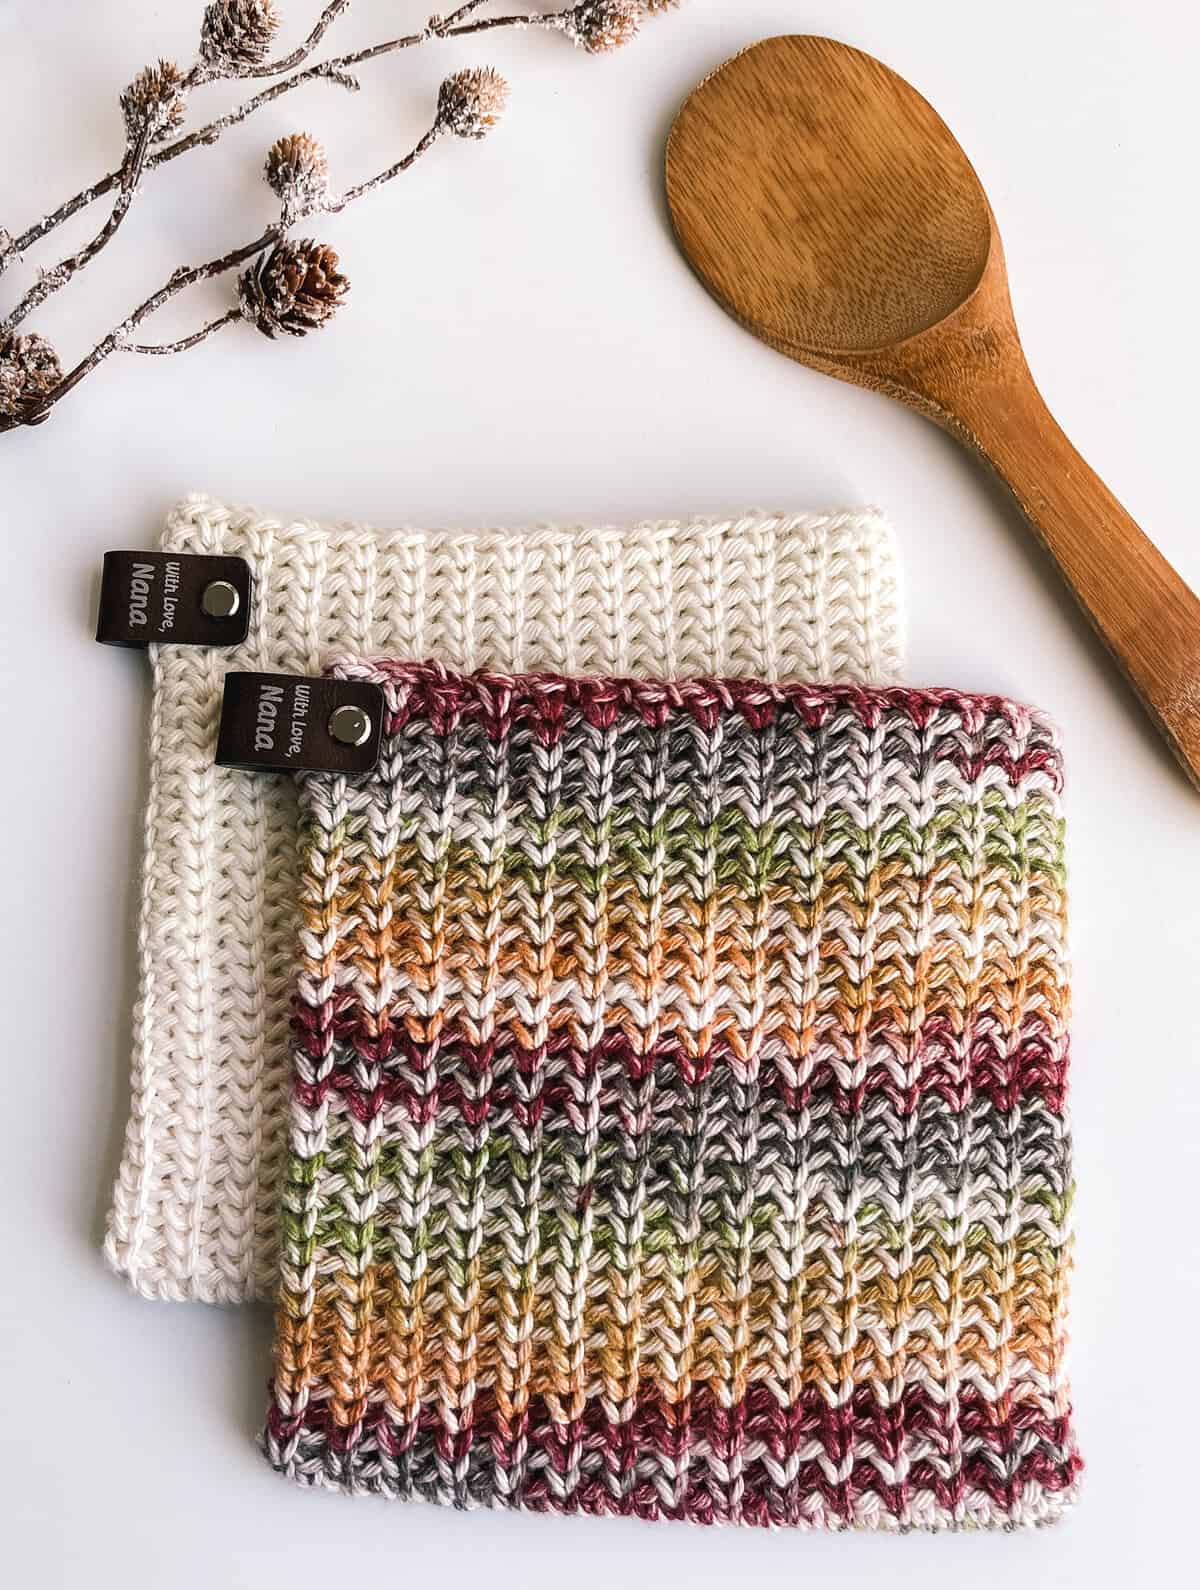
This double-thick hot pad is worked seamlessly in the round without any joining, creating a sturdy, insulated potholder that’s made in one piece. What makes it truly special is my crochet knit rib stitch – a stitch that gives it that gorgeous, authentic knit-look texture while being 100% crochet! The ribbed design not only looks like knitting but also adds extra thickness and stretch, making it super protective for handling hot pots and pans. If you love the look of this stitch as much as I do you might want to check out my Rustic Chunky Stuffed Pumpkin free crochet pattern as well!
I used a beautiful gradient cotton yarn for this one, and the way the colors flow is just magical and highlights the knit-like texture perfectly. Of course, you can use any worsted weight cotton yarn: solids for a classic look, variegated for fun pooling effects, or even scraps for a scrappy striped version!
Why You’ll Love This Crochet Hot Pad Pattern:
- Double thick for maximum heat protection (no more burned fingers!)
- One-piece construction – no sewing layers together
- Worked in the round without joining so no visible seams
- Features the crochet knit rib stitch for that satisfying faux-knit vibe
- Quick and satisfying project – great for gifts or market prep
- Fully reversible!
This pattern is beginner-friendly once you get the hang of the special stitch but the results look advanced and professional.


How to Make the Crochet Hot Pad Pattern
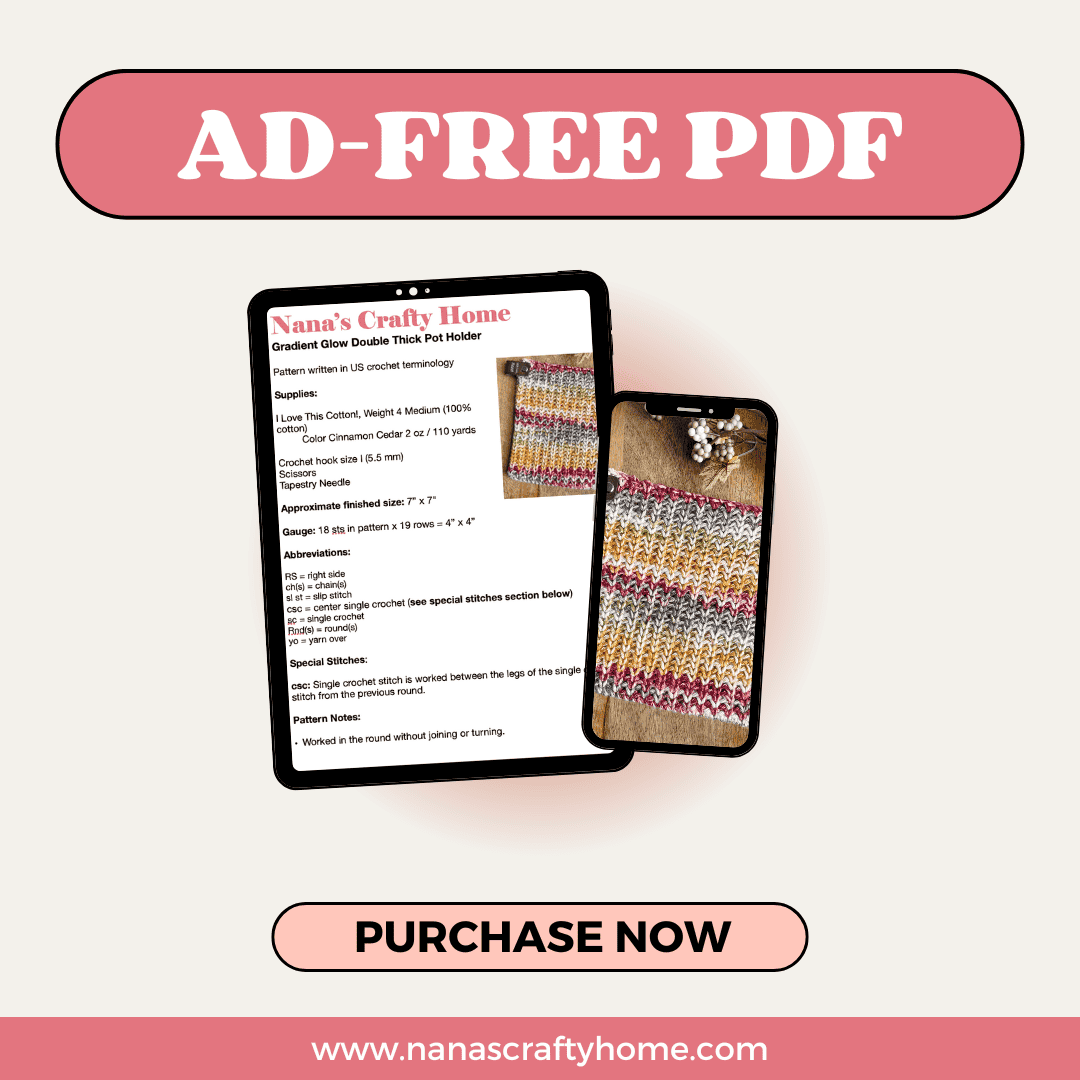
For the full free written pattern instructions for the Gradient Glow Hot Pad, scroll down below. You can also purchase the ad-free PDF of this pattern for a small fee. Or, become a Lifetime Member and never pay for a PDF again!
1. This crochet hot pad pattern is worked in the round from a foundation chain which means you will work into the foundation chain from both sides of the chain.
2. This crochet hot pad pattern is made with my Knit Rib Stitch which is basically the Waistcoat center single crochet stitch (csc) plus chains to create the faux rib knit texture.
2. No increasing which means as you continue to grow your hot pad it will begin to cup to create both sides of your hot pad as you work in the round without joining.
3. A one-round repeat which will keep growing to the size you wish – completely customizable to size! If you want a little wider hot pad add chains in multiples of 2. If you want it a little taller add rounds. So easy!
4. Once you have achieved the height you wish you will fasten off leaving a long tail for seaming the top edge of your hot pad together with the Mattress Stitch or your preferred join method.
5. Add a wooden ring like I did for my Granny Hot Pad, add a crochet loop like I did in my Mosaic Medley Pot Holder or you can add a leather tag to the corner for a modern finish!
I also have a complete video tutorial to walk you through your pot holder if you need a bit of help along the way!
I hope you enjoy making the Gradient Glow Hot Pad! I love seeing your makes so if you share on social media tag me @nanascraftyhome!
Tonya 💕
Supplies for the Gradient Glow Crochet Hot Pad
*This post contains affiliate links. You can click on any yarn or material highlighted to purchase. I will receive a small commission if you purchase but it won’t cost you any extra! As an Amazon Associate I earn from qualifying purchases.
I am using Hobby Lobby’s I Love This Cotton! which is a medium weight #4 cotton variegated yarn. This crochet hot pad also looks fantastic in a solid color as well but I really love how the gradient variegated yarn lets the stitches shine!
To give my hot pad that extra professional and personal touch, I added a custom leather tag that says “with love Nana” – it’s attached with a simple screw rivet, no sewing required! These no-sew tags are a game-changer for finishing crochet or knit projects. I got mine from Etsy, and there are so many great shops offering customizable faux or genuine leather versions (perfect for thick items like this double-thick hot pad).
Purchase the ad-free PDF
You can purchase the ad-free printable PDF of this Gradient Glow Hot Pad for a small fee. You can purchase the individual pattern, or if you love PDFs, you might want to check out my Lifetime Membership. It’s an awesome deal! Never pay for one of my PDFs again!!


To get notified of my free crochet patterns and future giveaways, sign up for my newsletter. I never share or sell your information to third parties — it stays private!
You may also like the following free crochet patterns by Nana’s Crafty Home that can be found on the blog:


- 1. Flower Power Pan Protectors free crochet pattern
- 2. Modern Ring Towel Holder free crochet pattern
- 3. Dish Scrubber free crochet pattern
Gradient Glow Double Thick Pot Holder free crochet hot pad pattern
Pattern written in US crochet terminology
Supplies:
I Love This Cotton!, Weight 4 Medium (100% cotton)
Color Cinnamon Cedar 2 oz / 110 yards
Crochet hook size I (5.5 mm)
Scissors
Tapestry Needle
Approximate finished size: 7” x 7″
Gauge: 18 sts in pattern x 19 rows = 4” x 4”
Abbreviations:
- RS = right side
- ch(s) = chain(s)
- sl st = slip stitch
- csc = center single crochet (see special stitches section below)
- sc = single crochet
- Rnd(s) = round(s)
- yo = yarn over
Special Stitches:
csc: Single crochet stitch is worked between the legs of the single crochet stitch from the previous row.
Pattern Notes:
- Worked in the round without joining or turning.
Recommended Tutorial:
Crochet Rib Stitch Tutorial
Gradient Glow Pot Holder Tutorial
Pattern Instructions
Ch 31.
Rnd 1: Sc in second ch from hook and in each ch to last ch, rotate work to begin working in unused loops from foundation ch, sc in each unused loop to end. Do not sl st join at end. 60
Rnd 2: Csc in first st, *ch 1, sk next st, csc in next st,* repeat from * to * to last st, ch 1, sk last st.
Rnd 3. Csc in first st, *ch 1, sk ch-1, csc in next st,* repeat from * to * around.
Rnds 4 – 33: Repeat round 3. Note: I wanted to make a square and since my width measured 7”, I worked enough rounds to measure 7” in height before fastening off.
Fasten off, leaving a long tail for sewing the top seam. Weave in ends not meant for seaming.
With long tail, sew top of pot holder together using a whip stitch or Mattress stitch through both sides of pot holder.
Weave in remaining ends.
Add leather tag to pot holder (optional).
Wood Ring option
After seaming top edge do not weave in end. With yarn end on needle, sew wood ring to corner of hot pad by inserting needle into center of ring, pull through, insert needle into corner of pot holder and repeat 5-7 times to securely fasten ring to corner of hot pad.
Hanging Loop option
Join yarn into top corner of hot pad with slip stitch, ch 16, sl st in second ch from hook and in each ch to end.
Fasten off, leaving a long tail. With long end of yarn on needle, sew end of chain to corner creating a loop. Secure and weave in end.
Copyright 2026 Tonya Bush / Nana’s Crafty Home, LLC.
Social Media links:
Facebook: https://www.facebook.com/nanascraftyhome
Instagram: https://www.instagram.com/nanascraftyhome/
Pinterest: https://www.pinterest.com/nanascraftyhome/
YouTube: https://www.youtube.com/c/TonyaBush
Twitter: https://twitter.com/nanascraftyhome
Facebook Group: https://www.facebook.com/groups/829792060522798
Sign up for my Newsletter: https://nanascraftyhome.com/sign-up-for-my-free-newsletter/
 Hi! Thank you so much for being here! I am Tonya the designer behind Nana's Crafty Home. As a wife, mother, Nana of 9 & with 2 fur babies, my days are filled with love, laughter, hugs and yarn! Here you will find colorful and creative crochet designs for yourself or loved ones. My hope is that you will be inspired to learn and create along with me!