The magic of Christmas decorating awaits—twinkling lights, the scent of pine, and those oversized stockings hanging by the chimney with care, just waiting to overflow with goodies.
Between baking cookies, wrapping gifts, and dodging tinsel disasters, who has time for complicated crochet patterns? That’s why I’m thrilled to share my latest free pattern: the Basic Simple Double Crochet Christmas Stocking—a beginner-friendly project that’s as straightforward as it is festive.
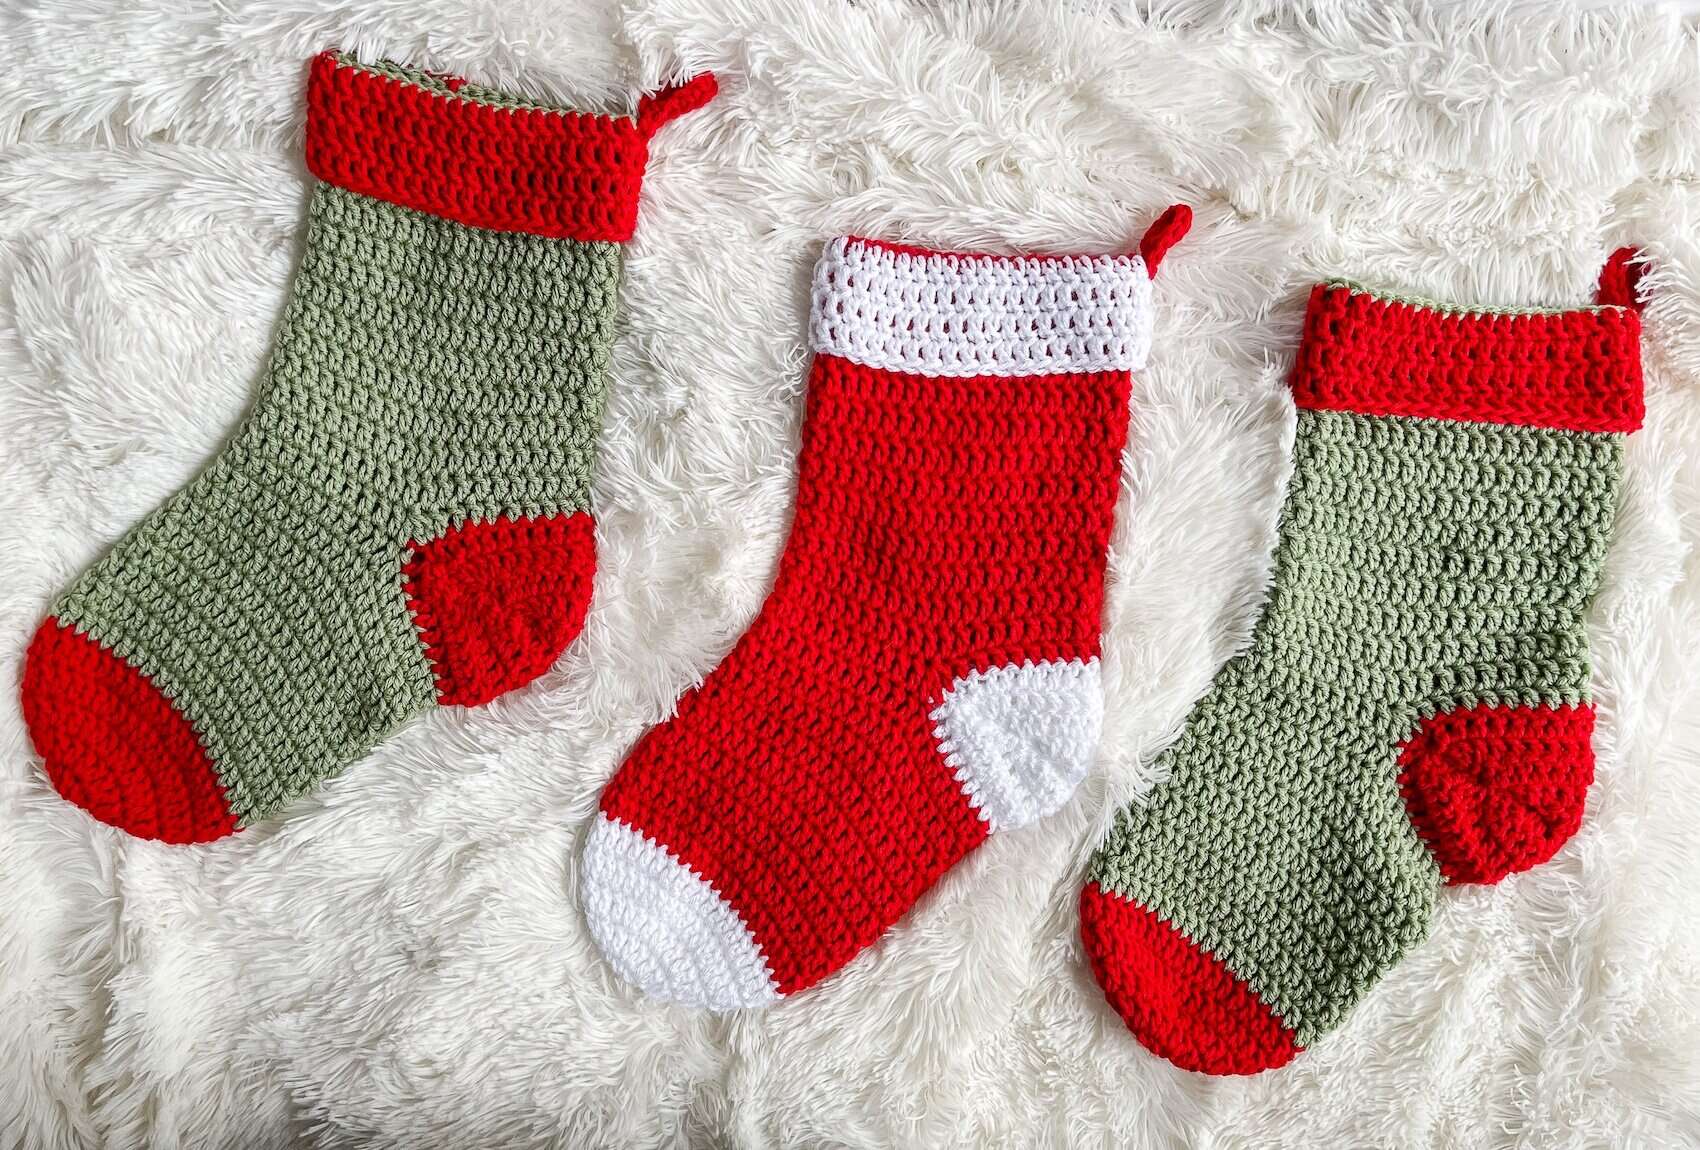
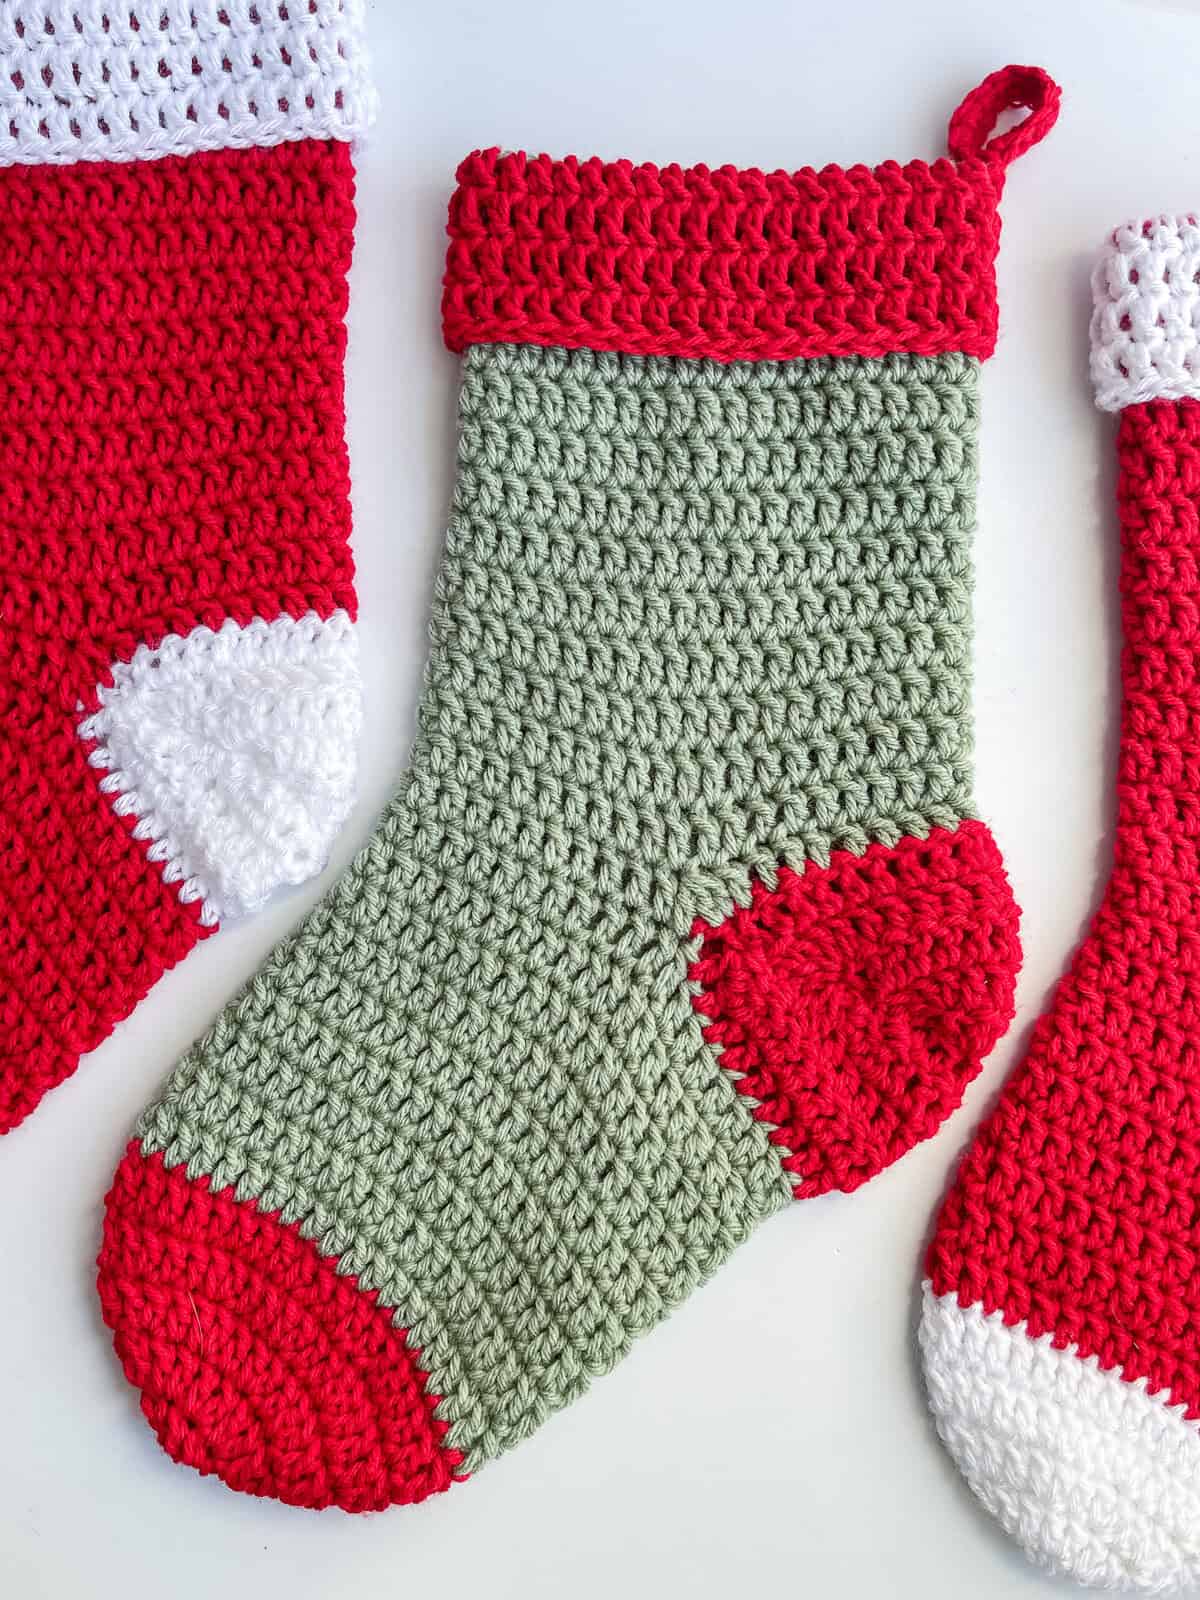
A large, classic stocking worked entirely in double crochet stitches (!), from cheeky toe to jaunty cuff, all in one piece!
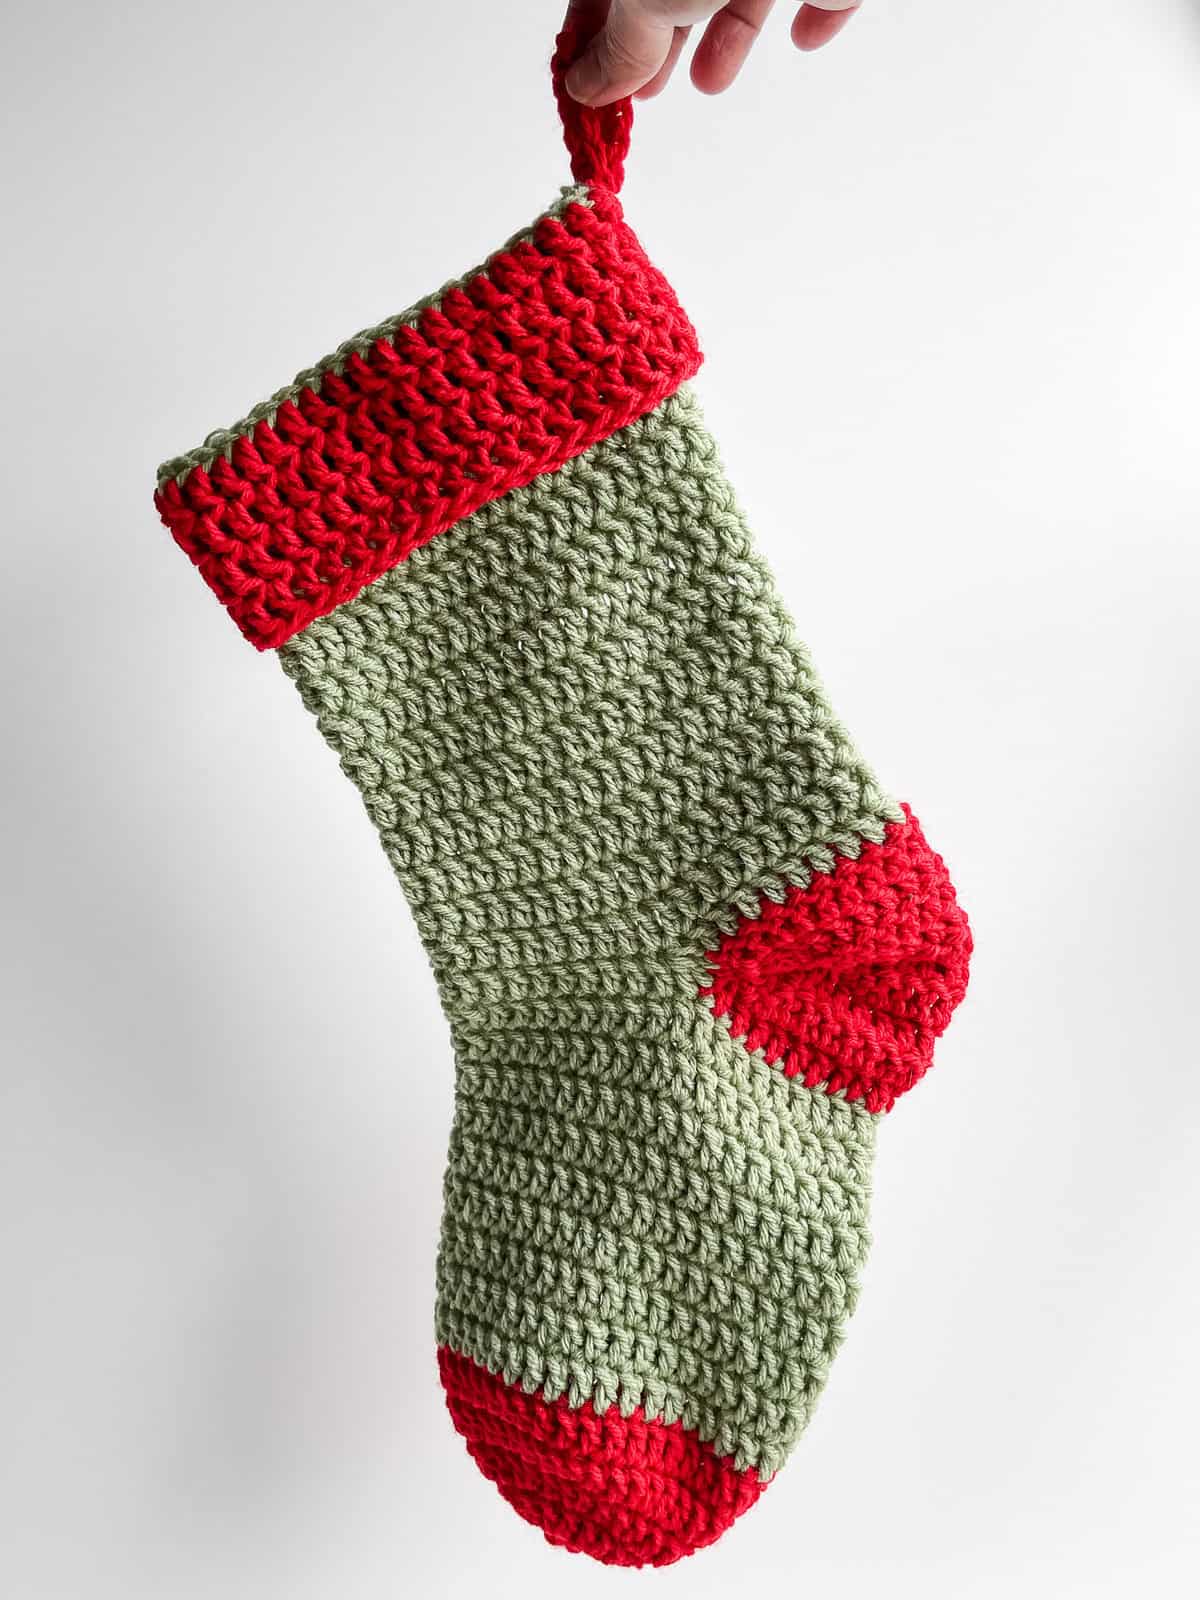
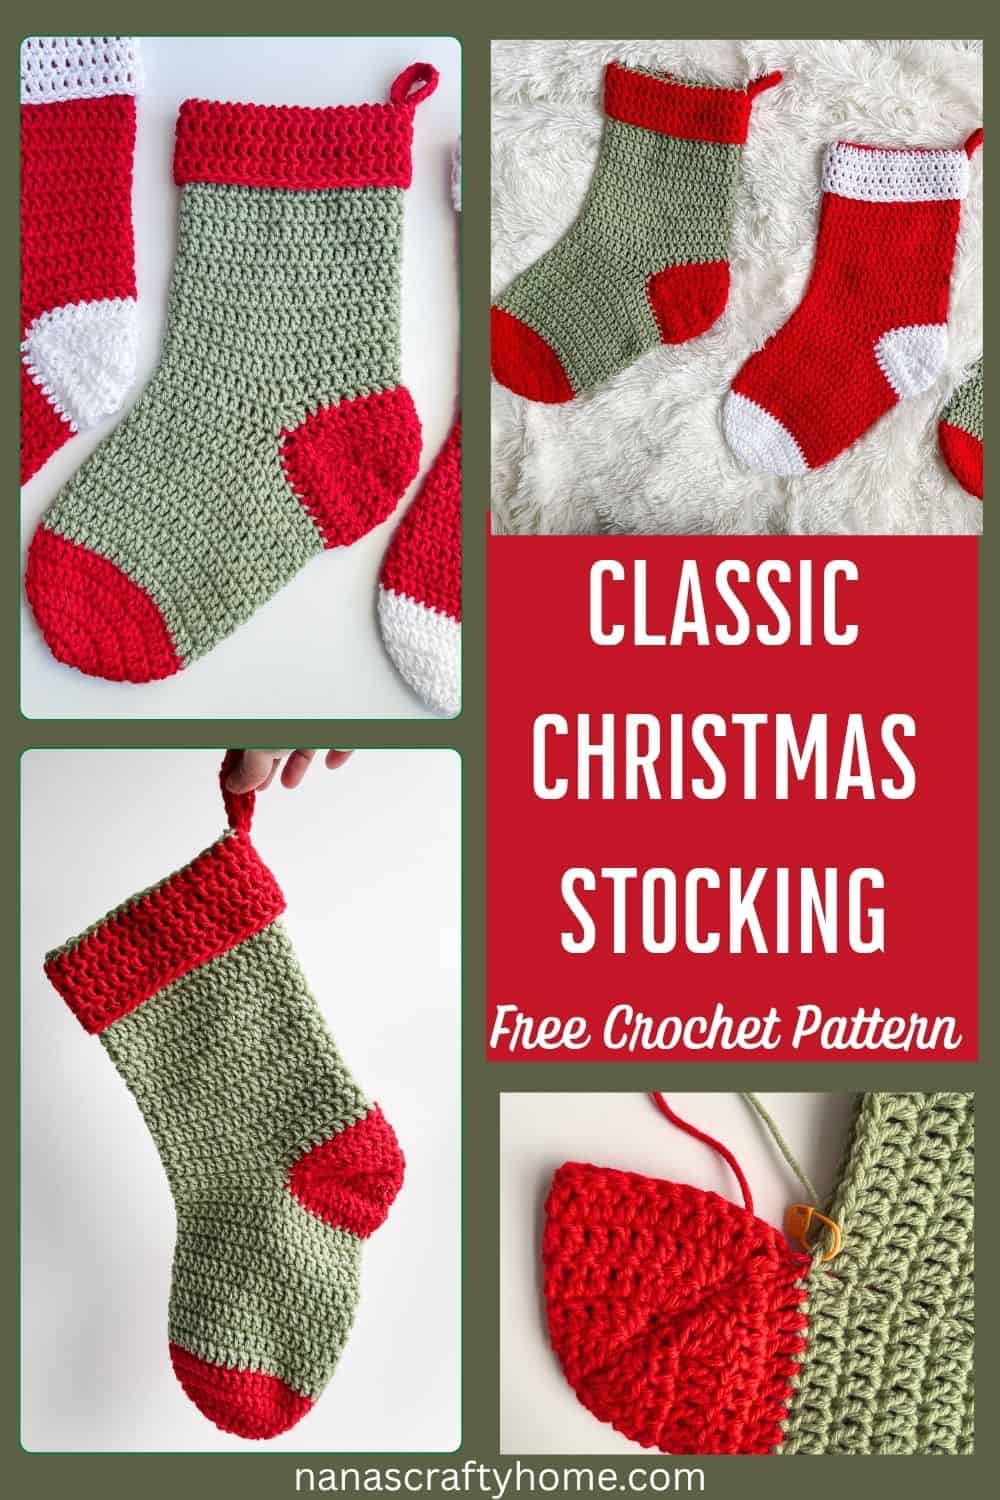
I’ve whipped up several of these beauties in timeless holiday hues—vibrant red for that Santa-approved vibe, lush green with a red toe for a Grinch-like twist, and crisp white accents for a snowy elegance.
They’re the perfect canvas for personalization, too—add stripes, pom-poms, or even fun & festive appliques. And if you need extra help working that heel, I’ve got you covered with a step-by-step video tutorial right here on the blog.
Grab your hook, some worsted-weight yarn, and let’s stitch up some holiday cheer that’ll have your mantel looking merry in no time. Who’s ready to hang their first handmade stocking?

How to make a Classic Crochet Christmas Stocking
For the full free written pattern instructions for the Classic Crochet Christmas Stocking, scroll down below. You can purchase the ad-free PDF of this pattern for a small fee. Or, become a Lifetime Member and never pay for a PDF again!
1. This Christmas Stocking can be made in one solid color or in a two-color option which I love! Pick your two colors and begin by working with the contrasting color which will be used for the toe, heel and cuff.
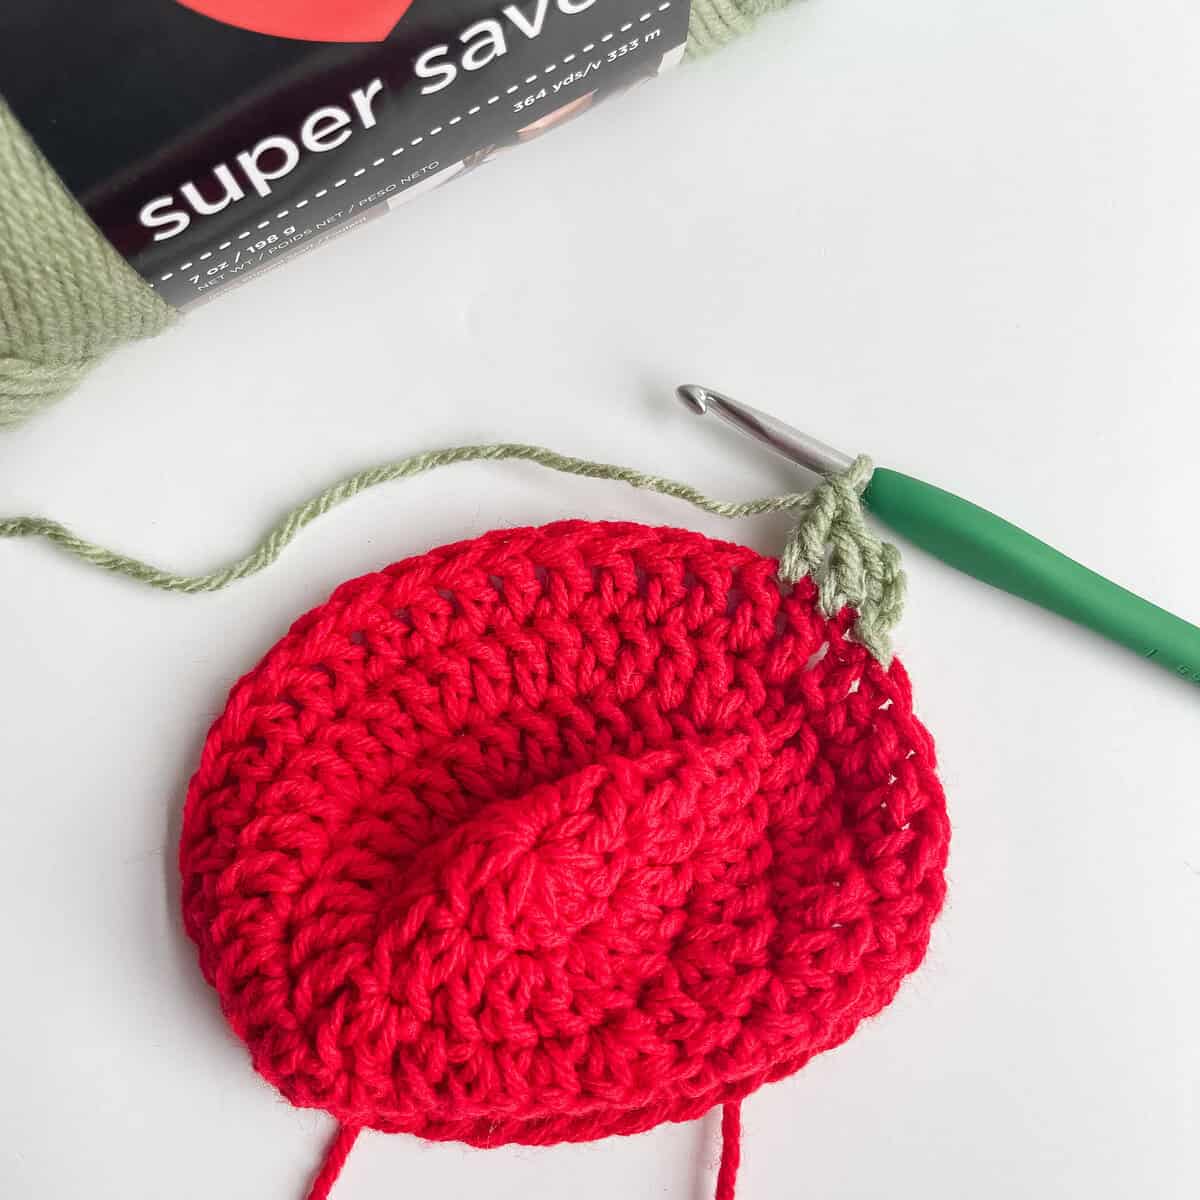
2. Working in the round starting with a magic circle with double crochet increases through round 4 then stop increasing for the remainder of the instep through round 14.
3. For the heel you will begin working with the contrasting color and will begin working in turned rows with a double crochet stitch in only 20 stitches leaving the remaining 20 stitches unworked.
4. Begin working decreases at the beginning and end of each row until only 4 stitches remain.
5. Begin working increases at the beginning and end of each row until you are back to the original 20 stitches.
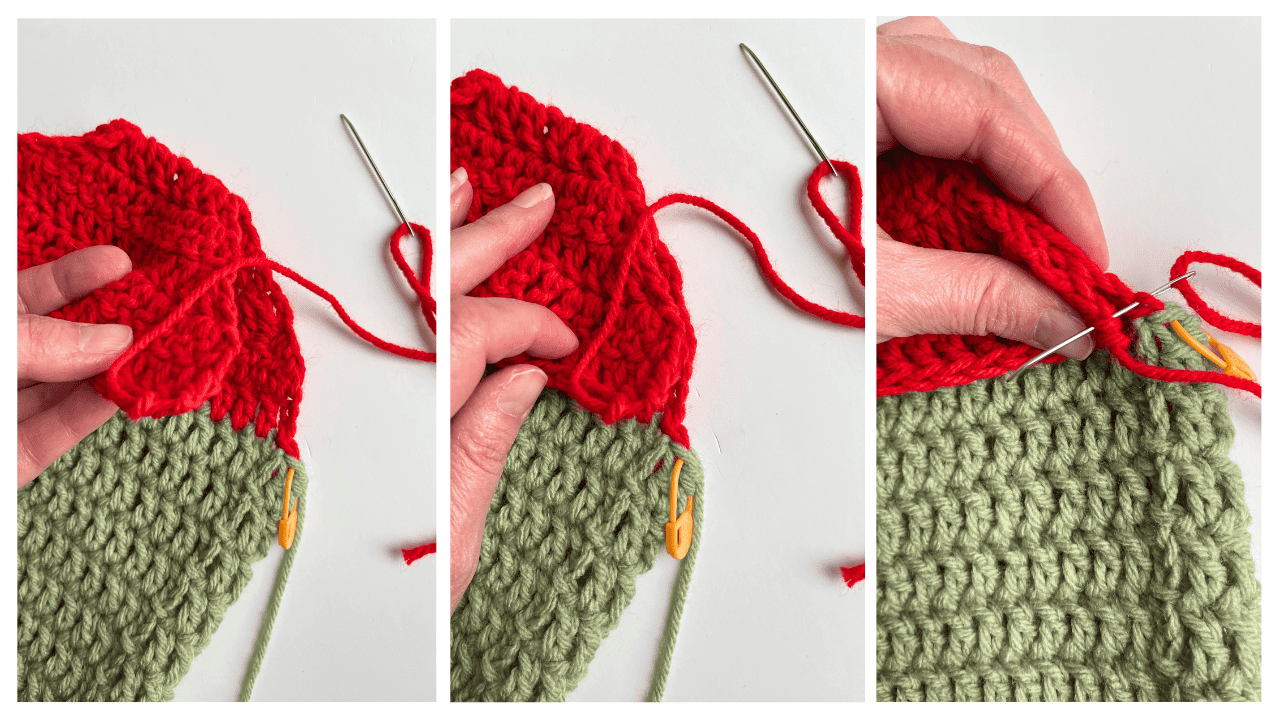
6. Fold the heel together and then sew the ends together to create the heel.
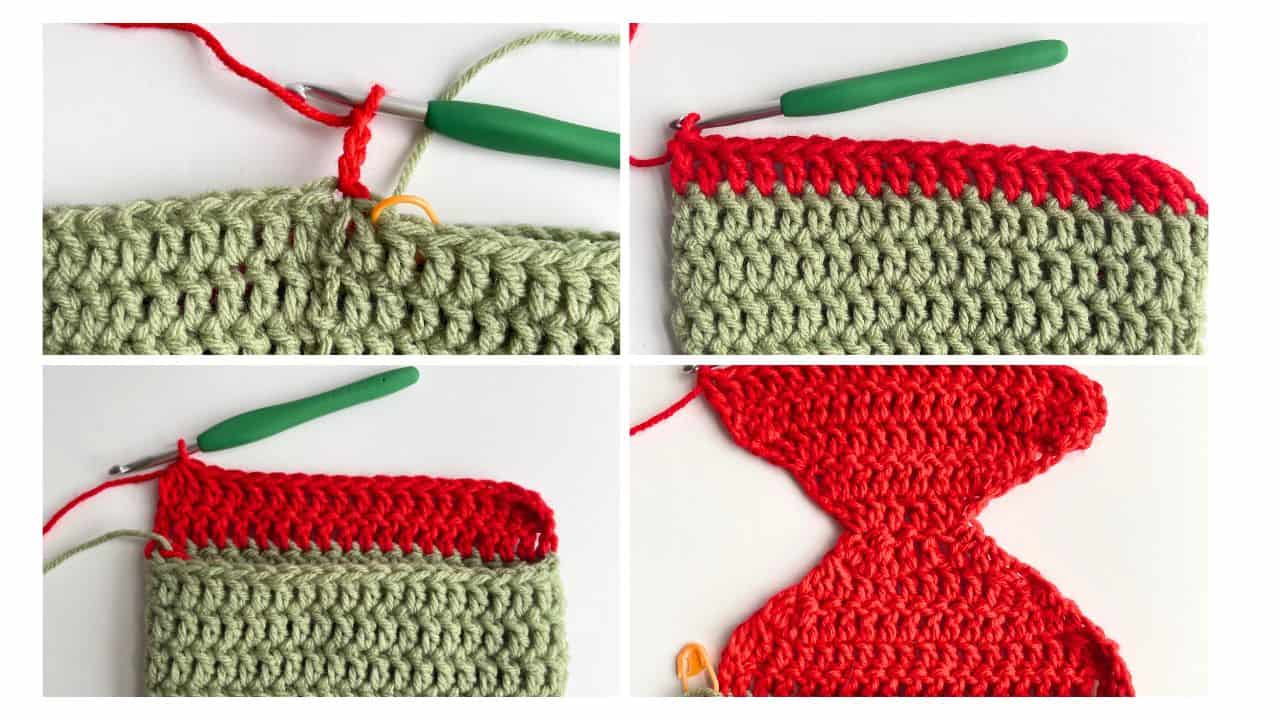
7. Then you will begin working in the round again with your main color until you reach the cuff. That first round the most important thing to remember is we want to get back to 40 total stitches AND we want to close the gap at those two corners between the heel and the instep commonly referred to as the “gusset” . In my pattern we will do that with dc3tog over each corner as shown below.
8. Change colors back to the contrasting color, turn and work the cuff.
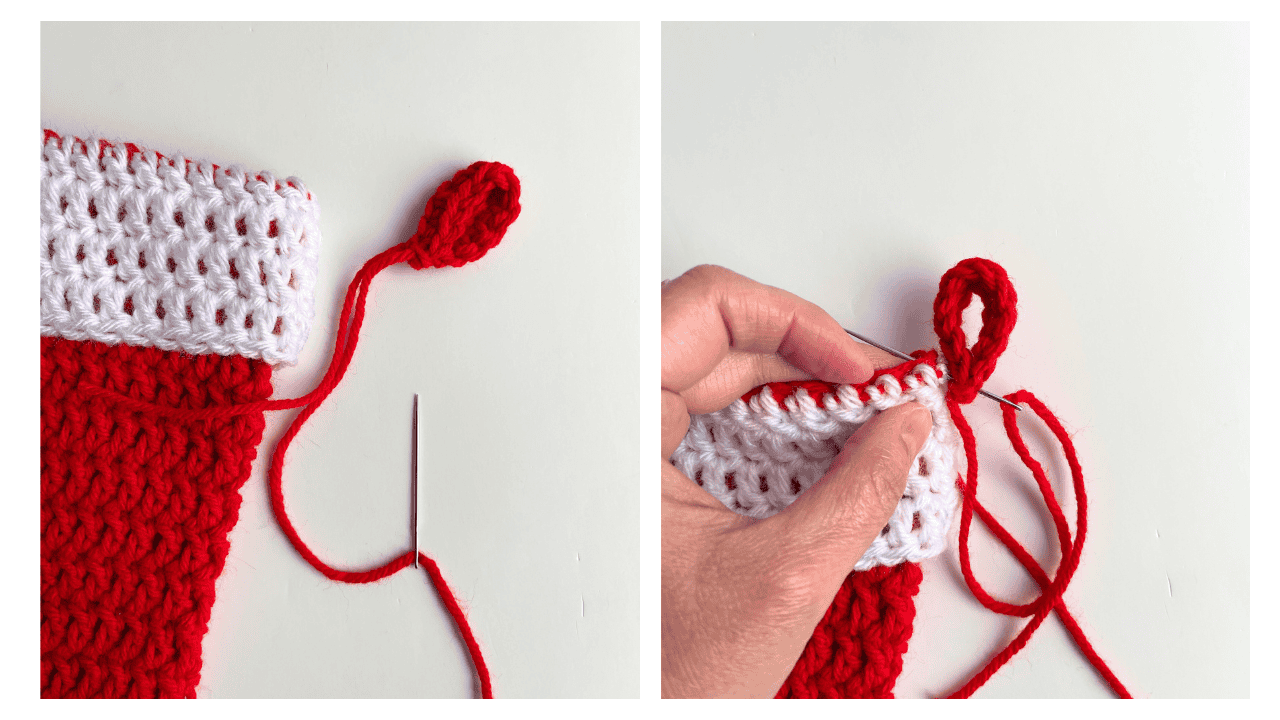
9. Add a simple hanging loop to complete!
10. Personalize your stocking with pom poms, festive appliques or other embellishments to complete!
I hope you enjoy this Christmas crochet stocking pattern!
Tonya
Christmas Stocking Supplies
*This post contains affiliate links. You can click on any yarn or material highlighted to purchase. I will receive a small commission if you purchase but it won’t cost you any extra! As an Amazon Associate I earn from qualifying purchases.
I made my Christmas stocking using Red Heart Super Saver, which is a sturdy and economical medium worsted weight acrylic yarn. Substitute with your favorite yarn – make your stocking smaller by using a smaller weight yarn or oversized with a chunky weight yarn.
Match the color of your Christmas home decor or in a child’s favorite colors to personalize even further!
Christmas Stocking + 7 Christmas Applique Pattern Bundle
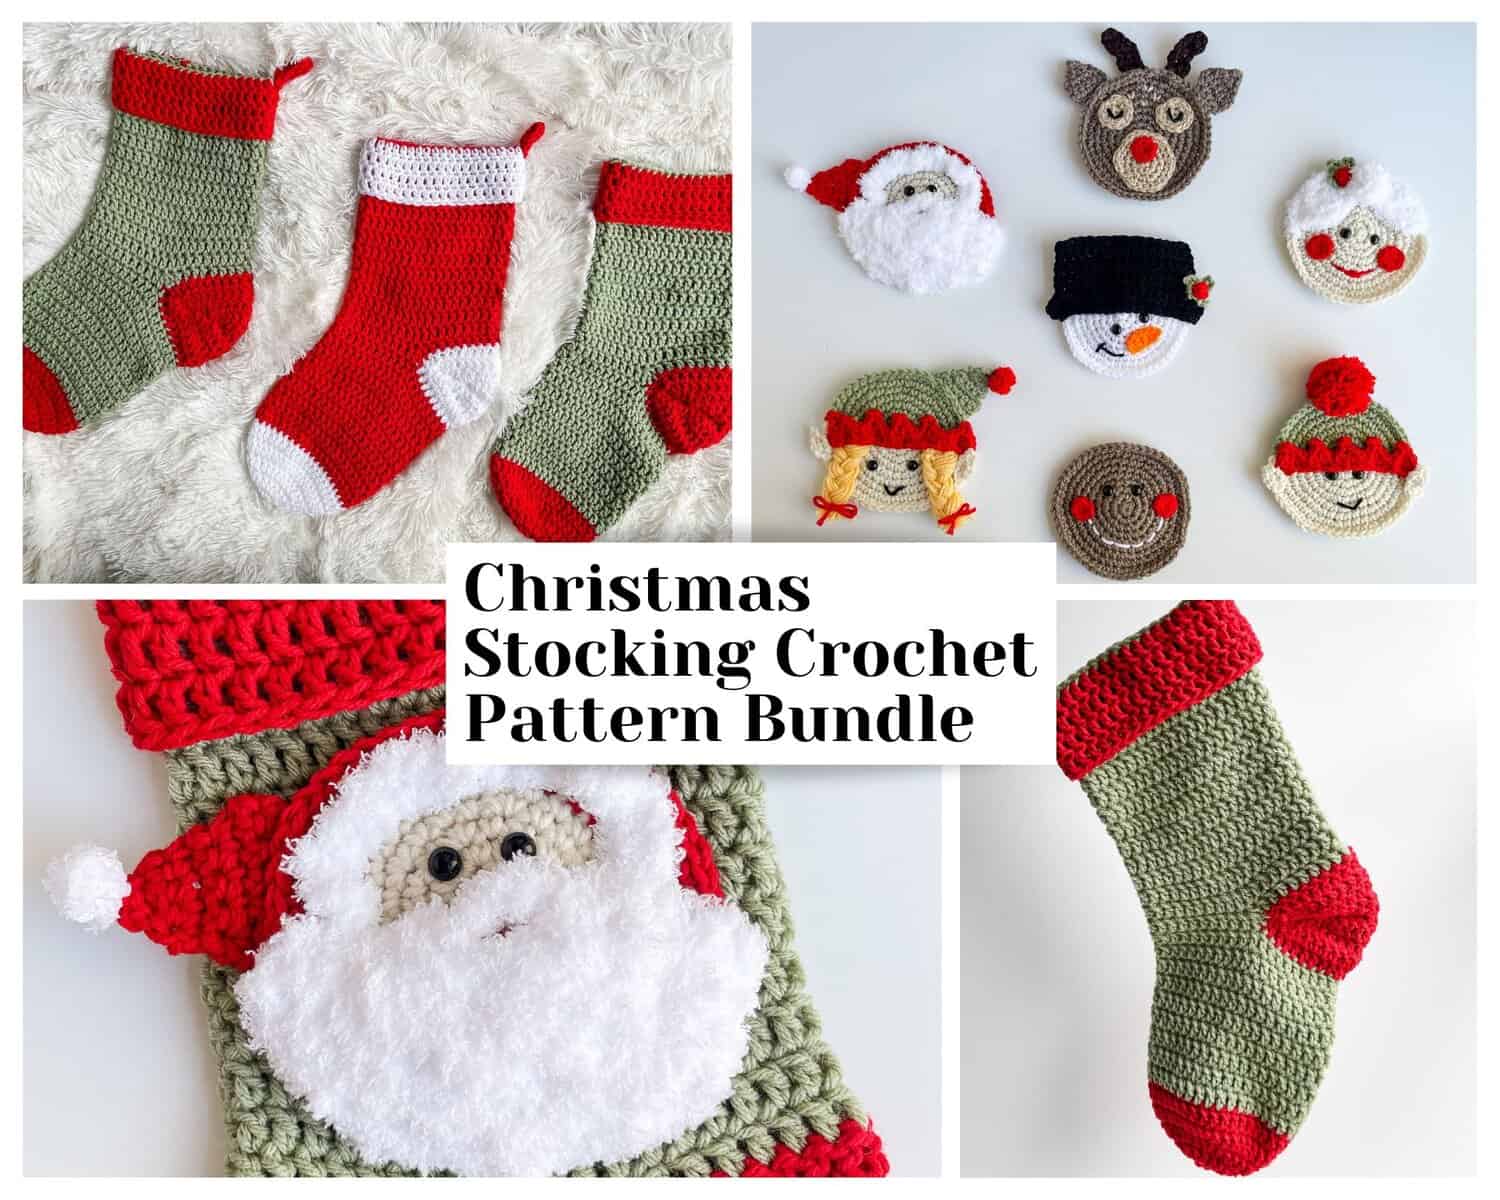
I have put together a bundle of patterns which include 7 Christmas Character Appliques with the Classic Christmas Stocking Pattern included in one pattern bundle! Now available for one-low price! Also available to Lifetime Members free!
Over the next 2 weeks I will be releasing each of the appliques as free crochet patterns on the blog. Right now you can grab all 7 applique patterns + the Classic Christmas stocking pattern all together for one low price!
These Christmas themed applique patterns are the perfect size to sew on your Classic Christmas Stocking and include a snowman, gingerbread man, Santa, Mrs. Claus, Reindeer, Girl Elf & Boy Elf patterns. They are all so cute and a great way to personalize your Christmas stockings this year!
I have begun releasing each applique pattern starting with the Gingerbread Man and Snowman appliques and then a new one every few days after that until all 7 have been released. Check out the free patterns now!
Purchase the ad-free PDF
You can purchase the ad-free PDF of this crochet Classic Christmas Stocking for a small fee. You can purchase the individual pattern, or if you love PDFs, you might want to check out my Lifetime Membership. It’s an awesome deal! Never pay for one of my PDFs again!!


If you would like daily crochet inspiration be sure to follow me on Facebook, Instagram, Pinterest, YouTube, Twitter and Tumblr!
To get notified of my free crochet patterns and future giveaways, sign up for my newsletter. I never share or sell your information to third parties — it stays private!
You may also like the following free Christmas crochet patterns by Nana’s Crafty Home:


- 1. Luxe Boho Chunky Christmas Stocking free crochet pattern
- 2. Gnome Ornament free crochet pattern
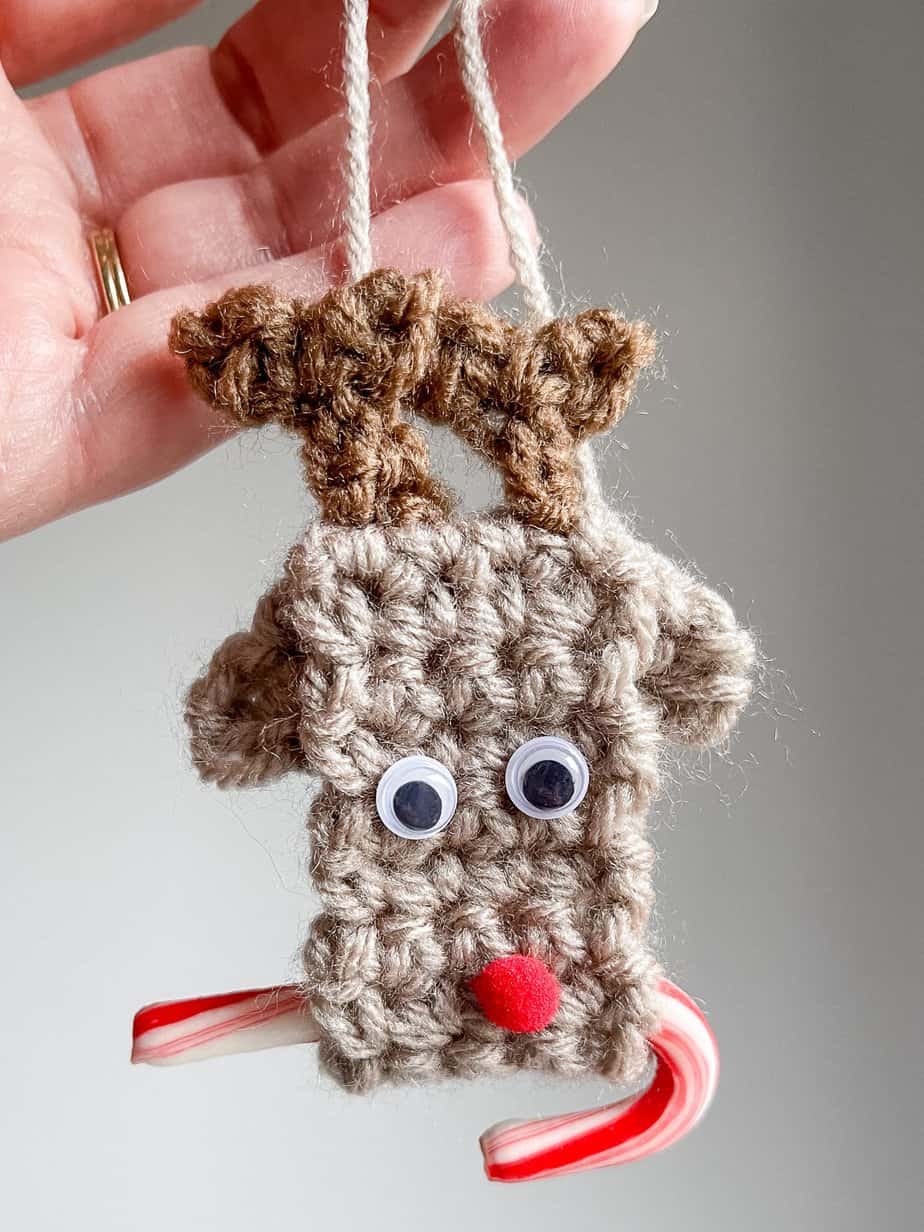
- 3. Reindeer Crochet Ornament free crochet pattern
Classic Christmas Stocking Free Crochet Pattern Instructions
Pattern written in US crochet terminology
Supplies:
Red Heart Super Saver Weight 4 / Medium (100% acrylic)
- Cherry Red 3.2 oz / 170 yards (MC)
- White 1.0 oz / 54 yards (CC)
Size I (5.5 mm) crochet hook
Scissors
Stitch marker (optional)
Tapestry needle
Approximate finished size: 7” wide at cuff x 17” long
Gauge: First 4 rounds = 5” / 3 dc sts = 1”
Abbreviations:
- MC = magic circle
- ch(s) = chain
- dc = double crochet
- st(s) = stitch(es)
- sl st = slip stitch
- RS = right side
- dc3tog = double crochet 3 together (See Special Stitches Section Below)
- yo = yarn over
- BLO = back loop only
- sc = single crochet
Special Stitches
dc3tog: *Yo, insert hook in next st, yo and pull up loop, yo, pull through 2 loops,* repeat from * to * twice (4 loops on hook), yo, pull through all 4 loops on hook.
Recommended Tutorial:
Classic Crochet Christmas Stocking complete video tutorial
Pattern Notes:
- Ch 3 at beginning of each round counts as first dc stitch.
- Ch 2 at beginning of a row does not count as a stitch.
- Stocking is worked in the round from the tip of the toe to the heel. Heel is worked in turned rows and then worked in the round from the heel to through the end of the cuff.
Pattern Instructions
Toe
With CC, make MC.
Round 1: Ch 3, 9 dc in MC, sl st in top of ch-3, tighten MC. (10)
Round 2: Ch 3, 1 dc in same st, 2 dc each st, sl st in top of ch-3. (20)
Round 3: Ch 3, 1 dc in same st, 1 dc in next st, *2 dc in next st, 1 dc in next st,* repeat from * to * to end, sl st in top of ch-3. (30)
Round 4: Ch 3, 2 dc in next st, *1 dc in next 2 sts, 2 dc in next st,* repeat from * to * to last st, 1 dc in last st, sl st in top of ch-3. (40)
Round 5: Ch 3, 1 dc in each st, sl st in top of ch-3. (40)
Fasten off CC, switch to MC.
Instep
Rounds 6 – 14: Repeat round 5.
Place a st marker in last st of row 14. DO NOT Fasten off MC, switch to CC. You will be pulling MC back into your work after working heel.
Heel
Note: You will now be working in turned rows across half of your stocking. Once heel is crocheted, you will fasten off to seam and create heel.
Row 1: (RS) Ch 3, 1 dc in next 19 sts. Leave remaining sts unworked. Turn. (20)
Row 2: Ch 2 (does not count as a st), dc3tog, 1 dc in each st to last 3 sts, dc3tog. Turn. (16)
Rows 3 – 5: Repeat row 2. (12, 8, 4)
Row 6: Ch 3, 2 dc in same st, 1 dc in each st to last st, 3 dc in last st. Turn. (8)
Rows 7 – 9: Repeat row 6. (12, 16, 20)
Row 10: Ch 3, 1 dc in each st to end. (20)
Fasten off, leaving a long tail for sewing heel.
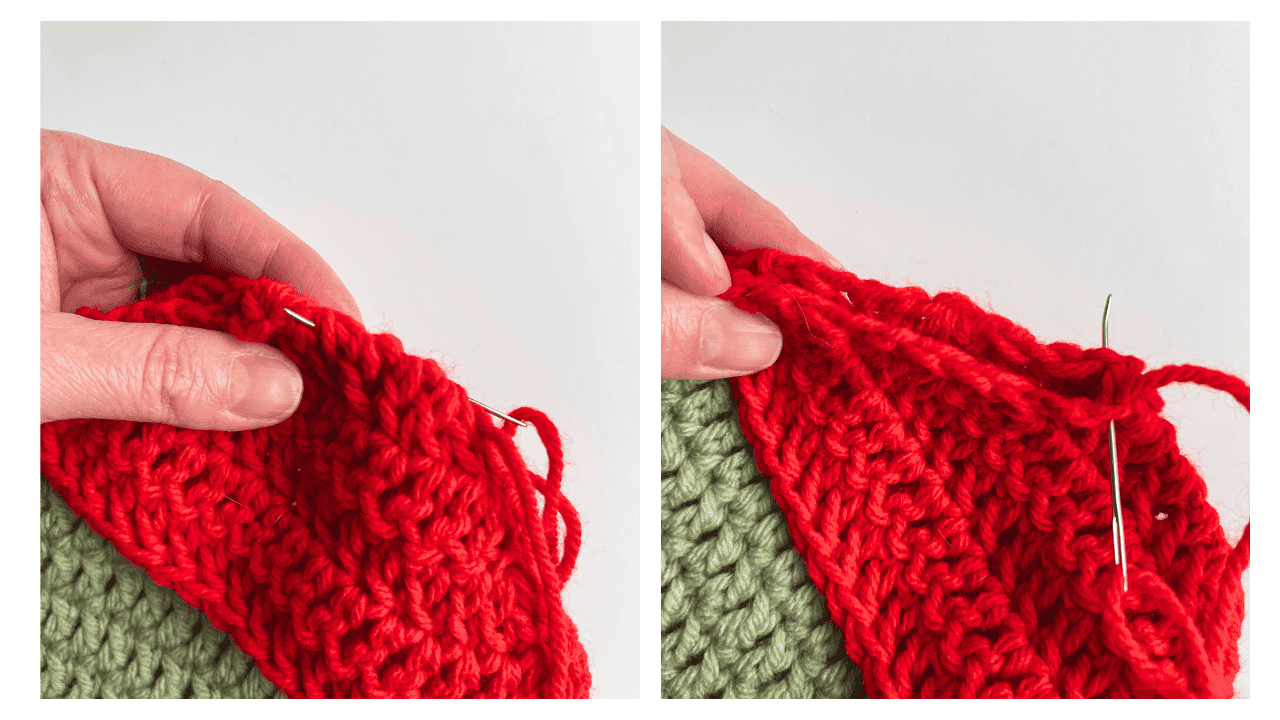
1. Fold and align the flap: Fold the heel flap in half with RS together. Align the edges carefully: match Row 1 to Row 10, Row 2 to Row 9, and so on, up to Row 5 to Row 6. The fold will naturally form the bottom curve of the heel.
2. Seam one side: Thread the long tail (reserved for seaming) onto a yarn needle. Use a whip stitch to join the side edges together. Insert the needle from back to front through both layers, matching stitch for stitch: secure the end of Row 10 to the end of Row 1, Row 9 to Row 2, Row 8 to Row 3, Row 7 to Row 4, and Row 6 to Row 5. Pull gently to close the seam without puckering—aim for even tension.
3. Secure and switch sides: Weave the end through bottom of row 5/6 on the wrong side (WS) to bring the needle through to the opposite side edge of the flap (still with RS facing inward).
4. Seam the other side: Repeat the whip stitch along the remaining side edge, working from the bottom fold up to the top. Again, match stitch for stitch as in Step 2.
5. Turn right side out: Turn heel so the RS faces outward. The seamed edges will now form the reinforced sides of the heel. Weave in any remaining ends on the inside.
Ankle
Notes:
- Round numbering resumes from the instep section.
- You’ll now join the work into the round, incorporating decreases at the heel/instep corners to shape the gusset. This closes the gap between the instep and the newly seamed heel, creating a smooth transition.
- Work all rounds with right side facing.
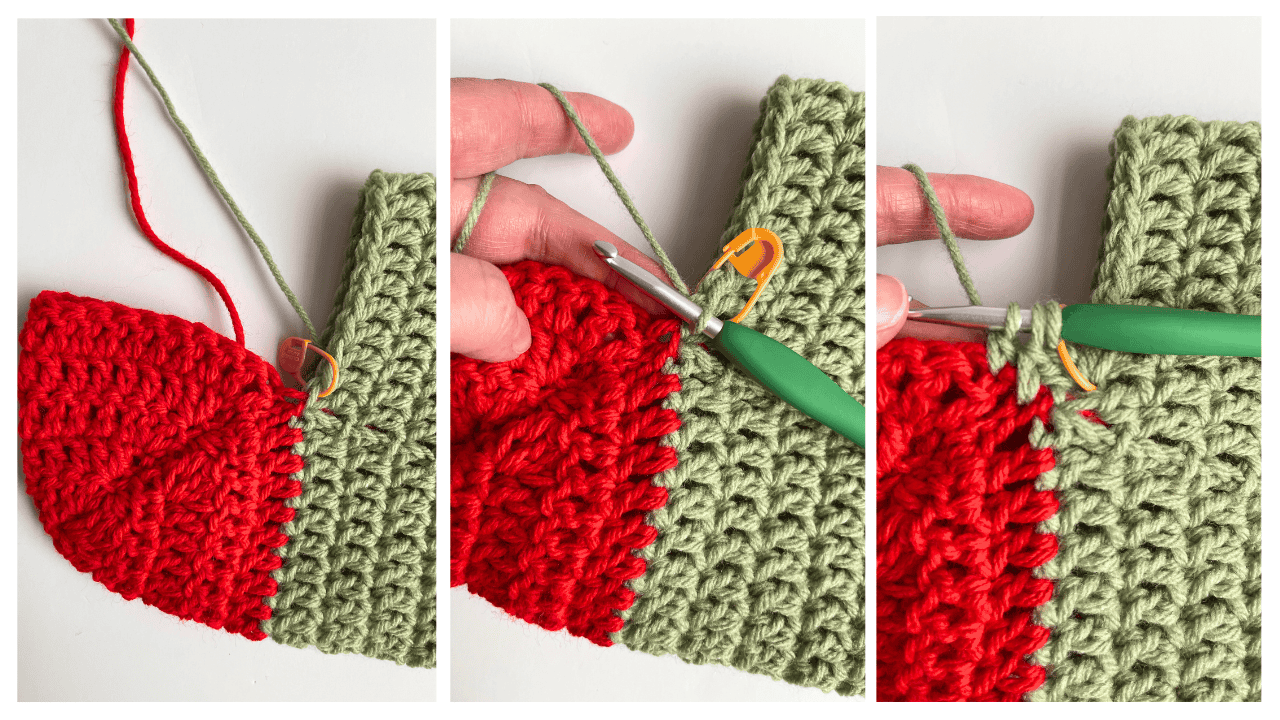
Round 15: Locate the last stitch of Round 14 on the instep (this is where we placed a st marker).
- Insert hook into that last st of instep, pull up a loop of MC, and work 1 slip st (sl st) to join.
- Chain 2 (does not count as st).
- Work 1 dc3tog as follows: Begin in the same st as the sl st (last st of instep Round 14), then twice into the chain-3 from the start of heel Row 1.
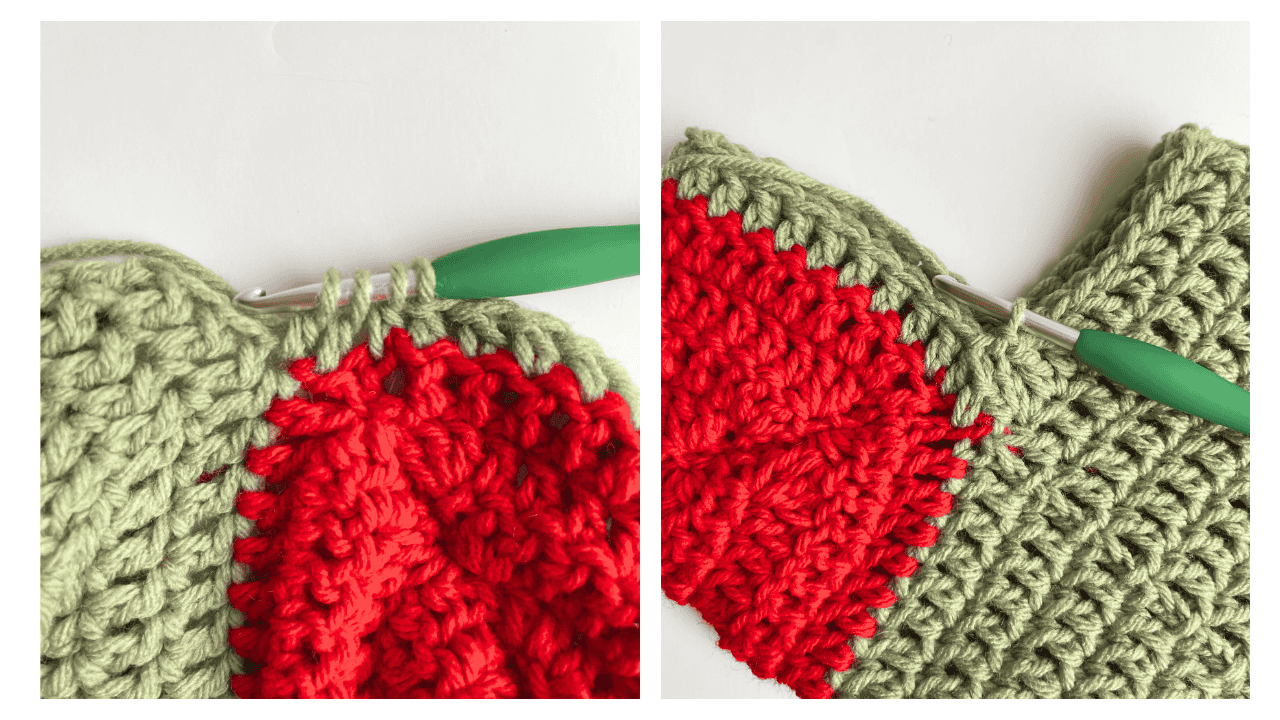
- Continue along the first heel edge: Work 1 dc in each stitch up the side of the heel flap to the next heel/instep join.
- At the second gusset corner, work 1 dc3tog as follows: Begin in the first st of heel Row 10, then into the last st of heel Row 1, and finally into the last worked st from instep Round 14.
- Resume across the instep: Work 1 dc in each remaining st of instep Round 14 to the end.
- Join with sl st to the top of the beginning st. Do not turn. (40 sts total)
Round 16: Ch 3, 1 dc in each st, sl st in top of ch-3. (40)
Rounds 17 – 28: Repeat round 16.
Fasten off MC, switch to CC.
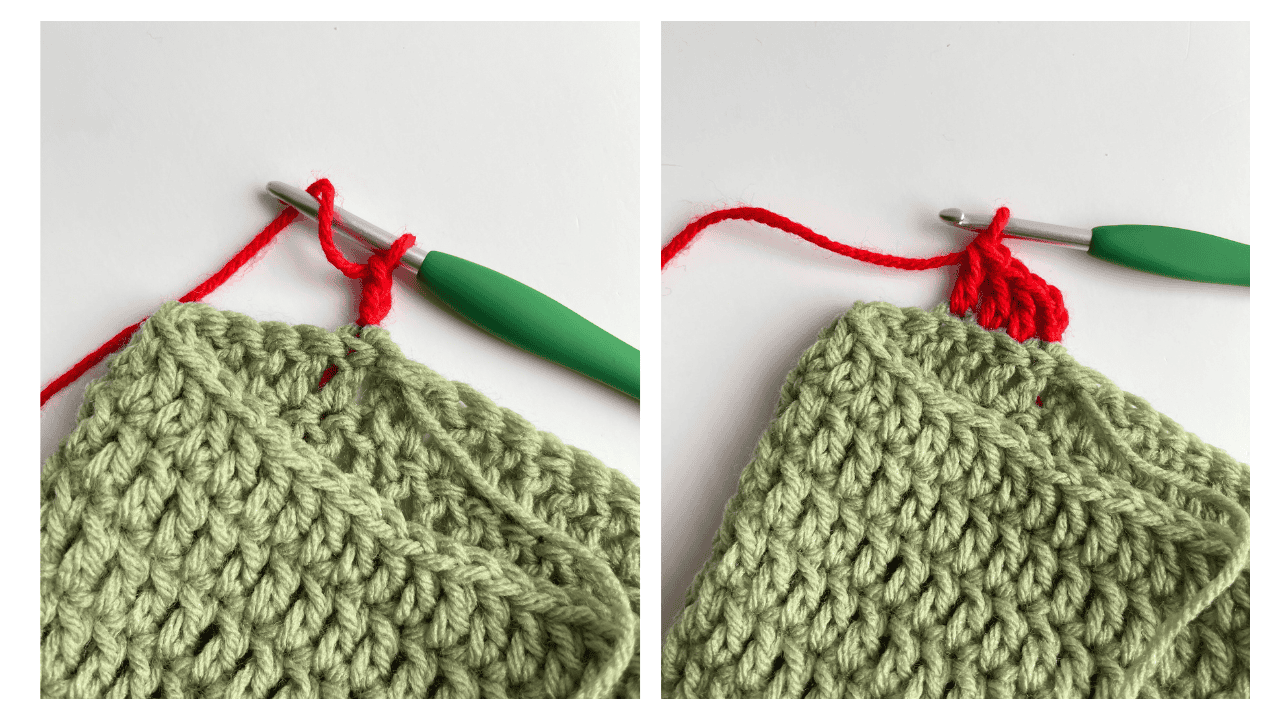
Cuff
Round 29: Turn. Working in BLO, sl st in next st (last st of round 28), ch 3, 1 dc in each st, sl st in top of ch-3. (40)
Round 30: Working in both loops, Ch 3, 1 dc in each st, sl st in top of ch-3.
Rounds 31 – 32: Repeat round 30.
Fasten off, weave in ends.
Hanging Loop
With CC, ch 13.
Row 1: 1 sc in second ch from hook and in each ch to end. (12)
Fasten off, leaving a long tail for sewing.
Form a loop and sew to top corner edge of stocking.
Weave in any remaining ends.
Copyright 2025 Tonya Bush/Nana’s Crafty Home, LLC.
Social Media links:
Facebook: https://www.facebook.com/nanascraftyhome
Instagram: https://www.instagram.com/nanascraftyhome/
Pinterest: https://www.pinterest.com/nanascraftyhome/
YouTube: https://www.youtube.com/c/TonyaBush
Twitter: https://twitter.com/nanascraftyhome
Facebook Group: https://www.facebook.com/groups/829792060522798
Sign up for my Newsletter: https://nanascraftyhome.com/sign-up-for-my-free-newsletter/
 Hi! Thank you so much for being here! I am Tonya the designer behind Nana's Crafty Home. As a wife, mother, Nana of 9 & with 2 fur babies, my days are filled with love, laughter, hugs and yarn! Here you will find colorful and creative crochet designs for yourself or loved ones. My hope is that you will be inspired to learn and create along with me!
0 Comments