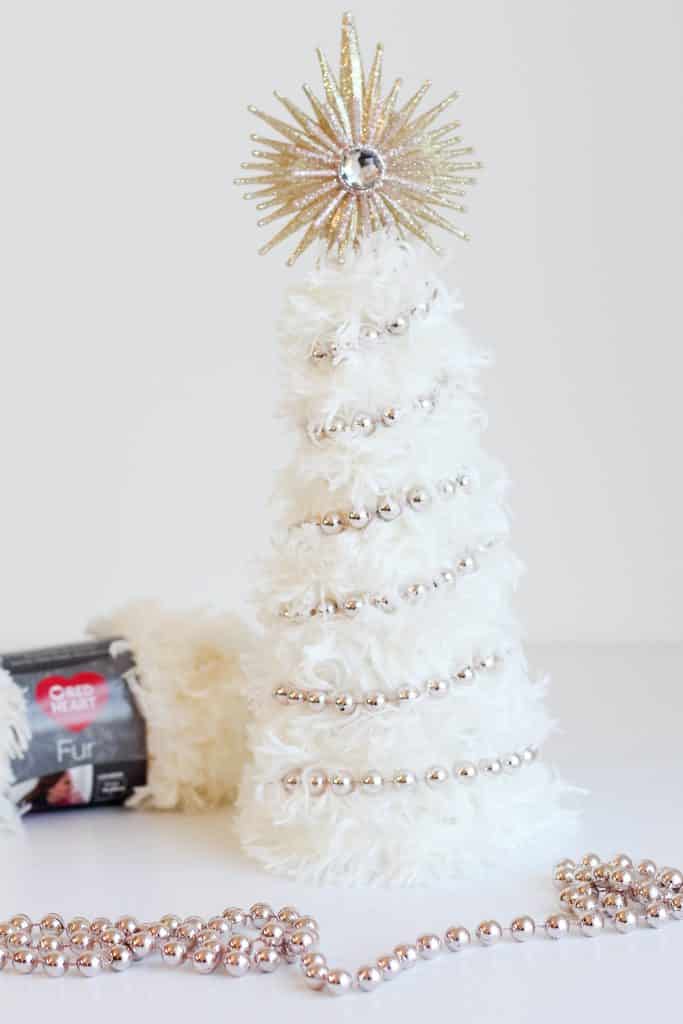
Learn how to make a shabby chic faux fur Christmas Tree yarn craft for your holiday home decor with this tutorial!
I have been seeing fancy tree displays all over the place this year and I knew this would be the perfect way to use up some of my fur yarn stash! And it will look amazing on display with my Nativity set, too!
For some reason I cannot resist buying fur yarn – maybe because it is so soft? But I seem to struggle finding projects for it. Designing patterns for it can be frustrating for me as I usually have to frog a project multiple times before I am happy with it. (Frogging is fun crochet terminology for rip-it, rip-it 😉) And frogging fur yarn is just plain awful. Sadly, I end up having a basket full of beautiful fur/fuzzy yarn that I just look at and pet once in awhile. 😂

I just knew this would end up being the perfect craft project to use up some gorgeous Red Heart Fur yarn I had stashed away. It is so fuzzy and soft. It almost has a feather like quality to it. I wanted a finished tree that had a shabby chic quality to it – and this yarn is absolutely perfect! However, use whatever fuzzy yarn you have on hand – so many amazing options and I can’t wait to see yours!
All you need for this project is a foam cone form that you can find at any craft store or even in the craft or floral section of a big box store, glue, fancy bead garland, bobby pins and a coordinating ornament for the tree top. The ornament is completely optional as I think it looks fantastic without, too.
The amount of yarn you will need will depend on the size cone you use but the small one I made didn’t use much yarn at all. You could make a small forest with just one ball of yarn!

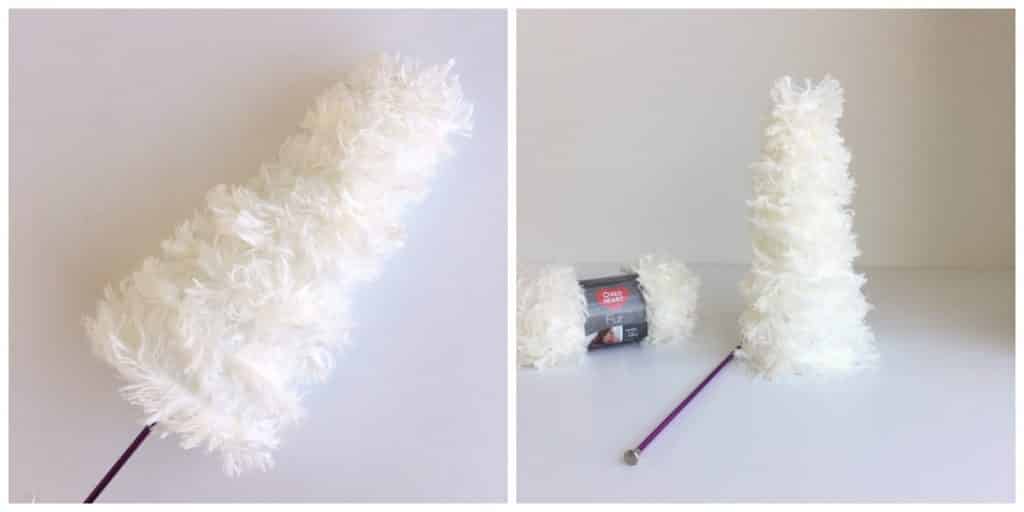
You will also notice that I have a long knitting needle which I used to shove into the bottom of the foam cone which helped me to hold the cone and spin it to apply the glue and the yarn. You don’t need to shove it in very far – an inch or two is plenty. Just enough to securely hold the tree.
You may also like the following Christmas decor ideas at Nana’s Crafty Home:


- Sunflower Ornament free crochet pattern
- Gnome Tissue Box Cover free crochet pattern
- Luxe Boho Christmas Stocking free crochet pattern

Shabby Chic Fur Yarn Christmas Tree Craft Tutorial
Supplies:
Christmas Bead Garland – I used blush pink but so many options available! amount needed will depend upon the size cone you use as well as how tightly you wrap your beads. I used approximately a 60″ length trimmed to length.
Red Heart Fur yarn in polar color way – substitute any fuzzy yarn you like or have on hand. I used approximately .5 oz / 1.6 yards
Glue (I used Gorilla Clear Grip but you could certainly use another glue of your choice – I think a hot glue gun would work just as well)
Coordinating ornament for a tree topper (optional)
Long knitting needle – used for holding the foam cone. A pencil or another long thin object could work just as well.
Bobby pins (used to hold bead garland in place on cone)
Fur Yarn Craft Christmas Tree Tutorial
- Insert knitting needle into the bottom of the foam cone. Only need to insert it approximately 1 – 2 inches, just enough to hold the foam securely.
- Starting adding glue along bottom edge of cone. Only add glue to section you will be adding yarn to as you work up the cone. You don’t want the glue to dry before you add the yarn.
- Begin wrapping yarn around cone. Continue adding glue to cone moving up the cone. Pull the fur at the top of each row down slightly as you add the glue so you can get the yarn close together which allows the tree to be as fuzzy as possible.

4. Once cone is completely covered with yarn, fasten off with scissors at top of cone.
5. Allow to dry before adding beads.
6. Insert bead strand string into 1 bobby pin.
7. Insert bobby pin at base of tree, push bobby pin all the way in to the foam cone to hold bead strand in place.

8. Begin wrapping bead garland around cone. Try to keep an equal distance between wraps.
9. Once you are at the top of the cone, trim garland to size.

10. Insert string of bead garland into a second bobby pin.
11. Insert bobby pin into cone at top of tree. Note: Be careful to insert bobby pin down into cone not sideways – you don’t want the bobby pin coming out the other side of the tree!

Add an optional ornament to the top of the tree. I was able to shove a spoke of the ornament into the top of the foam cone. If you have a flat ornament, you could glue to the top of the tree as well.

 Hi! Thank you so much for being here! I am Tonya the designer behind Nana's Crafty Home. As a wife, mother, Nana of 9 & with 2 fur babies, my days are filled with love, laughter, hugs and yarn! Here you will find colorful and creative crochet designs for yourself or loved ones. My hope is that you will be inspired to learn and create along with me!