The Star Granny Square Blanket is a patriotic patchwork style granny square blanket that is a free crochet pattern by Nana’s Crafty Home!
I have recently immersed myself in all things granny square over the last several weeks and I was inspired by a star quilt block to use crochet granny squares to make my very own crochet version!
Granny squares are really quite versatile and incorporating color-work into a traditional granny square can open up a whole new world of geometric design options!
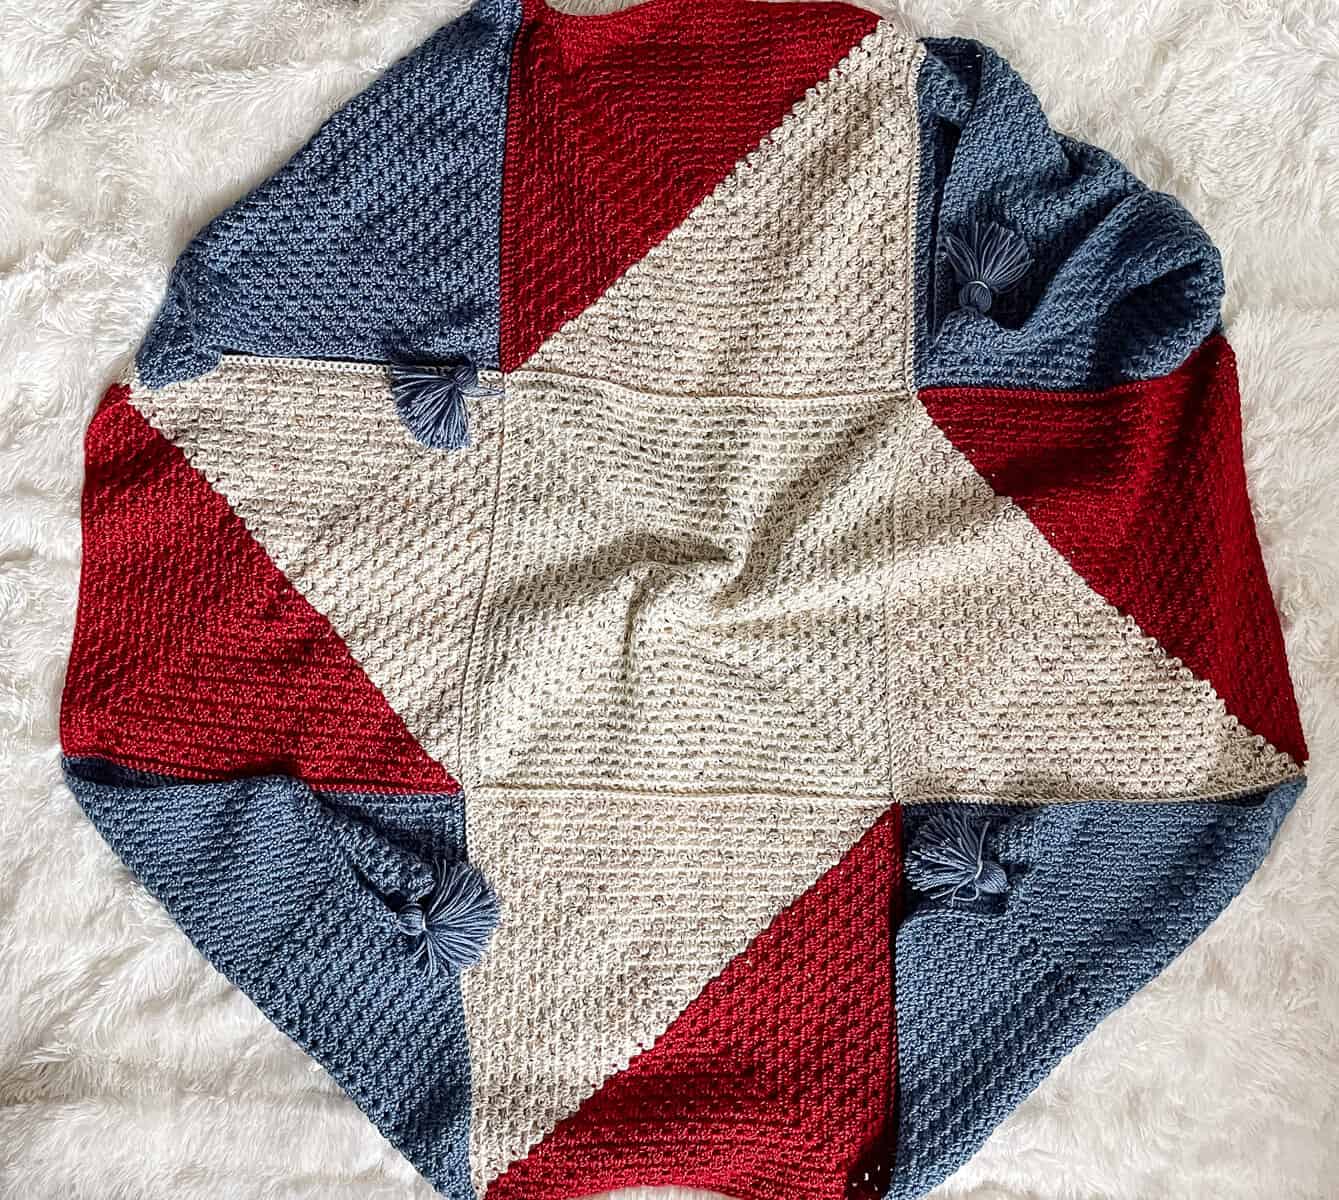
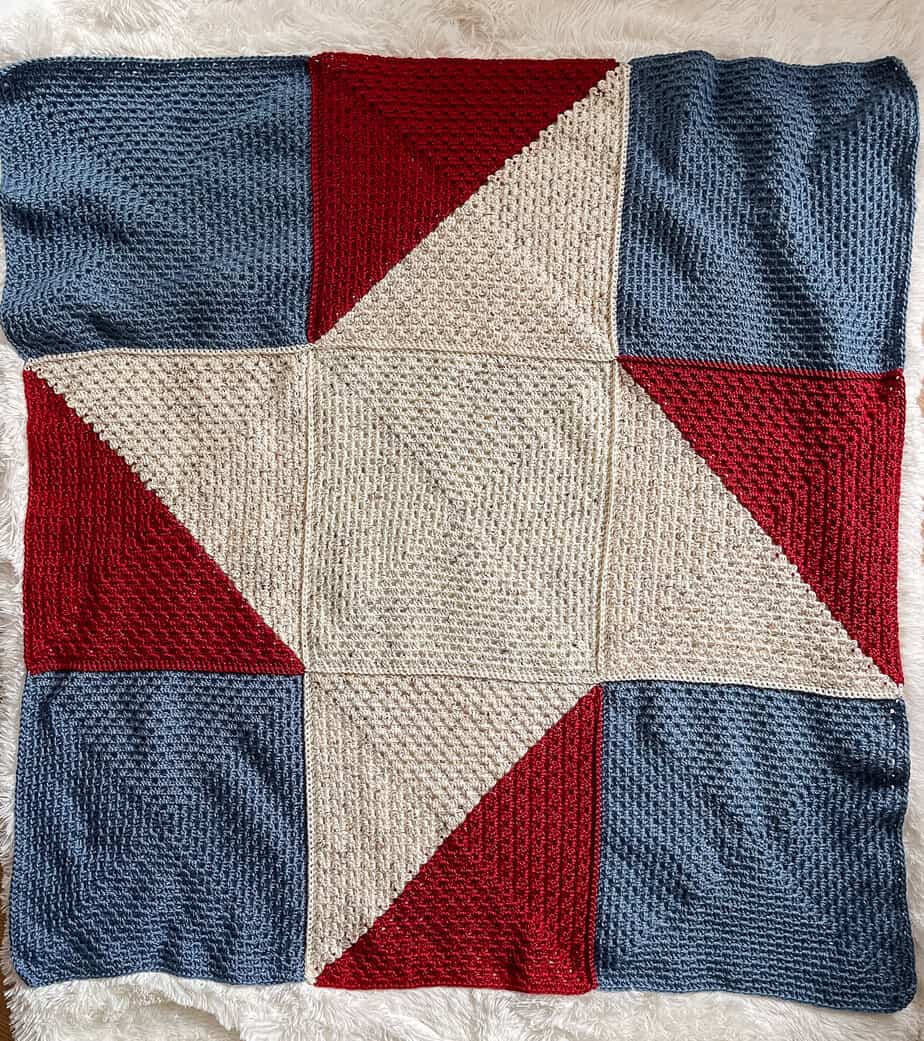
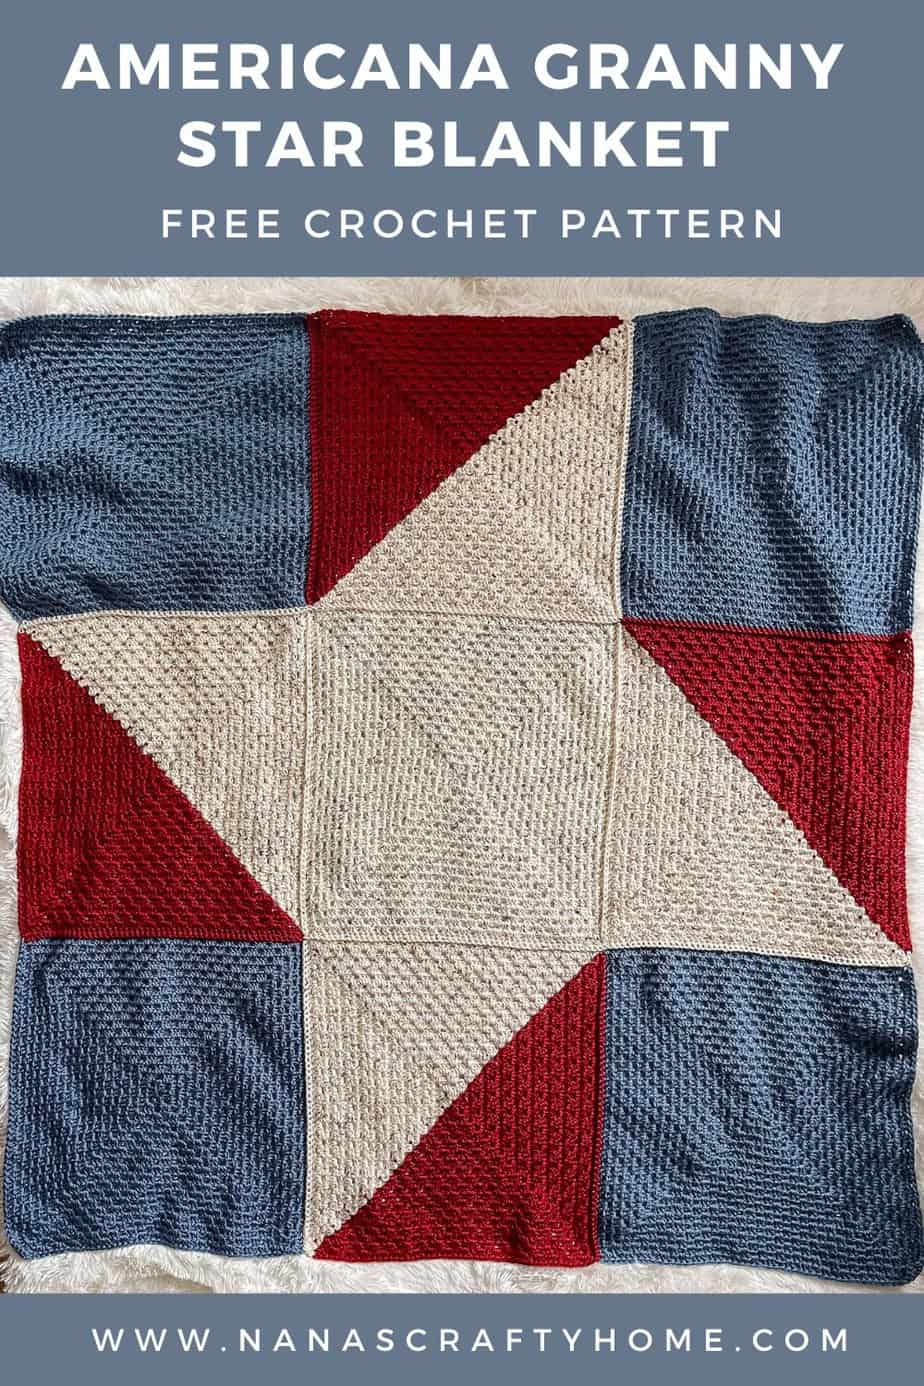
This quilt-like throw uses all granny squares to make a unique star design. By choosing patriotic yarn colors for my version I turned this throw into a vintage Americana themed star blanket.
So many different color options available – choose your favorite three colors to match your own home decor!

Star Granny Square Blanket Pattern Details
The Star Granny Square Throw uses a total of 9 large approximately 16.5″ granny squares for the design. There are 5 solid color basic granny squares + 4 Two-color or Half & Granny Squares used to create the star design.
Two-Color Granny squares are a simple variation of the classic granny square pattern. In order to keep ends at a minimum they are worked in turned rounds. You simply drop your color and pick up the second color as you work around!
I have a complete photo and video tutorial available for both the Basic Granny Square as well as the Two Color Granny Square.
Once the squares are all completed, they are arranged to create a geometric star design in your finished throw. I wanted a simple and easy join method that would also add a bit of dimension and texture to my finished blanket so I decided to go with the beginner-friendly single crochet join. Another easy option would be a slip stitch join or the mattress seam stitch for a truly invisible join. Choose a join that works for you!
I really love the contrast with three colors in my blanket but as another option you could choose to use two colors for your blanket.
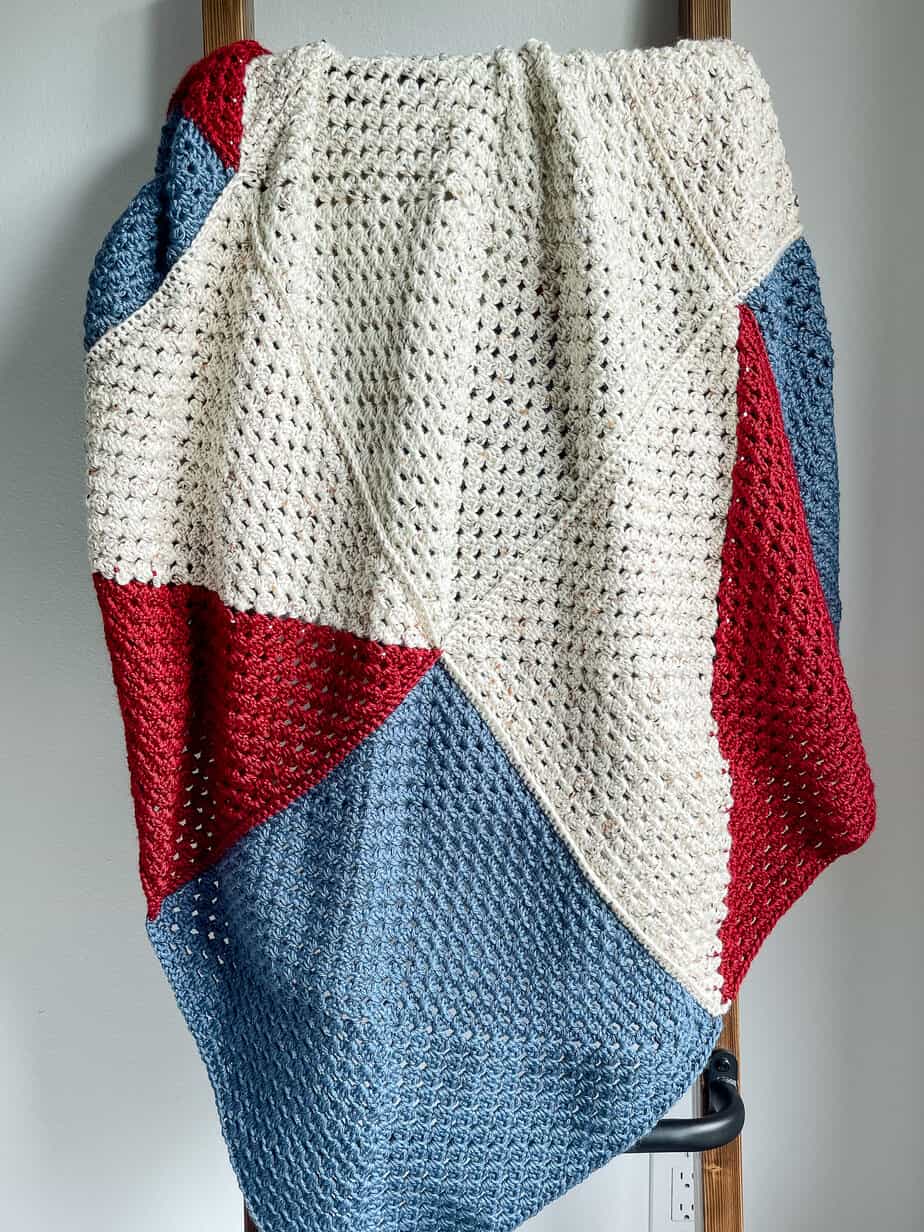
The approximate finished size for my star granny square blanket is 50″ x 50″ making it a good size throw blanket for the back of a couch, chair or at the end of the bed. However, you can easily adjust the size of your finished throw by adding or subtracting rounds to your individual granny squares! Simply make the same adjustment to each of the squares so they all are the same size before joining.
Since you are joining 3 squares in each direction to make a square you can determine how large your finished blanket will be by measuring 1 square then multiplying by 3. So if one square = 15″, multiply by 3 to get a final measurement of 45″. So your blanket will be approximately 45″ x 45″ after joining the squares. Easy, peasy!
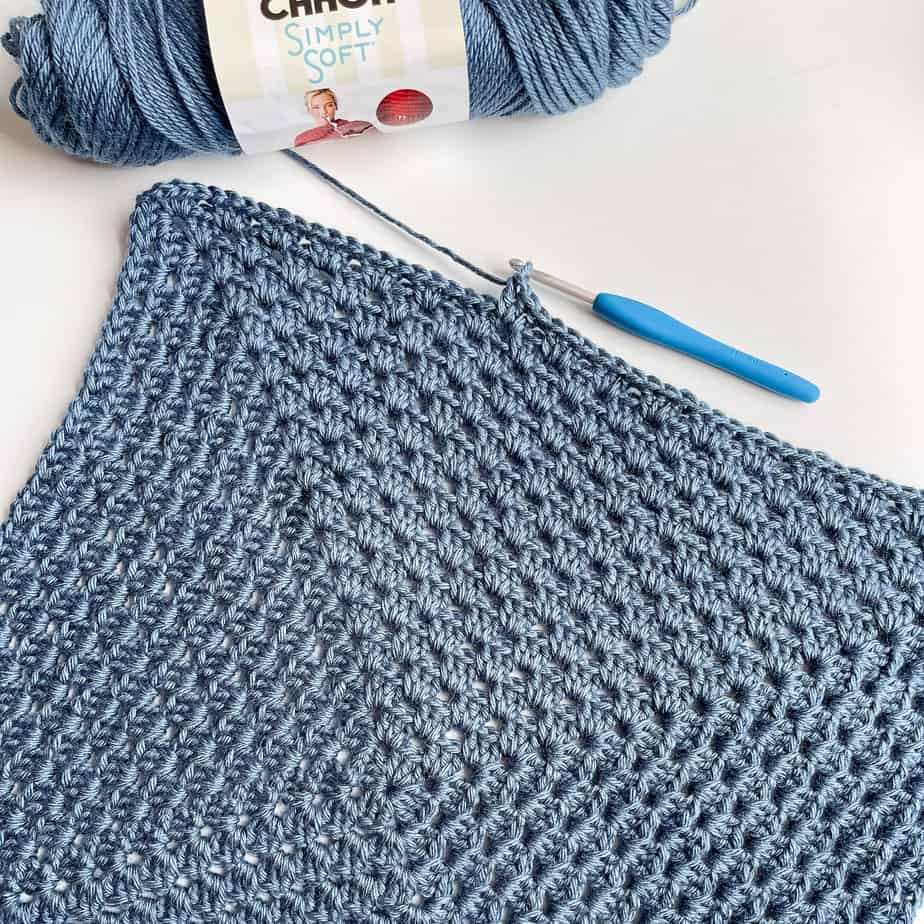
I am using Caron Simply Soft yarn* in solid colors and Caron Simply Soft Tweeds in combination for my crochet Granny Star Blanket which are both medium #4 worsted weight acrylic yarn. Caron Simply Soft is a delight – so soft and with a light sheen. Instead of a solid white I chose an off-white tweed which added an extra bit of rustic to my star as well!
*This post contains affiliate links. You can click on any yarn or material highlighted to purchase. I will receive a small commission if you purchase but it won’t cost you any extra! As an Amazon Associate I earn from qualifying purchases.
This Star Granny Square Blanket is also available as an ad-free, printable PDF!

(Or, scroll down for the free version!)
And, if your purchase the ad-free PDF, the pattern includes two complete stitch diagrams as well. If you love PDFs, you might want to check out my Lifetime Membership. It’s an awesome deal! Never pay for one of my PDFs again!!
If you would like daily crochet inspiration be sure to follow me on Facebook, Instagram, Pinterest, YouTube, Twitter and Tumblr!
To get notified of my free crochet patterns and future giveaways, sign up for my newsletter. I never share or sell your information to third parties — it stays private!
You may also like the following free crochet patterns at Nana’s Crafty Home:
- 1. American Flag C2C Placemat & Napkin Ring Free crochet pattern set
- 2. Rustic Star Pillow free crochet pattern
- 3. Gingham Granny Stripes Blanket by Kristyn Crochets
Americana Star Blanket Free Crochet Pattern
Pattern written in US crochet terminology
Supplies:
Caron Simply Soft Weight 4 Medium (100% acrylic) 6 oz / 315 yards
- Tweeds Off White 17 oz / 820 yards (White)
- Autumn Red 10 oz / 525 yards (Red)
- Country Blue 21.5 oz / 1130 yards (Blue)
Size H (5.0 mm) crochet hook
Scissors
Tapestry Needle
Abbreviations:
- RS = right side
- ch(s) = chain(s)
- st(s) = stitch(es)
- sk = skip
- dc = double crochet
- hdc = half double crochet
- beg = beginning
- sp(s) = space(s)
Approximate finished size: 50” x 50″
Gauge: First 4 rounds = 4” x 4″
Special Stitches:
Beg cluster = ch 3, 2 dc stitches worked in same stitch or space.
Cluster = group of 3 dc stitches worked in same stitch or space.
Pattern Notes:
- Two color granny square is worked in turned rounds.
- Solid color granny square is worked in non-turned rounds.
- Stitch count increases by 4 clusters each round.
- When changing colors do not fasten off, drop non-working yarn and pull back into work as indicated in pattern.
- To resize blanket, adjust the number of rounds for your granny squares by an equal amount.
Recommended Tutorial:
Half and Half Granny Square Tutorial
Join Squares with Single Crochet Tutorial
Two Color Granny Square (make 4)
With white, ch 4.
Round 1: (RS) 2 dc in fourth ch from hook, ch 2, (cluster, ch 1) in same sp, switch to red with ch 1, (cluster, ch 2, cluster, ch 1) in same sp, hdc join in top of ch-3. Turn. (4 dc clusters + 4 ch-2 sps)
Round 2: Beg cluster in sp created by join, sk next cluster, (cluster, ch 2, cluster) in next ch-2 sp, (cluster, ch 1, switch to white with ch 1, cluster) in next ch-2 sp, (cluster, ch 2, cluster) in next sp, cluster in beg sp, ch 1, hdc join in top of ch-3. Turn. (8 dc clusters + 4 ch-2 sps)
Round 3: Beg cluster in sp created by join, *cluster in sp between clusters to next ch-2 sp, (cluster, ch 2, cluster) in next ch-2 sp, cluster in sp between next clusters,* (cluster, ch 1, switch to red with ch 1, cluster) in next ch-2 sp, repeat from * to * once, cluster in beg sp, ch 1, hdc join in top of ch-3. Turn. (12 dc clusters + 4 ch-2 sps)
Round 4: Beg cluster in same sp, *cluster in each sp between clusters to next ch-2 sp, (cluster, ch 2, cluster) in ch-2 sp, cluster in each sp between clusters to next ch-2 sp;* (cluster, ch 1, switch to alternate color with ch 1, cluster) in next ch-2 sp, repeat from * to * once, cluster in beg sp, ch 1, hdc join in top of ch-3. Turn. (16 dc clusters + 4 ch-2 sps)
Rounds 5 – 18: Continue repeating round 4 while alternating colors.
Solid Color Granny Square (make 4 in blue / 1 in white)
Ch 4.
Round 1: (RS) Beg cluster in fourth ch from hook, ch 2, *(cluster, ch 2) in same sp,* repeat from * to * twice, sl st in top of ch-3. (4 clusters + 4 ch-2 sps)
Round 2: Sl st in next 2 sts, sl st in ch-2 sp, (beg cluster, ch 2, cluster) in same sp, *sk next cluster, (cluster, ch 2, cluster) in next ch-2 sp,* repeat from * to * twice, sl st in top of ch-3 from beg cluster. (8 clusters + 4 ch-2 sps)
Round 3: Sl st in next 2 sts, sl st in ch-2 sp, (beg cluster, ch 2, cluster) in same sp, *3 dc cluster in sp between clusters to next ch-2 sp, (cluster, ch 2, cluster) in next ch-2 sp,* repeat from * to * twice, cluster in sp between next clusters, sl st in top of ch-3 from beg cluster. (12 dc clusters + 4 ch-2 sps)
Round 4: Sl st in next 2 sts, sl st in ch-2 sp, (beg cluster, ch 2, cluster) in same sp, *3 dc cluster in each sp between clusters to next ch-2 sp, (cluster, ch 2, cluster) in same sp,* repeat from * to * twice, 3 dc cluster in each sp between clusters to end, sl st in top of ch-3 from beg cluster. (16 dc clusters + 4 ch-2 sps)
Rounds 5- 18: Continue repeating round 4.
Fasten off. Weave in ends.
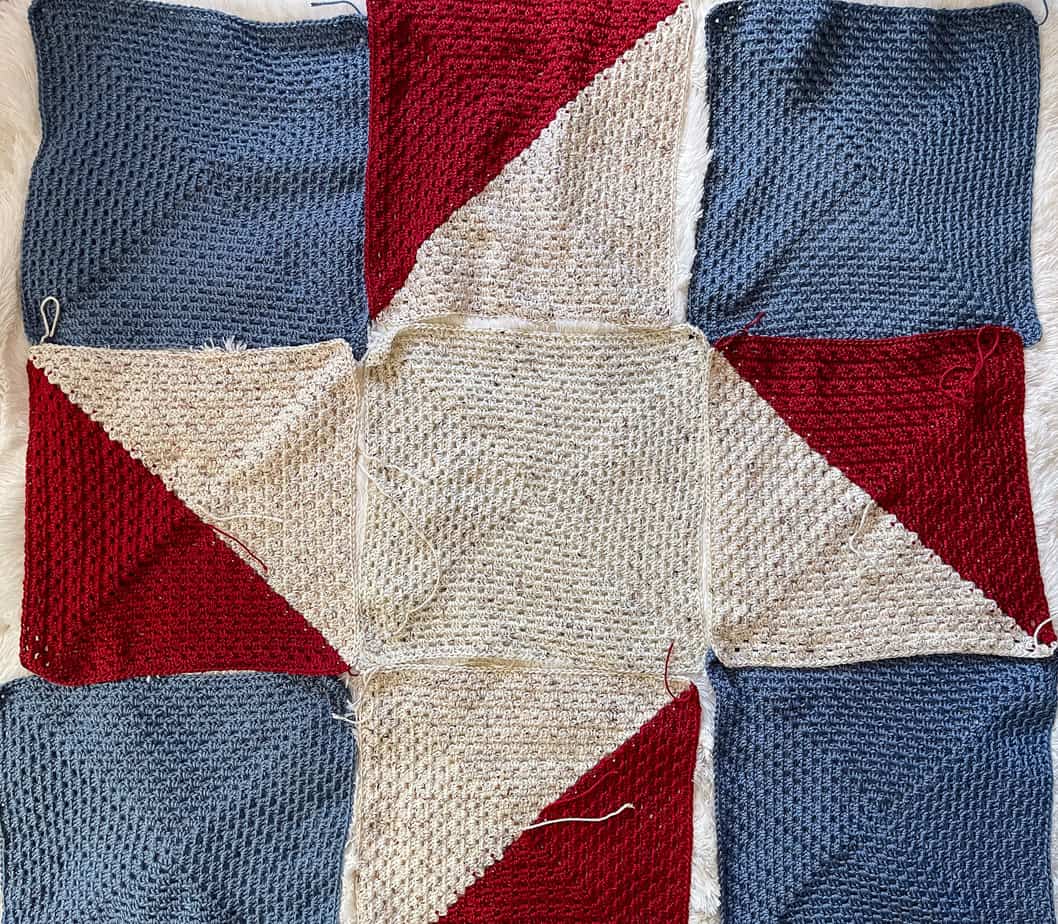
Assemble squares RS facing as shown:
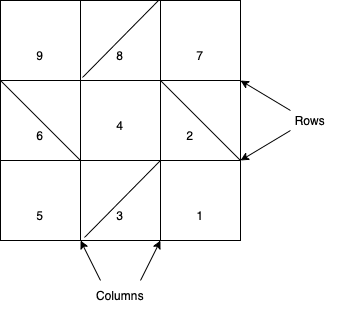
Joining Squares – Single Crochet Join
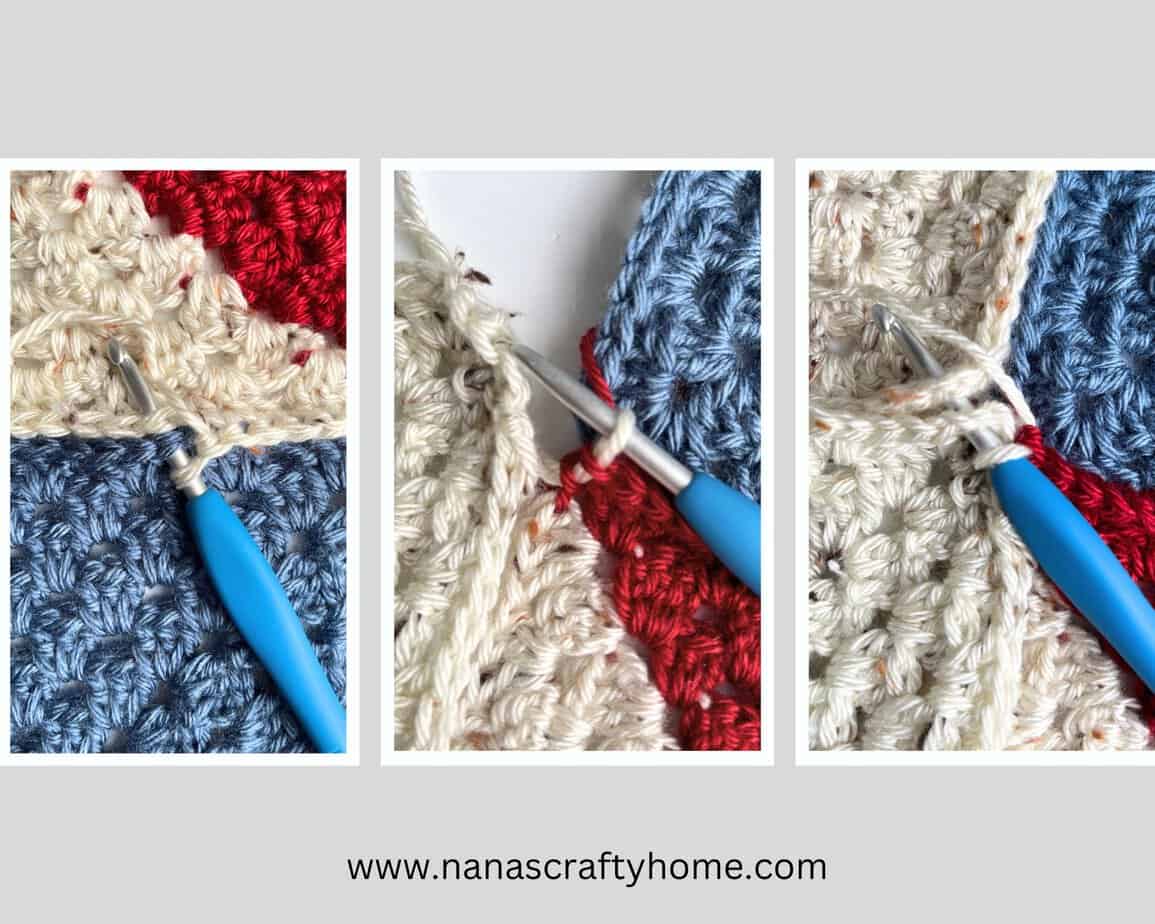
With white on your hook, join white into the ch-2 corner sp of top right corner of square 1, insert your hook into the ch-2 sp of square 1 and square 2 and complete a sc. Continue working a sc under both loops of both squares in top of stitches along sides of both squares 1 & 2 to opposite corner space.
At the corner space, sc in the ch-2 corner space through both squares.
With RS of Squares 3 & 4 facing up, sc in the ch-2 corner sp through both squares.
Continue working a sc in top of each stitch along sides of both Squares 3 and 4 to corner space. Switch to red with sc in corner of squares 5 & 6. Repeat steps to join squares 5 & 6.
At the last corner spaces of squares 5 & 6, sc in the last ch-2 space through both squares. Fasten off.
Now join Squares 2 & 7 with color red, Squares 4 & 8 and then Squares 6 & 9 with color white in same manner.
Once all rows are joined you will now join the columns.
Begin working sc join with white for Squares 7 & 8 to first corner. At the corner, sc in the ch-2 sp of both Squares 7 & 8. Working over the previous join, sc in the ch-2 sp of both Squares 2 & 4. Begin sc join through both sides of each square to next corner. With color red, repeat corner instructions for squares 2, 4, 1 and 3. Continue to end. Fasten off.
With color red, repeat same steps for next column of squares beginning with squares 8 & 9, switch to color white and work through squares 4 & 6 and then squares 3 & 5.
Fasten off. Weave in ends.
Add 2 3/4” tassels to each corner, if desired.
Copyright 2024 Tonya Bush / Nana’s Crafty Home, LLC.
Social Media links:
Facebook: https://www.facebook.com/nanascraftyhome
Instagram: https://www.instagram.com/nanascraftyhome/
Pinterest: https://www.pinterest.com/nanascraftyhome/
YouTube: https://www.youtube.com/c/TonyaBush
Twitter: https://twitter.com/nanascraftyhome
Facebook Group: https://www.facebook.com/groups/829792060522798
Sign up for my Newsletter: https://nanascraftyhome.com/sign-up-for-my-free-newsletter/
 Hi! Thank you so much for being here! I am Tonya the designer behind Nana's Crafty Home. As a wife, mother, Nana of 9 & with 2 fur babies, my days are filled with love, laughter, hugs and yarn! Here you will find colorful and creative crochet designs for yourself or loved ones. My hope is that you will be inspired to learn and create along with me!