

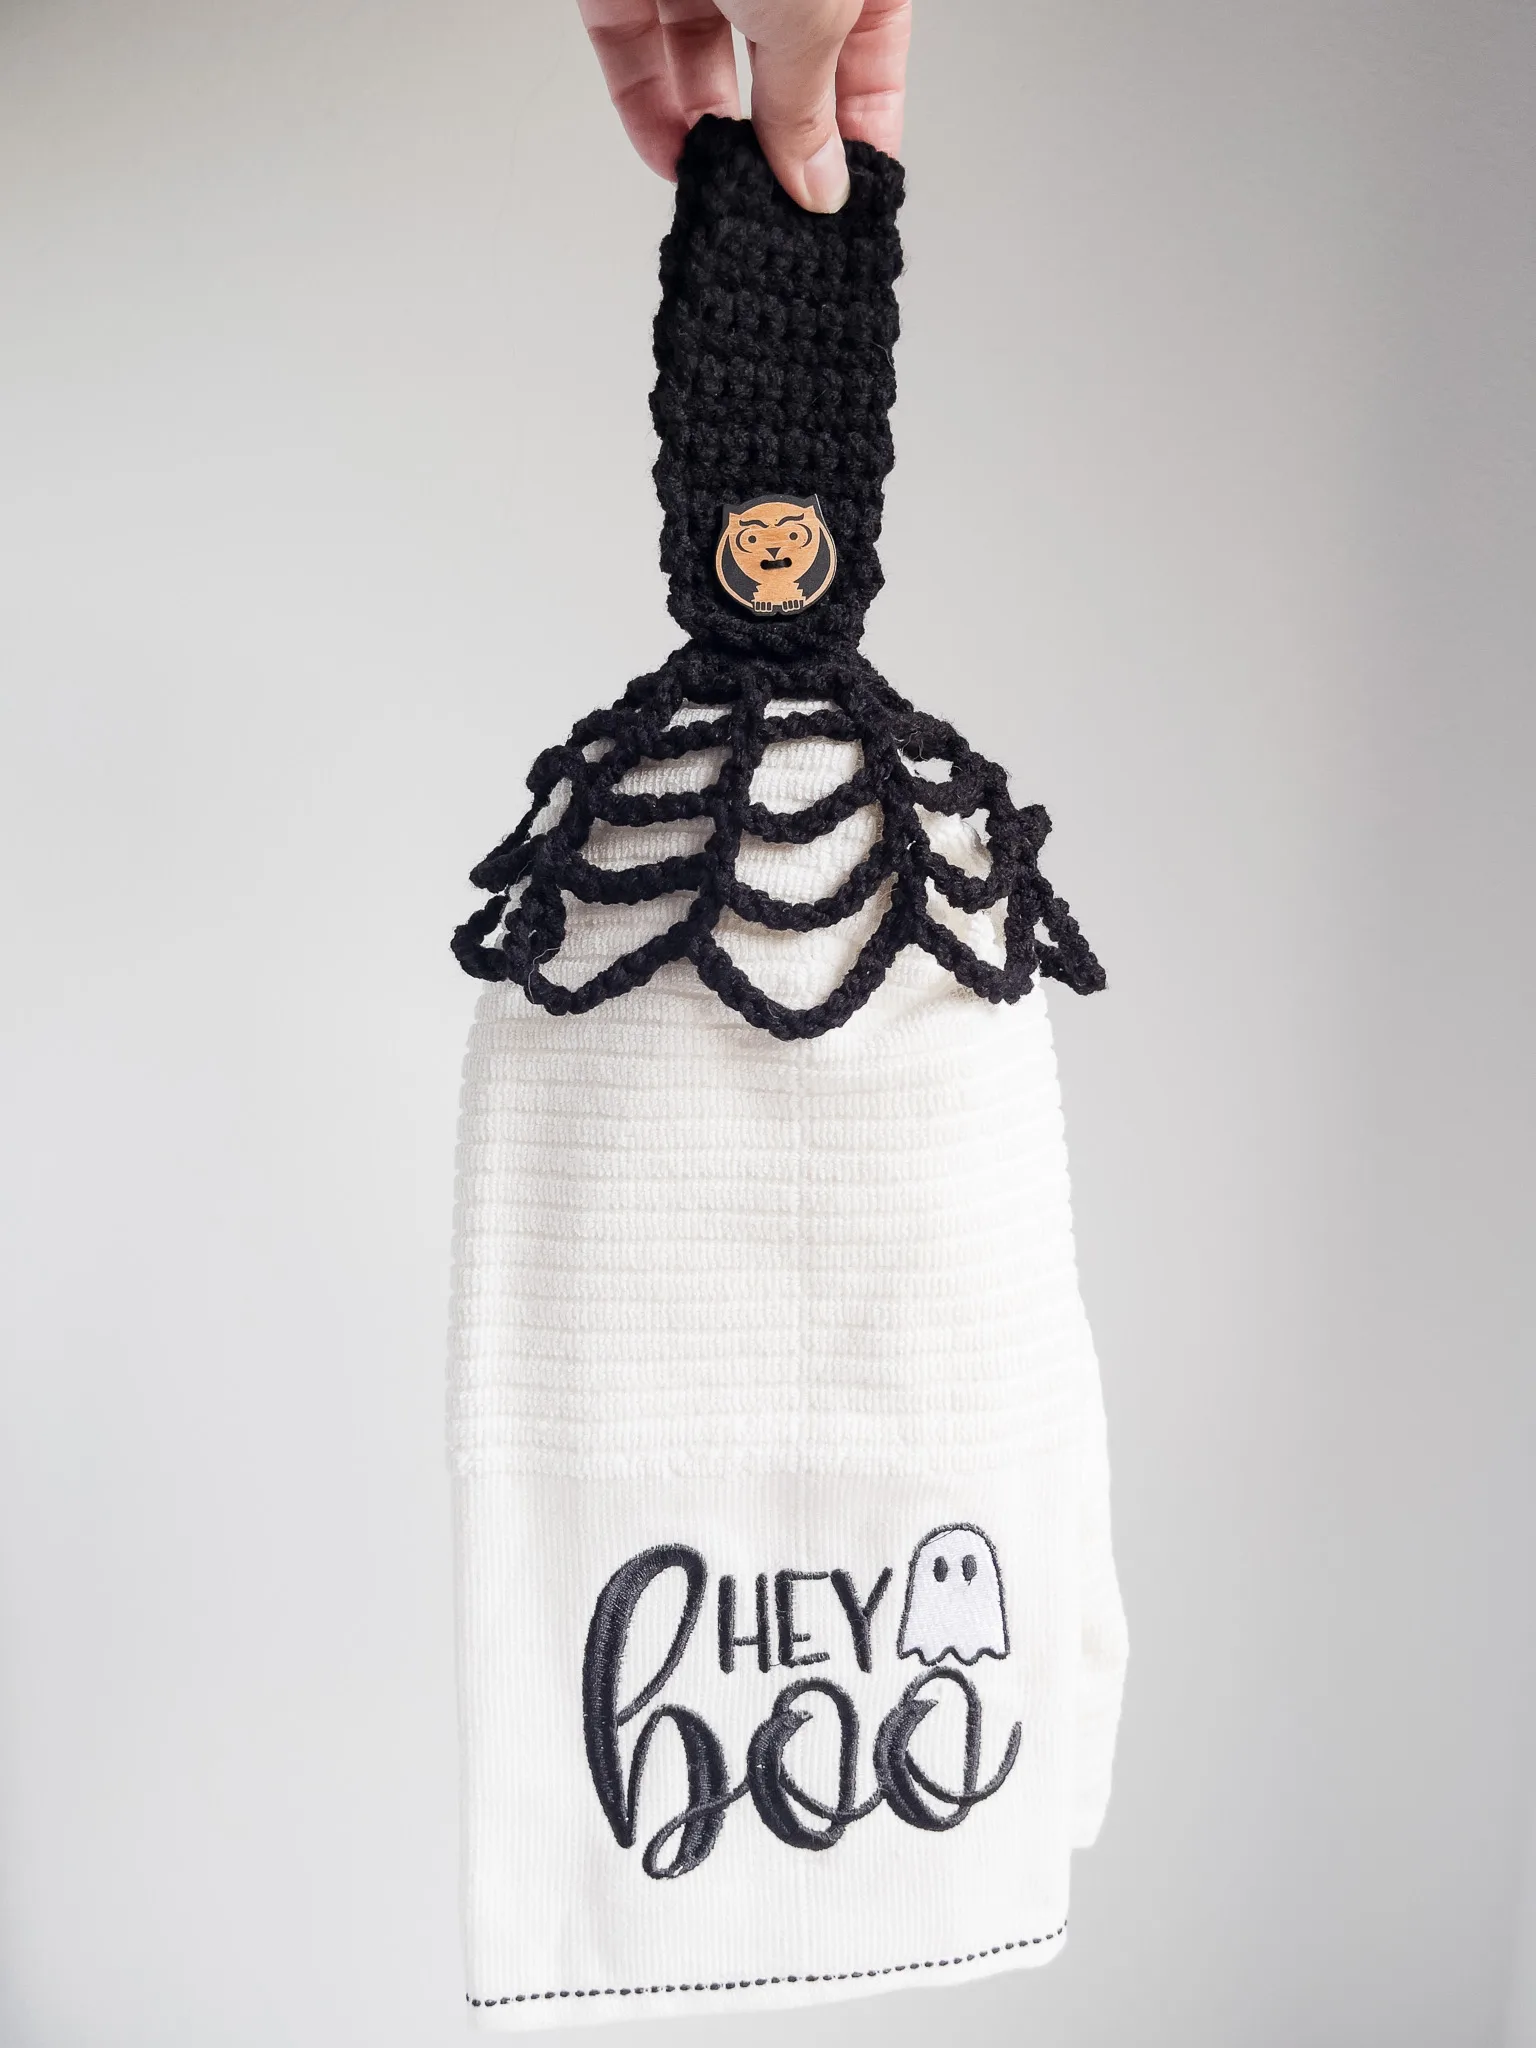
If you’re looking for a quick and easy Halloween project, this spiderweb crochet towel holder is about to become your new favorite make. It’s spooky, it’s whimsical, and it works up so fast you’ll want to make one for every towel in the house!
I love dressing up my kitchen for the seasons, but I don’t always have time for a big project in October. That’s exactly how this little topper came to be. I wanted something with a fun Halloween feel that I could stitch up in one sitting, and a spiderweb seemed like the perfect fit.
I adapted my popular Spiderweb Crochet Pattern into a web "skirt". The web “skirt” is worked in the round using simple double crochet stitches and chain spaces that grow a little longer each round. That’s what gives it that open, lacy web look. The hanging tab is plain single crochet worked right over a 2” plastic ring, so there’s no fussy assembly. I used Loops & Threads Soft Classic in black, a worsted weight acrylic that’s soft, affordable, and holds its shape beautifully.

Why You’ll Love This Spiderweb Crochet Pattern
So EASY!: This pattern is rated Easy, and it only uses basic stitches: chains, slip stitches, single crochet, and double crochet.
So QUICK!: With just five rounds for the web and a short hanging tab, you can finish one in 30 minutes (or less!). That makes it perfect for last-minute Halloween decorating or a stack of handmade gifts.
Perfect for Scraps: You’ll need less than 40 yards of worsted weight yarn, so it’s a great way to use up leftover yarn from your stash - make in any colors, too!
It’s perfect for Halloween craft makes. Pair spiderweb crochet towel holder with a ghost towel, a pumpkin towel, or a plain white one, and your kitchen is instantly ready for the season. These would also sell well at fall craft fairs and bazaars.
Fun Decorative Buttons: A ¾” button holds the tab closed, and it’s the perfect spot to show some personality. I used a sweet little owl on one and a cute ghost on another. A novelty Halloween button really makes each one unique.
It’s practical: Towel holders keep your dish towel right where you need it on the oven door or cabinet handle, so it doesn’t end up on the floor. Pretty and useful? Yes, please! Great for the bathroom, too!
Tips for Crocheting Your Spiderweb Towel Holder
Here are a few little tips to help your project turn out just right.
Don’t forget the long tail. When you start the web skirt, leave about 10” of yarn hanging. You’ll use it later to sew the skirt to the ring, and it saves you from attaching a new strand.
Count your chains. Each round of the web adds two more chains to every space. A quick count at the end of each round keeps your web even, so all eight “strands” hang the same length.
Try a different color. Black looks wonderfully spooky on a white towel, but this pattern works in any color. Try orange for a pumpkin-patch feel, purple, or white for a ghostly web on a dark towel.
Wondering which towel to use? Any standard kitchen hand towel will work. I love a white towel with black embroidery because the web really pops against it.
Get the Spiderweb Crochet Towel Holder Ad-Free Printable PDF
| Want an ad-free, printer-friendly version of the Spider Web Towel Holder? The printable PDF is available in my shop! It’s perfectly formatted, easy to read while you’re working, and great for keeping in your pattern binder.👉 [LINK TO PDF ] If you love PDFs, you might want to check out my Lifetime Membership. It’s an awesome deal! Never pay for one of my PDFs again! |


Supplies for the Halloween Towel Holder pattern
*This post contains affiliate links. You can click on any yarn or material highlighted to purchase. I will receive a small commission if you purchase but it won’t cost you any extra! As an Amazon Associate I earn from qualifying purchases.

I am using Loops & Threads Soft Classic yarn for this quick and easy spider web Halloween towel holder. This yarn is a medium worsted weight acrylic blend. Very economical! You could certainly sub with your favorite yarn - great pattern for raiding your scrap basket!
I am also using a 2" craft ring for my towel topper instead of my usual 3" ring. For those of you that have made my previous towel toppers I have always used a 3" ring. My first spider web towel topper I tried the 3" and found that there was a large gap of space between the top of the folded towel and the bottom of the hanging tab which left open space since the web is lacy. So instead I tried the 2" ring and was a lot happier with the result. However, you could use the 3" if you have those on hand.
Check out these adorable Halloween buttons on Amazon - they are perfect for these towel holders! They were all so cute it was hard to pick!
Looking for more Halloween Crochet Patterns?
If you’re looking for more Halloween makes, be sure to check out these Halloween crochet patterns.

Nana’s Crafty Home Community
I've opened the Nana's Crafty Home Community, a free place where crocheters can gather, share their projects, ask questions and cheer each other on. Free to join!
You may also love the following free crochet patterns by Nana's Crafty Home:


- Black Cat & Spider Towel Holder free crochet pattern
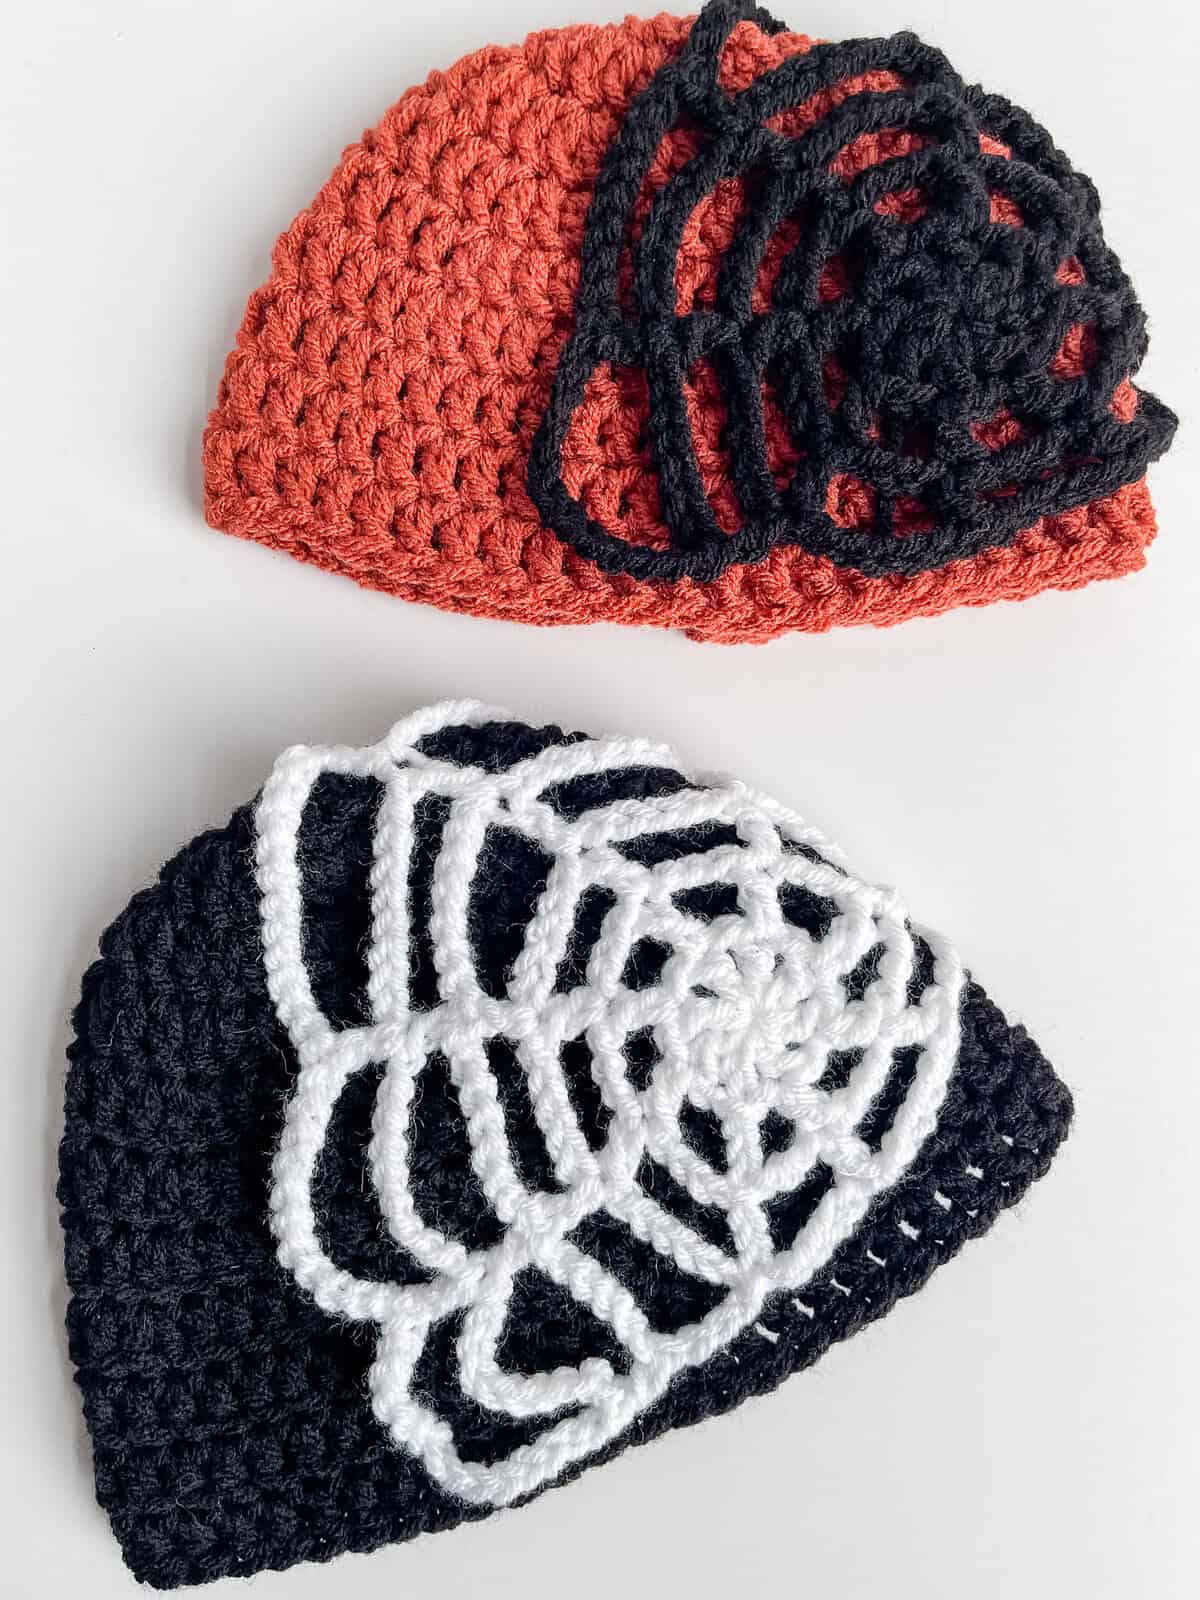
- Spider Web Beanie free crochet pattern
- Spider Web free crochet pattern

Spiderweb Crochet Towel Holder free crochet pattern
Pattern written in US crochet terminology
Supplies:
- Loops & Threads Soft Classic Weight 4 / Medium (100% acrylic)
- Black 0.7 oz / 36 yards
Size I (5.5 mm) crochet hook
(1) 2” Plastic Craft Ring
(1) 3/4” Button
Embroidery floss to sew on button
Scissors
Tapestry Needle
Kitchen Towel (for displaying)
Finished Size: 8” tall (measured from top of folded hanging tab to bottom of web) x 7” wide (measured across widest edge of web bottom)
Gauge is not critical for this project
Abbreviations:
- Rnd(s) = round(s)
- RS = right side
- WS = wrong side
- ch(s) = chain(s)
- sc = single crochet
- sl st = slip stitch
- st(s) = stitch(es)
- dc = double crochet
- sp(s) = space(s)
- sk = skip
- prev = previous
Pattern Notes:
- Hanging tab is crocheted onto the 2” ring working in turned rows.
- Web “skirt” is worked in the round. Once web is completed, it is sewn onto the top of the ring at the bottom of the hanging tab.
- Beginning chains count as first dc st + number of chains for space.
Pattern Instructions:
Web “Skirt”
Leaving a long length of yarn for sewing (approx 10” long), ch 16, sl st in first ch to form a ring.
Rnd 1: (RS) Ch 5 (counts as first dc + ch-2), *sk next ch, (1 dc, ch 2) in next ch,* repeat from * to * to last ch, sk last ch, sl st in third ch of beginning ch-5. (8 dc sts + 8 ch-2 sps)
Rnd 2: Ch 7, (1 dc, ch 4) in each dc st from prev rnd, sl st in third ch of ch-7. (8 dc sts + 8 ch-4 sps)
Rnd 3: Ch 9, (1 dc, ch 6) in each dc st, sl st in third ch of ch-9. (8 dc sts + 8 ch-6 sps)
Rnd 4: Ch 11, (1 dc, ch 8) in each dc st, sl st in third ch of ch-11. (8 dc sts + 8 ch-8 sps)
Rnd 5: Ch 13, (1 dc, ch 10) in each dc st, sl st in third ch of ch-13. (8 dc sts + 8 ch-10 sps)
Fasten off and weave in ends not left for sewing.
Hanging Tab
Row 1: (WS) Working over 2” ring, 7 sc over ring. Turn. (7) (See photo 1 & 2 at bottom of PDF)
Row 2: (RS) Ch 1, 1 sc in each st. Turn. (7)
Rows 3 - 28: Repeat row 2. (7)
Row 29: (Button hole row) Ch 1, 1 sc in first 2 sts, ch 3, sk next 3 sts, 1 sc in next 2 sts. Turn. (4 sc + 3 chs)
Row 30: Ch 1, 1 sc in first 2 sts, 3 sc in ch-3 sp, 1 sc in next 2 sts. Turn. (7)
Row 31: Ch 1, 1 sc in each st. (7)
Fasten off. Weave in ends.
Note: Hanging tab is approximately 8” long excluding 2” ring.

With RS of web skirt facing out, insert hanging tab into center of “skirt”, pull up tab through opening at top of web until ring comes to the top of the skirt. With long tail left for sewing, sew skirt to ring using the unused loop from foundation ch of skirt & row 1 loops of hanging tab. Sew the entire round 1 (both sides) of skirt to bottom of hanging tab. See Photo 3 below.
Weave in end.
Button
With embroidery thread, sew button to front bottom at row 4 of hanging tab.
Copyright 2026 Tonya Bush / Nana’s Crafty Home, LLC.
Social Media links:
Community: https://community.raptive.com/nanascraftyhome
Facebook: https://www.facebook.com/nanascraftyhome
Instagram: https://www.instagram.com/nanascraftyhome/
Pinterest: https://www.pinterest.com/nanascraftyhome/
YouTube: https://www.youtube.com/c/TonyaBush
Twitter: https://twitter.com/nanascraftyhome
Facebook Group: https://www.facebook.com/groups/829792060522798
Sign up for my Newsletter: https://nanascraftyhome.com/sign-up-for-my-free-newsletter/

 Hi! Thank you so much for being here! I am Tonya the designer behind Nana's Crafty Home. As a wife, mother, Nana of 9 & with 2 fur babies, my days are filled with love, laughter, hugs and yarn! Here you will find colorful and creative crochet designs for yourself or loved ones. My hope is that you will be inspired to learn and create along with me!