This Crochet Spider Web pattern is a free crochet pattern by Nana’s Crafty Home!

It is so interesting how designing one pattern can so easily lead to additional patterns. I recently designed the Black Cat Towel Topper which incorporates a small spider applique in the design. The spider applique was such a fun, cute and easy design I knew he needed another way to be showcased so I came up with this easy, beginner-friendly spider web!
We are BIG fans of the Lord of the Rings books and movies. If you aren’t familiar with the story in the Return of the King, there is a very dramatic scene in which Frodo is led into a giant spider’s lair by Gollum. It is very frightening and intense to watch Frodo become ensared by Shelob’s web as she is stalking him. Each time I watch the movie I can only halfway watch it – covering my eyes throughout most of the scene even though I know how it ends.
My grandkids are spider obsessed so I think I am going to make a giant web and crochet several different colored spider appliques that will be unattached to the web. They can then play with the web and spiders making it a fun activity! And, I am sure the appliques will end up hidden in the house for scares along the way. 😉.
What fun decorations several of these would be paired with my spider applique!

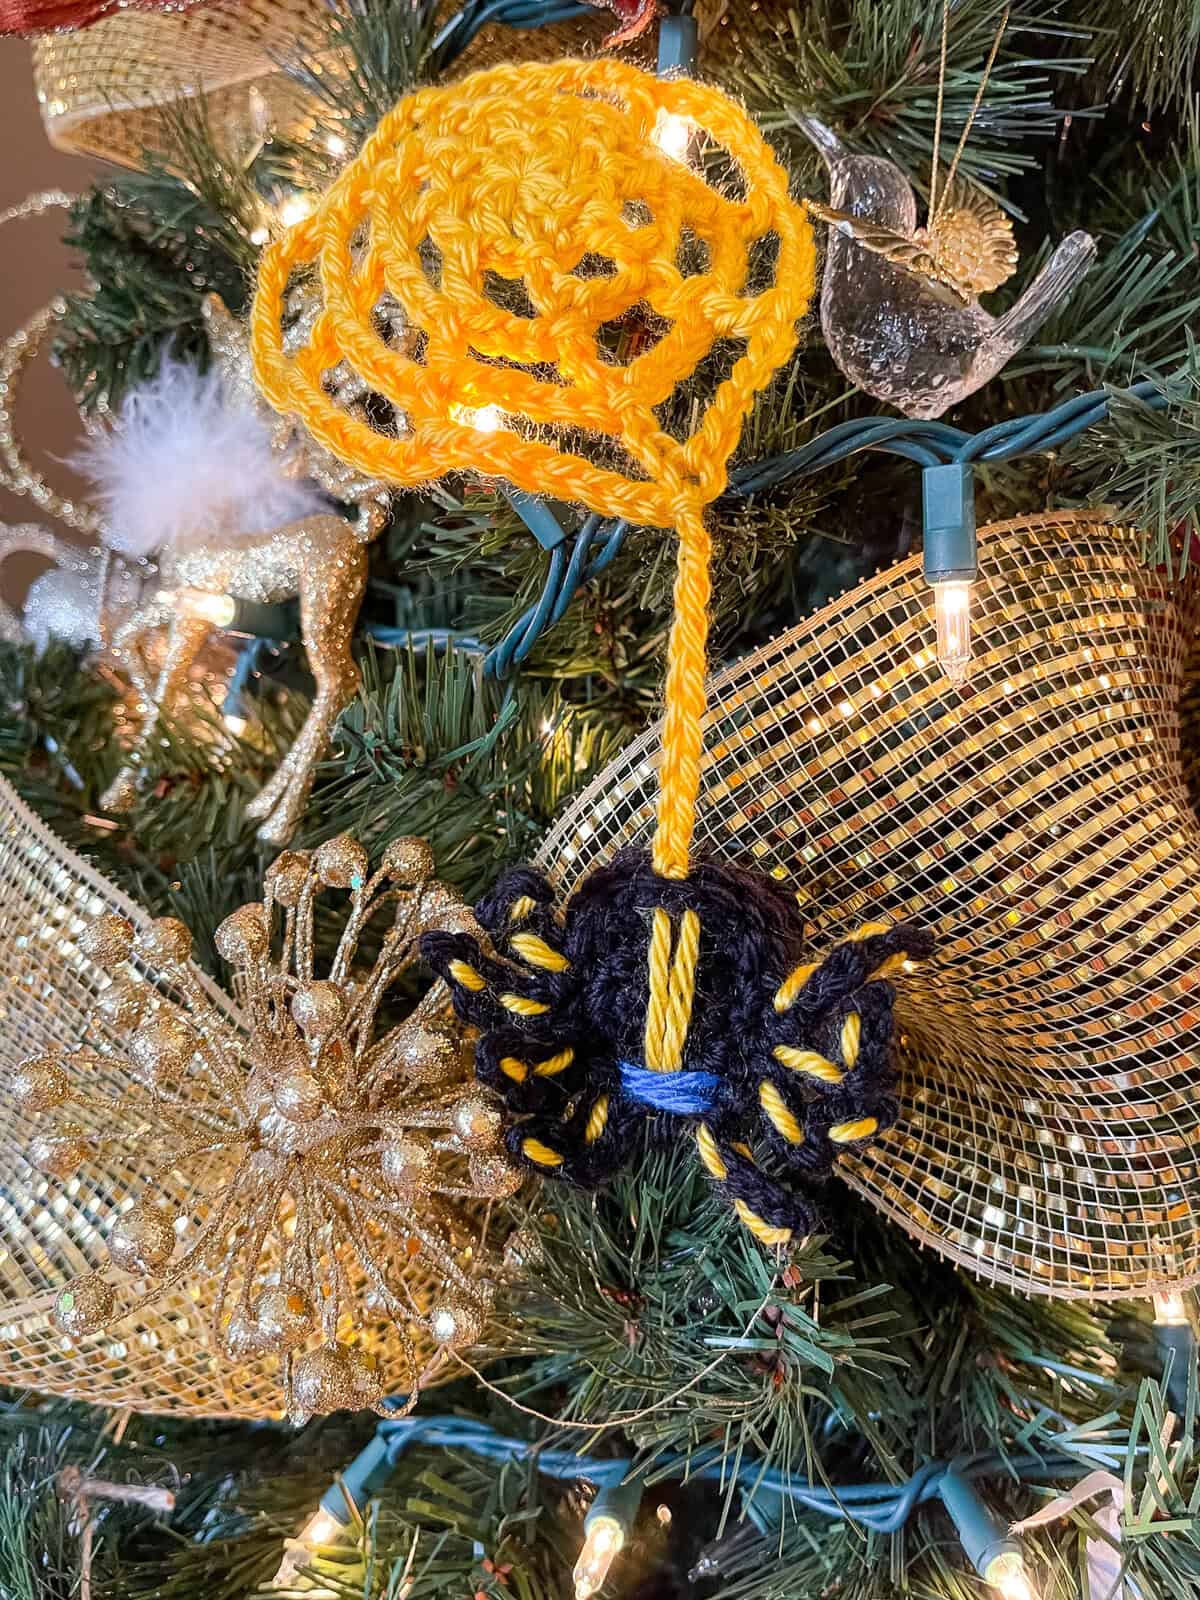
I’ve created several versions of my spider web designs over time, but my latest favorite is this sparkling Spider Ornament for our Christmas tree! One of my granddaughter’s absolute favorite Christmas books is The Spider Who Saved Christmas by Raymond Arroyo—a beautiful, faith-filled legend about Nephila, a brave cave-dwelling spider (a Golden Silk Orb-Weaver) who helps protect the Holy Family. Her shimmering golden web inspires the tinsel we hang today. As soon as I read it, I knew I had to make a golden spider web ornament, complete with a little spider appliqué modeled after Nephila herself. Now, hanging it on our tree each year has become one of our most cherished family traditions!

Crochet Spider Web Pattern details
This free crochet spider web pattern is really very easy. You are working chains and double crochet stitches throughout which makes this spider web beginner-friendly!
So easy to customize the size of this spider web as well. You will continue working rounds in the stitch pattern to the size desired.
I am using Red Heart With Love yarn for my spider web which is a medium #4 worsted weight acrylic yarn. However, you can use any yarn you have on hand – a great way to use up your scraps!
I have a complete video tutorial for my crochet spider web pattern as well. You can find it here at the bottom of this post or you can head on over to YouTube to watch. (Subscribe to my YouTube Channel to get notified whenever I post a new video).

I do recommend that you wet block your spider web. Wet blocking will really “open” your stitches and make for a more clearly defined shape for your spider web. Completely optional, of course! I have a complete guide to wet blocking your crochet projects – check out my complete photo and video tutorial.

Wet blocking process for the spider web
The spider web + spider applique pattern set is also available as an ad-free, printable PDF! You can purchase the individual pattern, or if you love PDFs, you might want to check out my Lifetime Membership. It’s an awesome deal! Never pay for one of my PDFs again!! (Or, scroll down for the free version!)

Purchase the ad-free pdf of the Spider & Spider Web crochet pattern set for a small fee. Thank you so much for supporting my work!

If you would like daily crochet inspiration be sure to follow me on Facebook, Instagram, Pinterest, YouTube, Twitter and Tumblr!
To get notified of my free crochet patterns and future giveaways, sign up for my newsletter. I never share or sell your information to third parties — it stays private!
You may also like the following free halloween themed patterns by Nana’s Crafty Home:


- 1. Black Cat & Spider Towel Topper free crochet pattern
- 2. Black cat & pumpkin treat cups free crochet pattern
- 3. Pumpkin treat bag free crochet pattern

Crochet Spider Web free pattern instructions
Pattern written in US crochet terminology
Supplies:
Red Heart With Love Weight 4 Medium (100% acrylic, 7 oz / 370 yards)
White 0.01 oz / 1 yard (White)
Size J (6.0 mm) crochet hook
Scissors
Tapestry Needle
Approximate finished size: 15” round after blocking
Abbreviations:
RS = right side
MC = magic circle
ch(s) = chain(s)
sl st = slip stitch
st(s) = stitch(es)
dc = double crochet
sp(s) = space(s)
Recommended Tutorials:
Pattern Instructions:
Make a MC.
Round 1: (RS) ch 4 (counts as first dc + ch-1), (1 dc, ch 1) 7 times in MC, sl st in third ch of ch-4. (8 dc sts + 8 ch-1 sps)
Round 2: ch 6, (1 dc, ch 3) in each dc st from previous round, sl st in third ch of ch-6. (8 dc sts + 8 ch-3 sps)
Round 3: ch 8, (1 dc, ch 5) in each dc st from previous round, sl st in third ch of ch-8.
Round 4: ch 10, (1 dc, ch 7) in each dc st from previous round, sl st in third ch of ch-10.
Round 5: ch 12, (1 dc, ch 9) in each dc st from previous round, sl st in third ch of ch-12.
Round 6: ch 14, (1 dc, ch 11) in each dc st from previous round, sl st in third ch of ch-14.
Round 7: ch 16, (1 dc, ch 13) in each dc st from previous round, sl st in third ch of ch-16.
Round 8: ch 18, (1 dc, ch 15) in each dc st from previous round, sl st in third ch of ch-18.
Round 9: ch 20, (1 dc, ch 17) in each dc st from previous round, sl st in third ch of ch-20.
Round 10: ch 22, (1 dc, ch 19) in each dc st from previous round, sl st in third ch of ch-22.
Continue working stitch pattern by increasing by 2 chains each round to size desired.
Fasten off. Weave in ends.
I do recommend blocking your web for best results.

Copyright 2022 Tonya Bush / Nana’s Crafty Home
Social Media links:
Facebook: https://www.facebook.com/nanascraftyhome
Instagram: https://www.instagram.com/nanascraftyhome/
Pinterest: https://www.pinterest.com/nanascraftyhome/
YouTube: https://www.youtube.com/c/TonyaBush
Twitter: https://twitter.com/nanascraftyhome
Facebook Group: https://www.facebook.com/groups/829792060522798
Sign up for my Newsletter: https://nanascraftyhome.com/sign-up-for-my-free-newsletter/
 Hi! Thank you so much for being here! I am Tonya the designer behind Nana's Crafty Home. As a wife, mother, Nana of 9 & with 2 fur babies, my days are filled with love, laughter, hugs and yarn! Here you will find colorful and creative crochet designs for yourself or loved ones. My hope is that you will be inspired to learn and create along with me!