

The Never Ending Star Blanket is a free crochet star blanket pattern that grows from the center out into one cozy, six-point star throw. I had so much fun turning this star into a blanket you can keep going until it's just the size you want!
What makes this crochet star blanket different is how it's built. It's a six-point star worked from the center out in joined, non-turning rounds, with a raised front post half double crochet ridge running up between each point. After the setup rounds, you simply repeat two rounds until the blanket is as big as you like - the Never Ending Star! My sample finishes about 46" point to point, a lovely baby blanket throw size.
This free crochet star blanket pattern is adapted from the Never Ending Star Plant Hanger, a beautiful design by Kristyn Crochets that I've been so happy to host here on the blog. I loved that never-ending star shape so much, I just had to turn it into a blanket! Scroll down for the complete star crochet blanket pattern, free here on the blog.
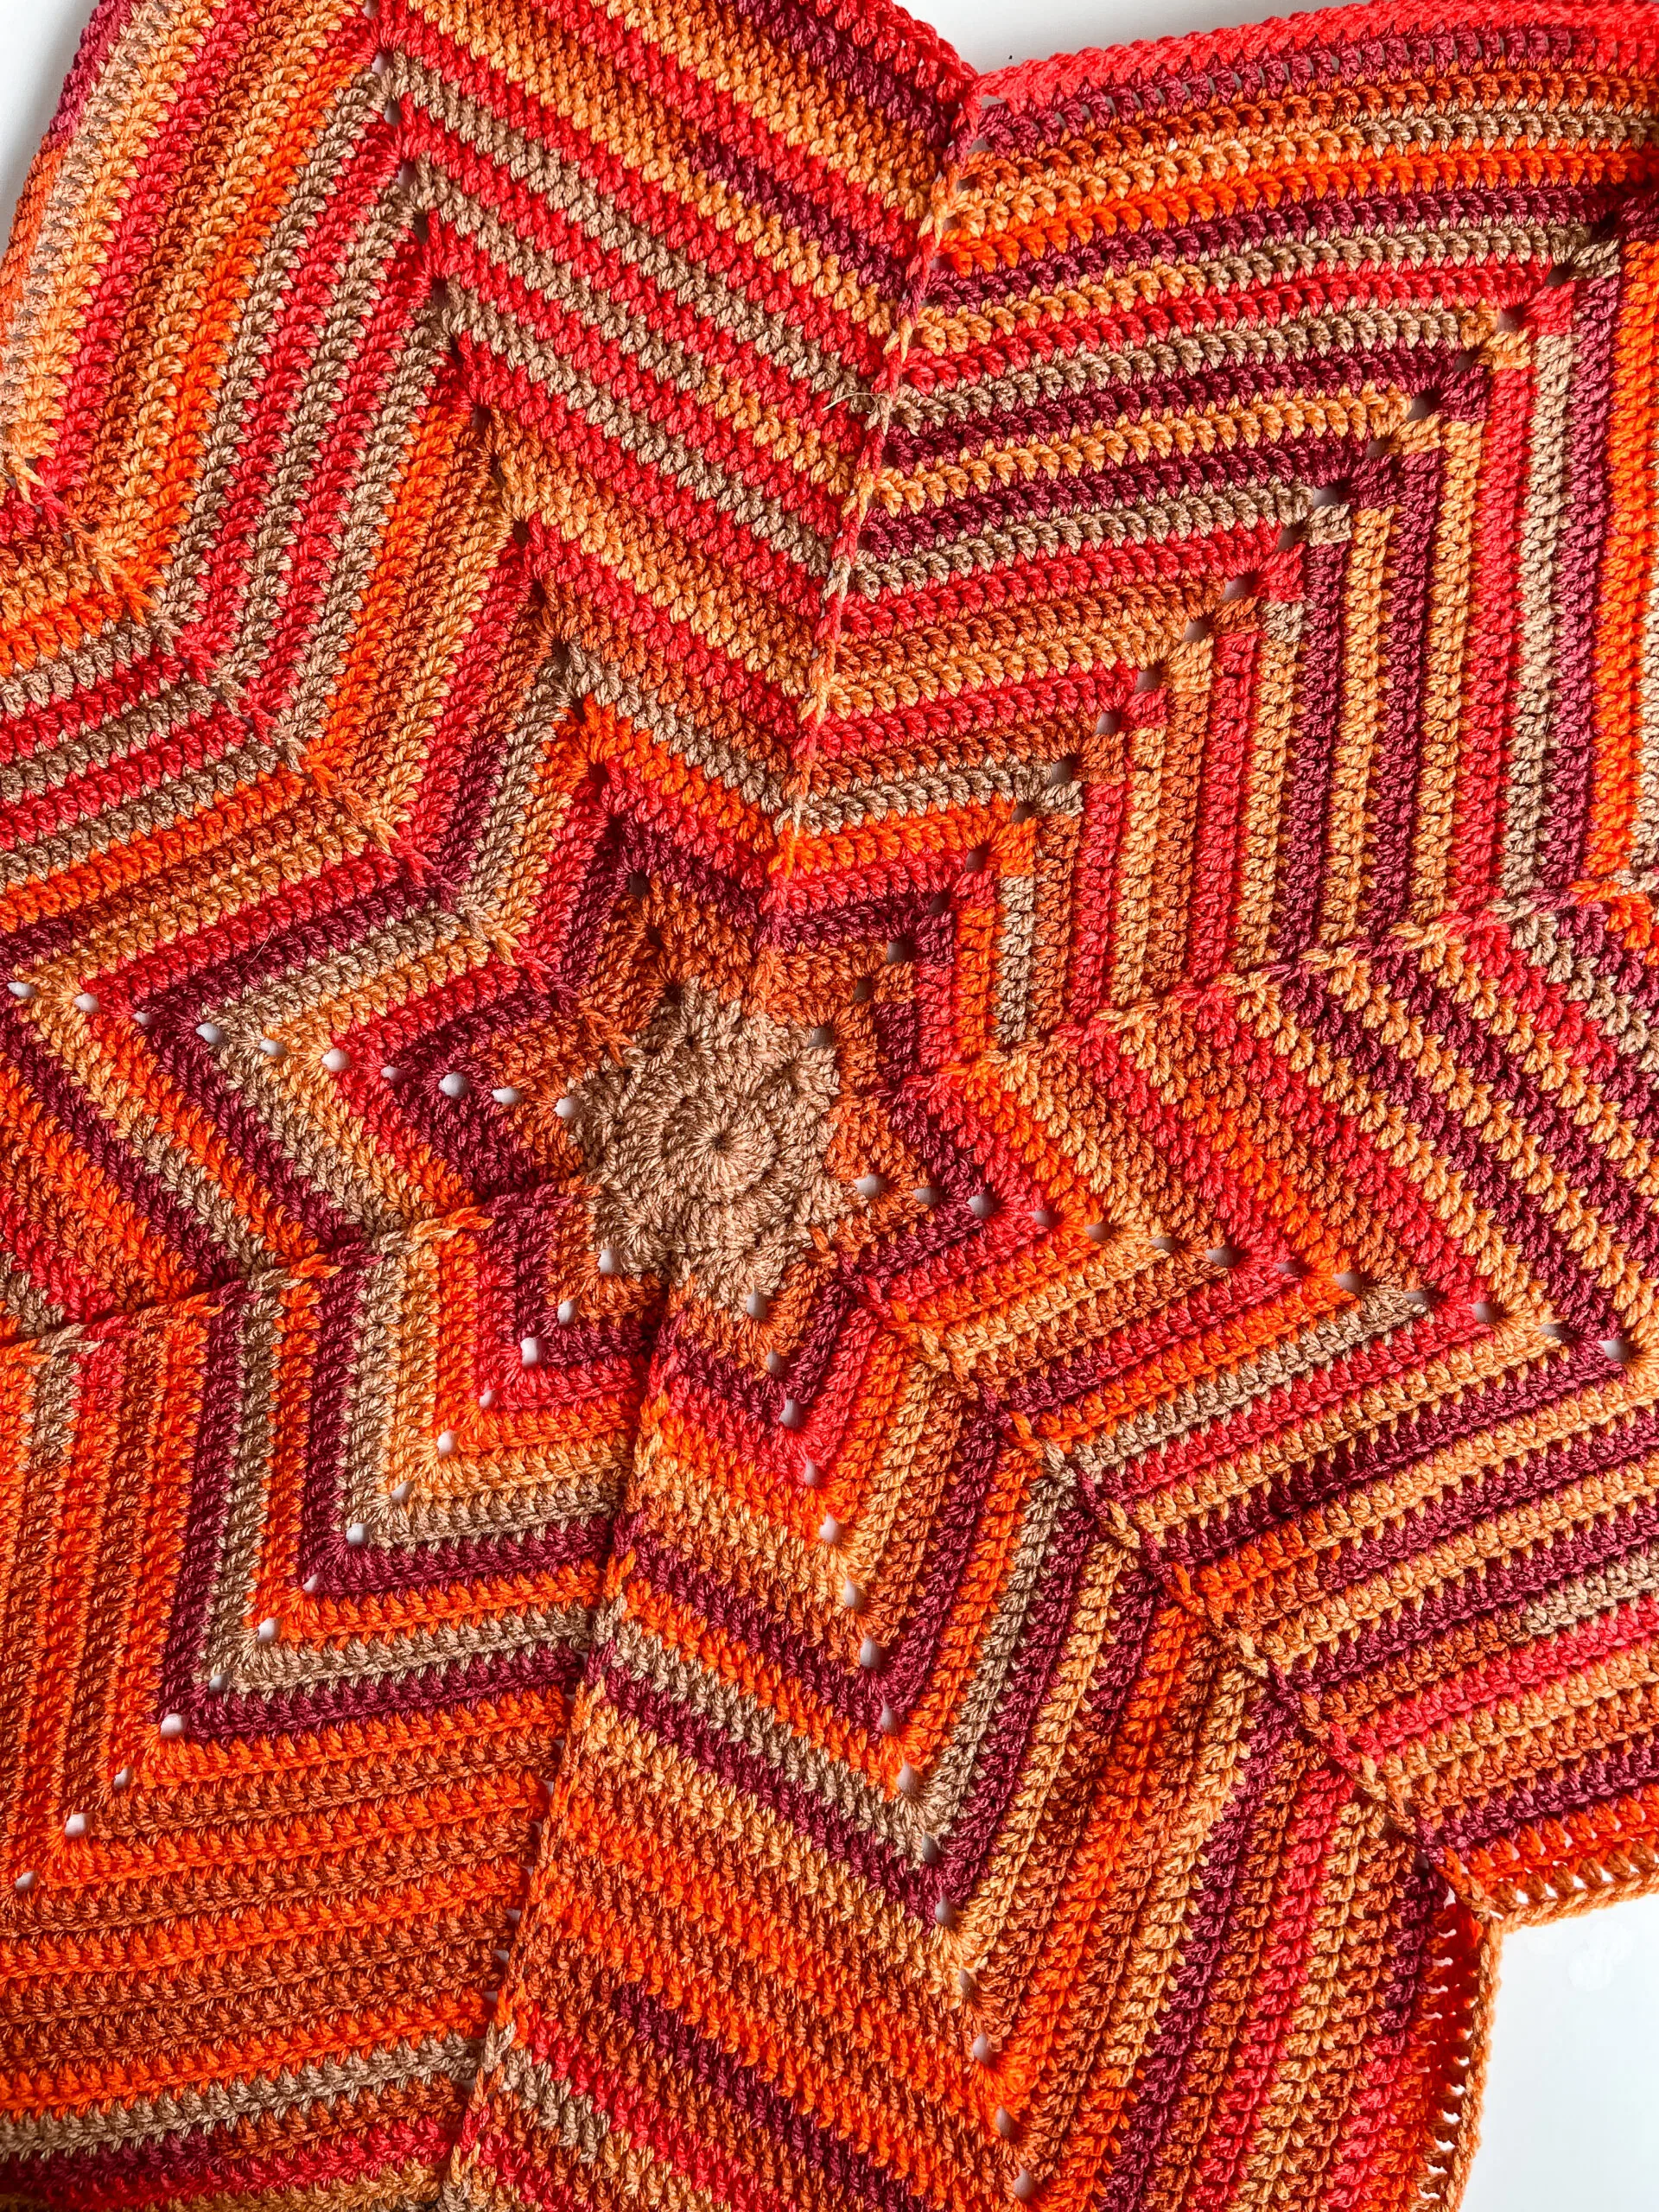
Pin this free crochet star blanket pattern to your boards so you can find it later!

Want the Never Ending Star Blanket Ad-Free Printable PDF?
Want an ad-free, printer-friendly version of the Never Ending Star Blanket?
The printable PDF is available in my shop! It's perfectly formatted, easy to read while you're working, and great for keeping in your pattern binder. The PDF also includes a complete stitch diagram!
👉 [Never Ending Star Blanket Pattern PDF]
If you love PDFs, you might want to check out my Lifetime Membership. It's an awesome deal! Never pay for one of my PDFs again!
You can also find my designs on my Ravelry designer page. Thank you so much for supporting my work!

About this Free Crochet Star Blanket Pattern
This crochet star blanket pattern is worked from the center out in joined rounds, and you won't turn at the end of a round. You'll start with a chain-4 ring — a magic circle is not recommended for this pattern — then work the first few rounds to establish the six points of the star.
From there, a front post half double crochet (FPhdc) creates a raised ridge that runs between each point of the star creating lovely texture. Those ridges are such a pretty detail, and they make each point of the star really stand out. After round 6, you just keep repeating rounds 5 and 6 until your blanket is the size you want, then finish with a simple single crochet edging.

The sample Never Ending Star Blanket measures about 46" x 46" point to point, a cozy baby blanket or crochet star afghan for the couch. Want a larger size? Work more repeats of rounds 5 and 6 for a larger blanket, and add more yarn as needed.
If you love star blankets but want a joined-square project instead, my Star Granny Square Blanket is made from standard granny squares and two-color granny squares that are joined together into a throw to create a star image on a square blanket!
Supplies for the free crochet Star Blanket
This post contains affiliate links. You can click on any yarn or material highlighted to purchase. I will receive a small commission if you purchase but it won't cost you any extra! As an Amazon Associate I earn from qualifying purchases.
I used Caron Cinnamon Swirl Cakes, a medium weight #4 acrylic yarn, in the color Heatwave. The sample uses 2 cakes (8 oz / 407 yards each, 16 oz / 814 yards total) and an H/8 (5.0 mm) hook. I love that the cake does the color changes for you as you go, so you can just relax and enjoy the stitches.
Just a note on using self-striping yarn for your Never Ending Star Blanket - I recommend color controlling for the first few rounds - especially through round 3. What is color controlling? That means if your yarn cake changes color in the middle of your round, go back to the beginning of that round, and begin with the next color change on the yarn cake. However, this is completely optional and not necessary!
You can certainly substitute your favorite medium worsted weight yarn if you would rather work in a solid color or a different cake. Just be sure to check your gauge so your blanket comes out the size you have in mind.
Complete Never Ending Star Blanket Video Tutorial Available!
A complete video tutorial for the Never Ending Star Blanket is available!
Nana’s Crafty Home Community
I've opened the Nana's Crafty Home Community, a free place where crocheters can gather, share their projects, ask questions and cheer each other on.
Free to join!
More Free Crochet Star Patterns
If you love this Never Ending Star Blanket, I have more free crochet star patterns right here on the blog! And if you don't want to miss a single new release, be sure to sign up for my free newsletter! You'll get new patterns, tutorials, and crafty inspiration delivered straight to your inbox.
👉 Sign up for my free newsletter here!
Let's Stay Connected! I love seeing your finished makes. Tag me on social media so I can cheer you on!
You may also love the following free crochet patterns:
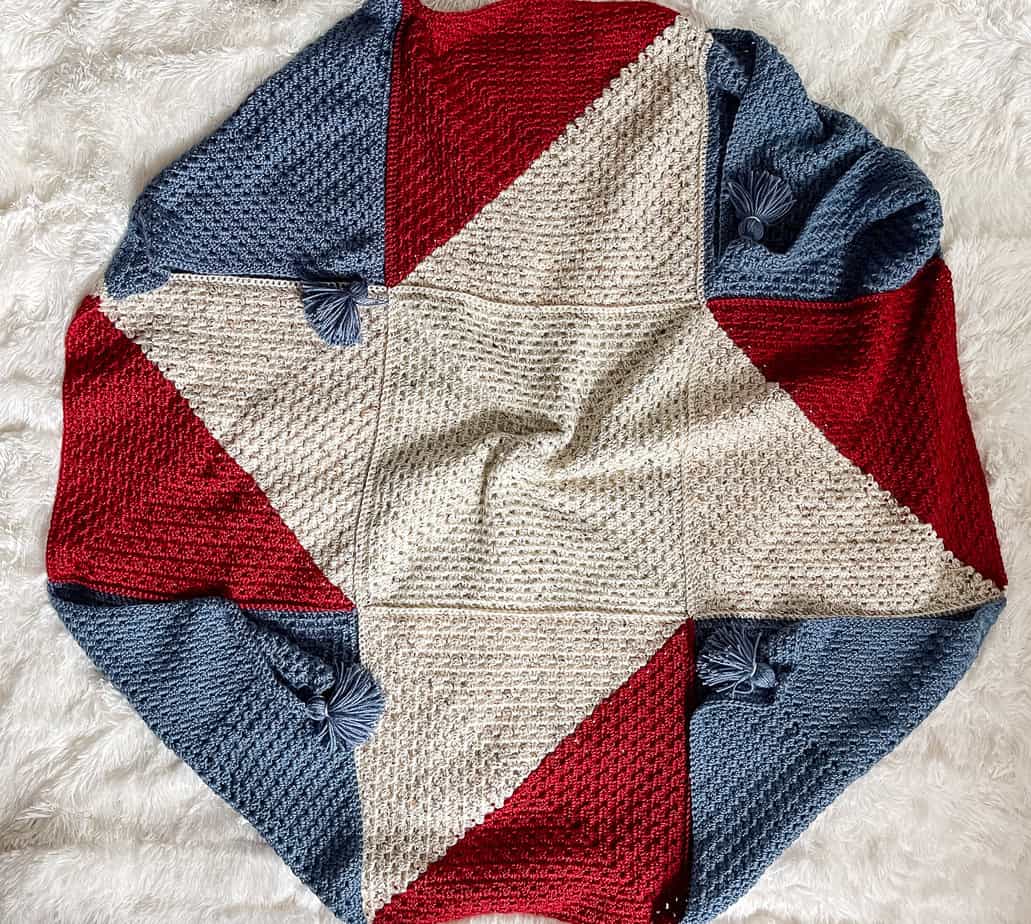


- Star Granny Square Blanket — a patchwork throw made from star granny squares joined together. This Never Ending Star Blanket is one big continuous star instead.
- Never Ending Star Plant Hanger — the design by Kristyn Crochets that inspired this blanket.
- Moon & Stars Baby Blanket free crochet pattern.

Never Ending Star Blanket FAQ
How much yarn do I need for the Never Ending Star Blanket?
The sample uses 2 cakes of Caron Cinnamon Swirl Cakes, a weight 4 medium (100% acrylic) yarn, in the color Heatwave. That's 8 oz / 407 yards per cake, or 16 oz / 814 yards total, for a blanket that finishes about 46" point to point. If you work extra rounds for a larger blanket, you'll need more yarn.
How do I make this crochet star blanket bigger or smaller?
After the setup rounds, continue repeating rounds 5 and 6 until the blanket is the size you want. Work fewer rounds for a smaller blanket or a crochet star baby blanket, or keep going for a larger throw. Then work the single crochet edging (round 27 on the sample) around the outside.
Why isn't my Never Ending Star Blanket laying flat?
The first few rounds will look a little wavy because you're working a lot of double crochet stitches in Rnds 1 and 2. That's normal, and the waviness should work itself out once you're past the setup rounds. If your blanket starts to cup up after several repeat rounds, you don't have enough stitches to keep it flat. Try working an extra Rnd 6, which adds more stitches. After each round, lay your blanket on a flat surface to check how it's sitting. Don't add too many extra Rnd 6 rounds without checking, though: if the blanket starts to ruffle or get wavy, that means you have too many stitches.
What is a FPhdc?
FPhdc stands for front post half double crochet. Yarn over and insert your hook from front to back to front around the hdc stitch post from the round below, yo, pull up a loop (3 loops on hook), yo, pull through all 3 loops on hook. In this pattern, that stitch creates the raised ridge that runs up between each point of the star.
Is this free crochet star blanket pattern beginner friendly?
This pattern is worked in joined, non-turning rounds and uses mostly double crochet, with half double crochet and a front post half double crochet stitches. If you're comfortable with double crochet and ready to try a front post stitch, you can make this blanket. A complete video tutorial is also coming soon!

Never Ending Star Blanket free written pattern
Pattern written in US crochet terminology
Supplies:
- Caron Cinnamon Swirl Cakes, weight 4 medium (100% acrylic), (2) in color Heatwave, 8 oz / 407 yards each (16 oz / 814 yards total)
- Hook H/8 (5.0 mm)
- Scissors
- Tapestry needle
Approximate finished size:
About 46" x 46" point to point
Gauge:
First 3 rnds = 5" x 5" point to point
Abbreviations:
- ch(s) = chain(s)
- rnd(s) = round(s)
- dc = double crochet
- beg = beginning
- hdc = half double crochet
- FPhdc = front post half double crochet
- sk = skip(ped)
- sp(s) = space(s)
- st = stitch
- sl st = slip stitch
- sc = single crochet
- RS = right side
- yo = yarn over
- rep = repeat
Special Stitches:
FPhdc: Yo and insert your hook from front to back to front around the hdc stitch post from the round below, yo, pull up a loop (3 loops on hook), yo, pull through all 3 loops on hook.
Recommended Tutorial:
Never Ending Star Blanket Complete Video Tutorial
Pattern Notes:
- Worked from the center out.
- Worked in non-turning, joined rounds.
- Ch 3 at beg of a round counts as first dc throughout.
- Stitch counts increase by 12 sts for 2 dc corner rounds and 24 sts for 3 dc corner rounds.
Instructions
Ch 4, sl st to form a ring. (Magic circle not recommended)
Rnd 1: (RS) Ch 3 (counts as first st here and throughout), 17 dc in ring, join with sl st in top of ch-3. (18)
Rnd 2: Ch 3, dc in same st, 2 dc in each st, sl st in top of ch-3. (36)
Rnd 3: (Ch 3, 2 dc, ch 3, 3 dc) in same st (beg corner), *sk next 2 sts, hdc in next st, sk next 2 sts, (3 dc, ch 3, 3 dc) in next st (corner),* rep from * to * to last 5 sts, sk next 2 sts, hdc in next st, sk last 2 sts, sl st in top of ch-3. (42 sts + 6 ch-3 sps)
Rnd 4: Sl st in next 2 sts, (sl st, ch 3, 2 dc, ch 3, 3 dc) in ch-3 sp, *dc in next 2 sts, sk next st, FPhdc in next st, sk next st, dc in next 2 sts, (3 dc, ch 3, 3 dc) in ch-3 sp,* rep from * to * to end, omitting final corner, sl st in top of ch-3. (66 sts + 6 ch-3 sps)
Rnd 5: Sl st in next 2 sts, (sl st, ch 3, 1 dc, ch 3, 2 dc) in ch-3 sp, *dc in each st to one st before FPhdc, sk next st, FPhdc around FPhdc, sk next st,** dc in each st to ch-3 sp, (2 dc, ch 3, 2 dc) in ch-3 sp,* rep from * to * around ending last rep at **, dc in each st to beg ch-3, sl st in top of ch-3. (78 sts + 6 ch-3 sps)
Rnd 6: Sl st in next st, (sl st, ch 3, 2 dc, ch 3, 3 dc) in ch-3 sp, *dc in each st to one st before FPhdc, sk next st, FPhdc around FPhdc, sk next st,** dc in each st to ch-3 sp, (3 dc, ch 3, 3 dc) in ch-3 sp,* rep from * to * around ending last rep at **, dc in each st to beg ch-3, sl st in top of ch-3. (102 sts + 6 ch-3 sps)
Rnds 7-26 (or to size desired): Continue repeating rnds 5-6.
Edging (Rnd 27): Ch 1, sc in same st, sc in each st to ch-3 sp, *4 sc in ch-3 sp, sc in each st to next ch-3 sp,* rep from * to * to end, sl st in first st.
Fasten off and weave in remaining ends.
Copyright 2026 Tonya Bush / Nana's Crafty Home, LLC.
Social Media links:
Community: https://community.raptive.com/nanascraftyhome
Facebook: https://www.facebook.com/nanascraftyhome
Instagram: https://www.instagram.com/nanascraftyhome/
Pinterest: https://www.pinterest.com/nanascraftyhome/
YouTube: https://www.youtube.com/c/TonyaBush
Twitter / X: https://twitter.com/nanascraftyhome
Facebook Group: https://www.facebook.com/groups/829792060522798
Sign up for my Newsletter: https://nanascraftyhome.com/sign-up-for-my-free-newsletter/
Disclaimer: This pattern is for personal use or small-scale crafting. If you intend to sell the finished product in the EU, ensure it complies with the General Product Safety Regulation (EU) 2023/988, including safety, labeling, and traceability requirements.

 Hi! Thank you so much for being here! I am Tonya the designer behind Nana's Crafty Home. As a wife, mother, Nana of 9 & with 2 fur babies, my days are filled with love, laughter, hugs and yarn! Here you will find colorful and creative crochet designs for yourself or loved ones. My hope is that you will be inspired to learn and create along with me!