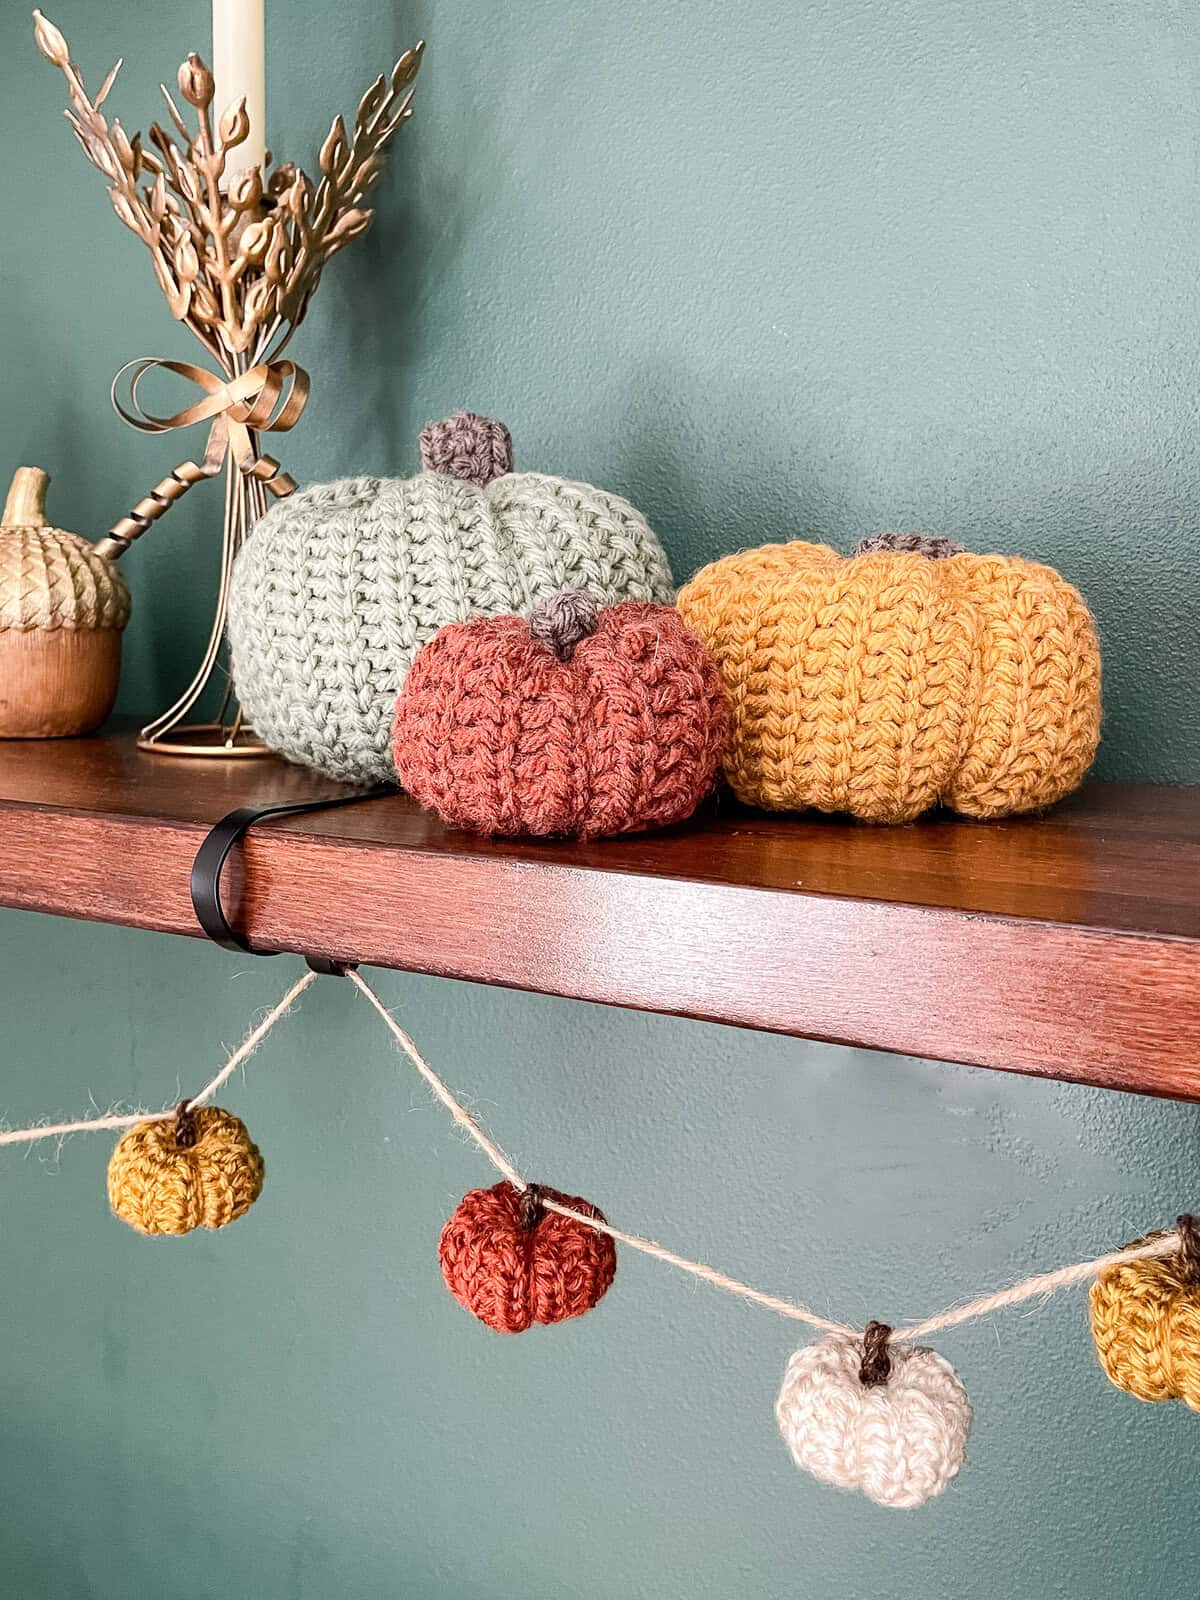
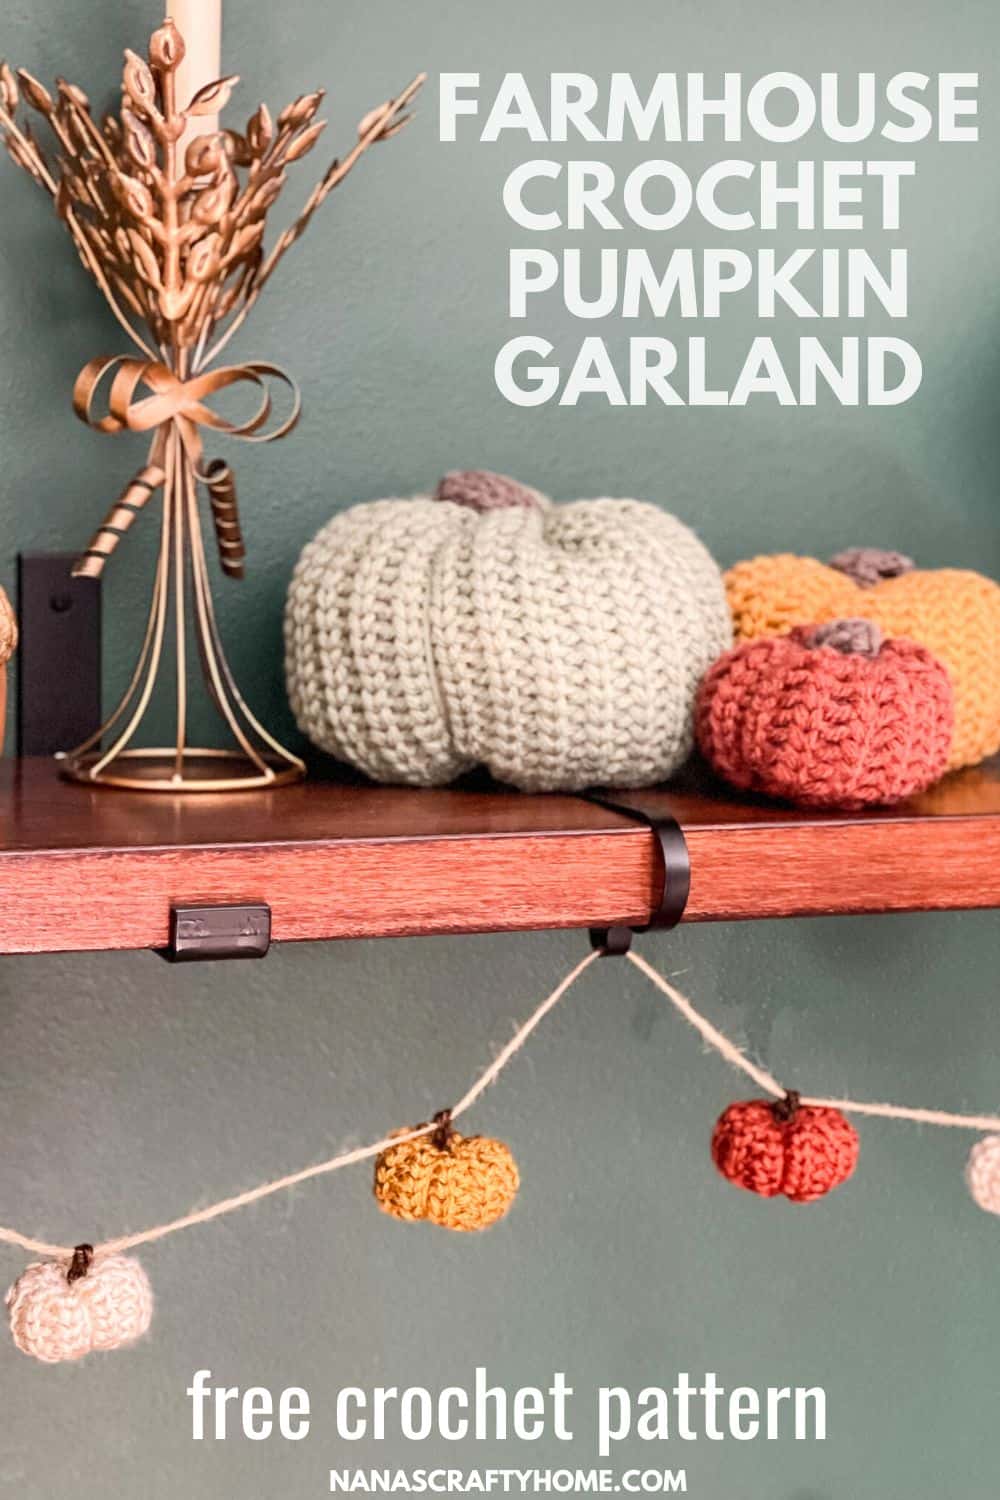
Fall is in the air, and what better way to embrace the cozy vibes than with a touch of handmade pumpkin charm? If you’ve already fallen in love with my Chunky Rustic Crochet Pumpkin pattern, get ready for a delightful mini fall home makeover with this adorable crochet pumpkin garland!
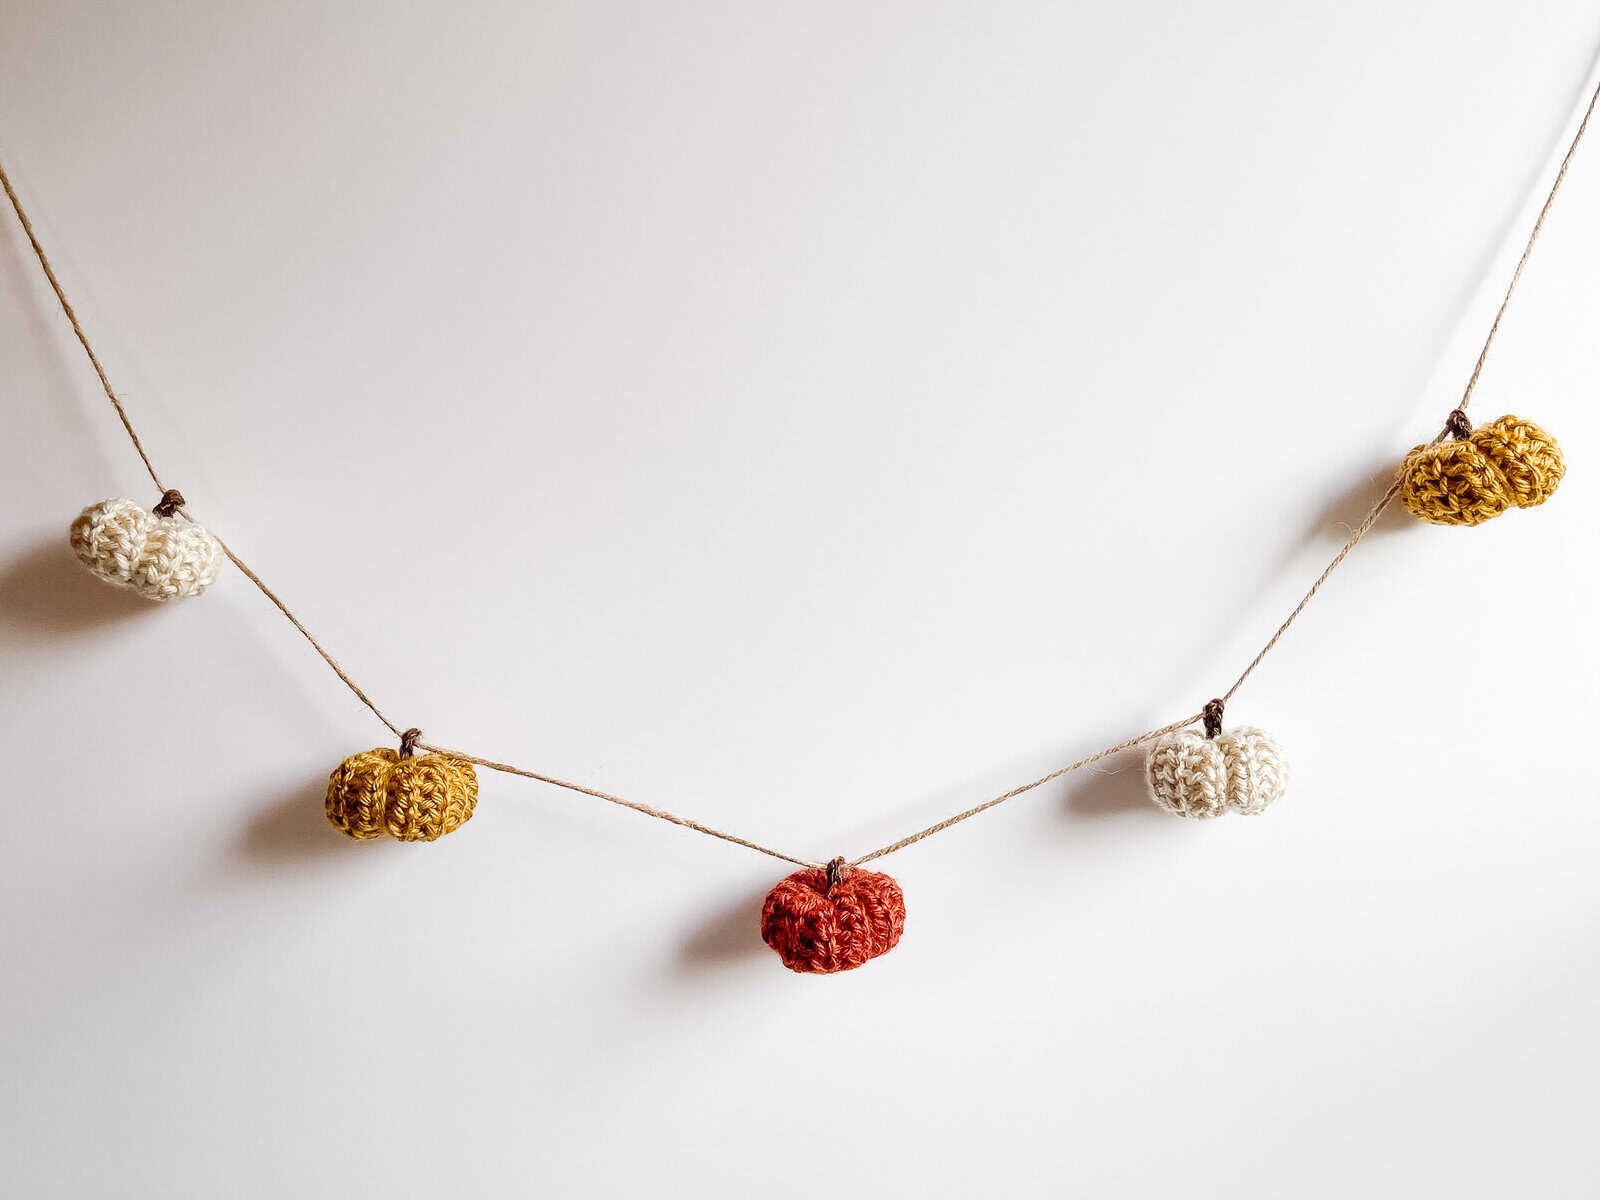
Today, I’m thrilled to share my adaptation: a whimsical Crochet Mini Pumpkin Garland that’s perfect for draping across your mantel, window sill, or even as a festive addition to your autumn table scape. These adorable bite-sized pumpkins capture all the rustic texture and warmth of the original chunky version but in a smaller, quicker-to-crochet scale. Using simple stitches and a palette of earthy yarns in creams, mustards, terracottas, and rusts, you’ll whip up a string of these cuties in no time.
Strung on natural twine, they add that effortless, farmhouse-inspired glow to your seasonal decor. Whether you’re a crochet newbie or a seasoned pro, this project is all about fun, customization, and celebrating the harvest season.

How to Make a Crochet Pumpkin Garland
For the full free written pattern instructions for the Mini Pumpkin Crochet Garland Pattern, scroll down below. You can purchase the ad-free PDF of this pattern set for a small fee. Or, become a Lifetime Member and never pay for a PDF again!
1. These mini pumpkins are made from the same stitch pattern as my Rustic Chunky Pumpkins – an easy, one-round, bottom-up (no seams!) stitch with a knit-like texture!
2. I have a complete stitch tutorial to walk you through making these knit-like crochet pumpkins!
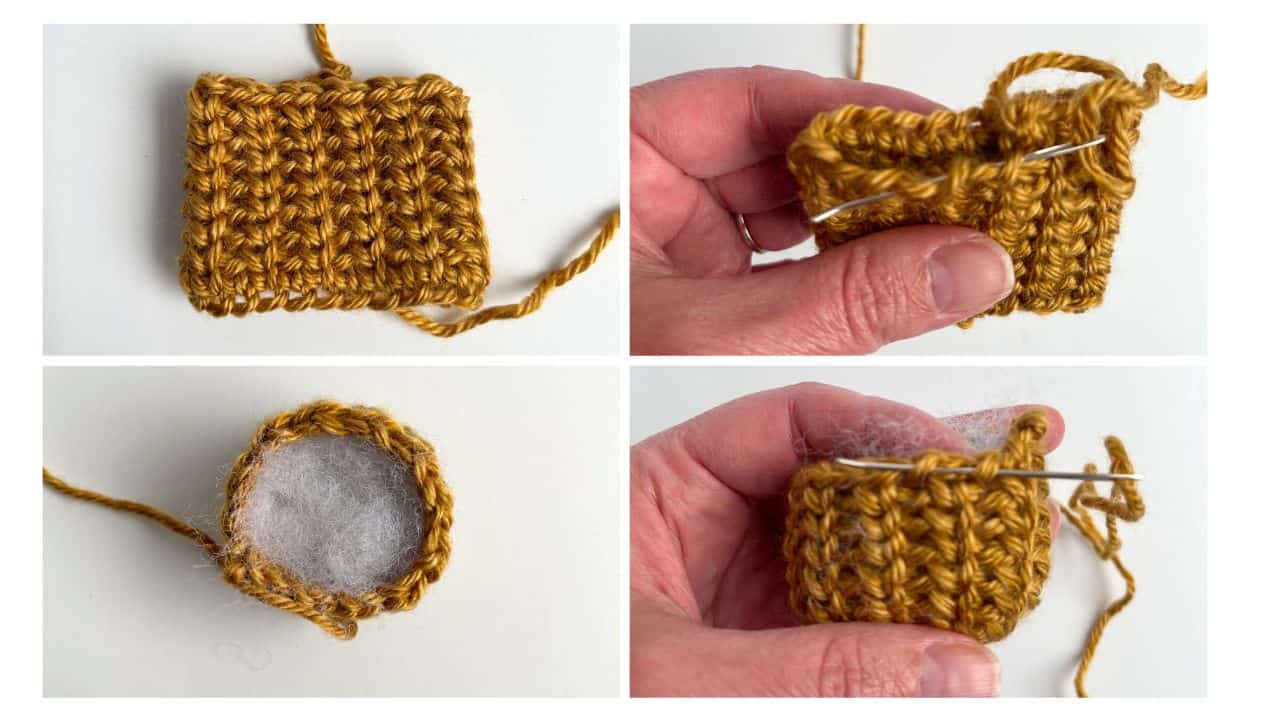
3. These mini crochet pumpkins are so quick to make! Once you have fastened off, simply cinch the bottom, stuff, cinch the top, create your pumpkin “segments”, and then sew on the small stem to complete!
If you need some extra visual help on how to finish your pumpkins I have a tutorial for my Checkered Stuffed Pumpkins you can check out as well: Checkered Pumpkin Tutorial with Time Stamp for assembly.
4. These finished mini pumpkins can then be scattered on your fall table centerpiece, runner or at the table setting for a fun little Thanksgiving party favors!
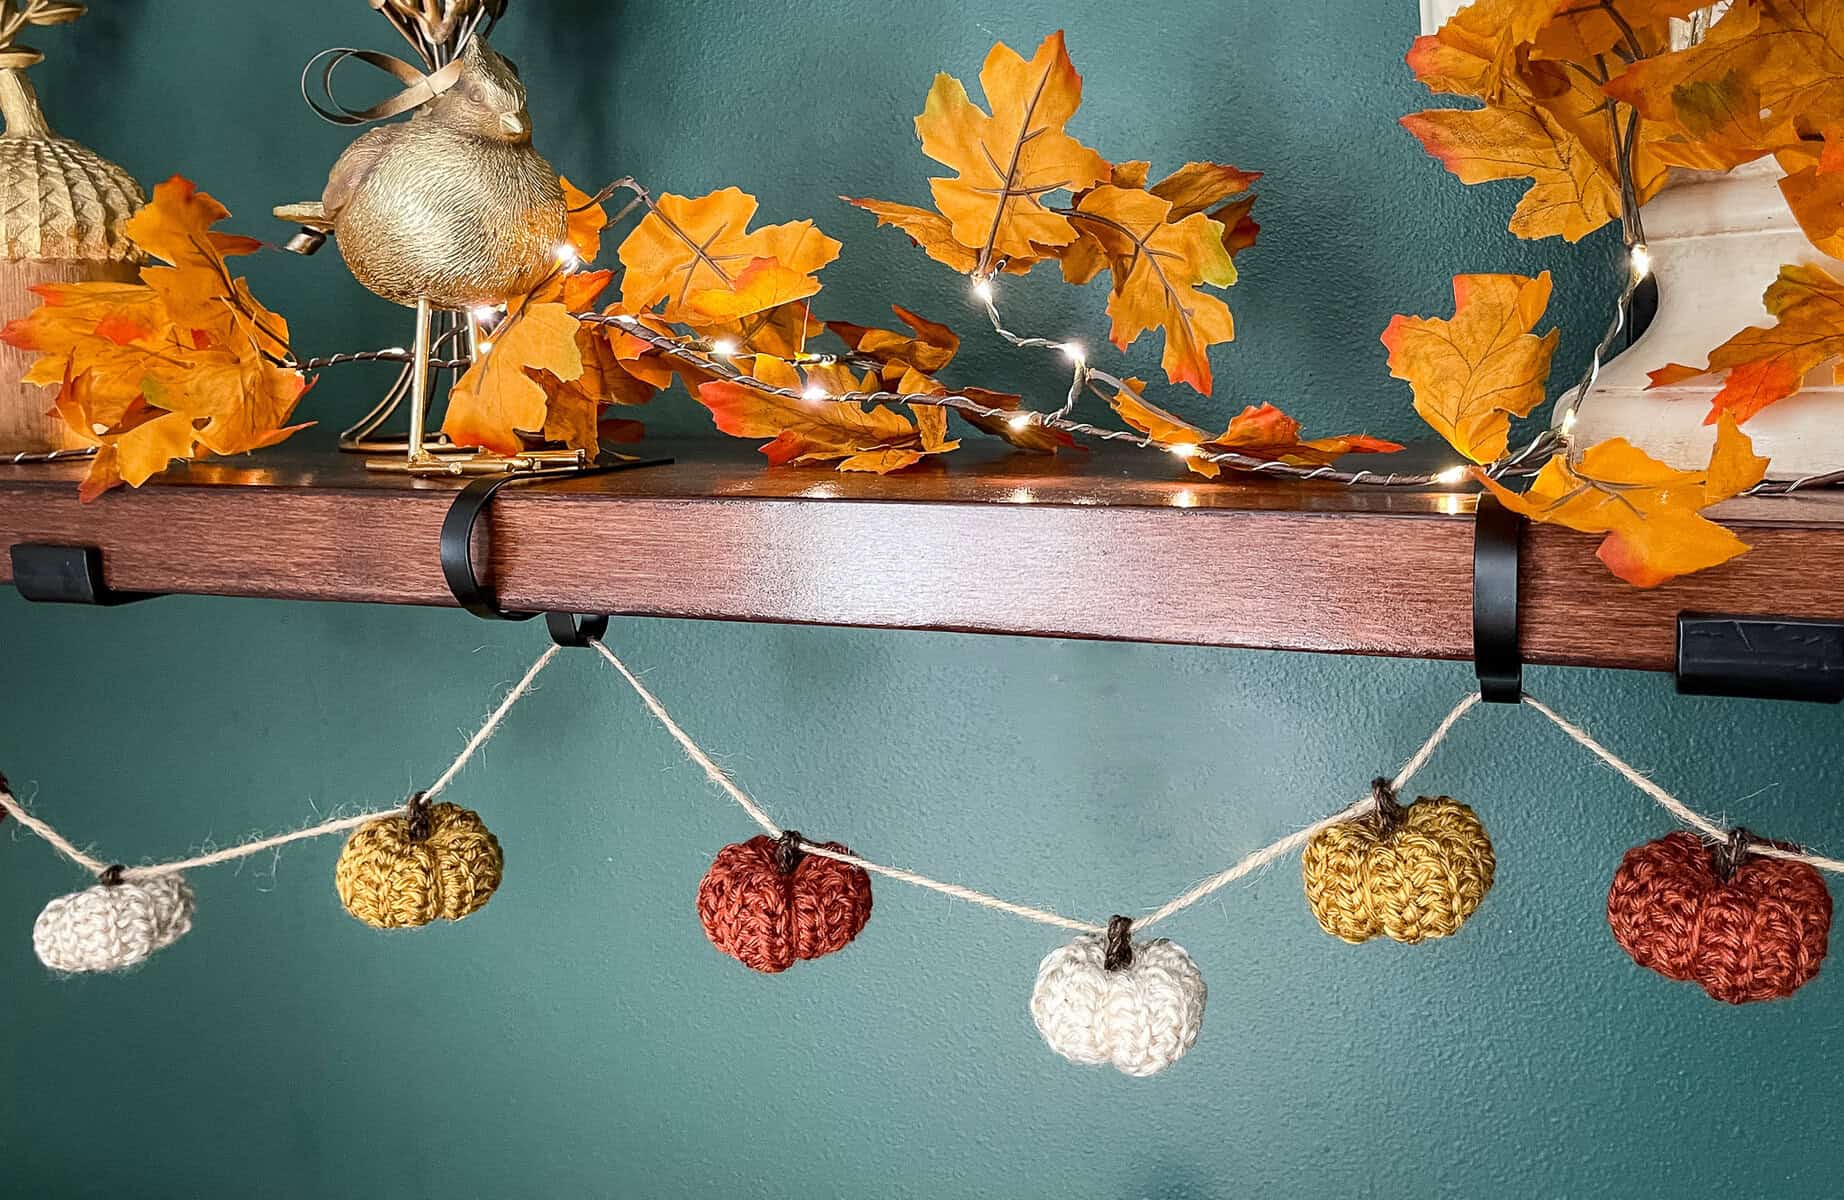
5. I opted for stringing my mini crochet pumpkins onto a piece of rustic jute twine to create a charming garland for my fireplace mantel—it’s absolutely adorable! To assemble, thread your desired length of twine through a large-eyed needle, then pass it through the stem of each pumpkin. The textured twine grips the pumpkins securely without slipping, yet you can easily slide them along to adjust spacing as needed.
6. Then simply make a knotted loop at each end of your garland for easy hanging!
I hope you enjoy this adorable mini crochet pumpkin garland pattern – be sure to send me photos of your finished mini pumpkins to tonya@nanascraftyhome.com or tag me on social media! @nanascraftyhome
Tonya 💕
This cute crochet pumpkin garland pairs beautifully with the Rustic Chunky Stuffed Pumpkins – another free crochet pattern on the blog!
Supplies for your Mini Crochet Pumpkin Garland
*This post contains affiliate links. You can click on any yarn or material highlighted to purchase. I will receive a small commission if you purchase but it won’t cost you any extra! As an Amazon Associate I earn from qualifying purchases.
I am using Lion Brand’s Heartland Yarn for my mini pumpkins as I had several scraps left over from my Patchwork Revelry Blanket. This project is perfect for your worsted weight yarn scraps! Pick your favorite fall colors and start making mini pumpkins for everyone!
For stuffing my pumpkins I used small amounts of Poly-fil. I always have a supply on hand! These pumpkins need very little stuffing!
I chose rustic jute twine for stringing my simple garland, but yarn works wonderfully as an alternative! If using yarn, which can be a bit more slippery and may allow the pumpkins to shift, secure them by making a simple knot on each stem. Just ensure each pumpkin is positioned exactly where you want it on the string before knotting.
I am getting questions about the shelf clamps I used for my garland as well! I purchased them on Amazon – they are actually sold as Stocking Holders and they are absolutely great because they will expand to the size of your shelf. You can find them on Amazon here: https://amzn.to/42bRiF0
Purchase the ad-free PDF
You can purchase the ad-free PDF of this Mini Crochet Pumpkin Garland for a small fee. You can purchase the individual pattern, or if you love PDFs, you might want to check out my Lifetime Membership. It’s an awesome deal! Never pay for one of my PDFs again!!


If you would like daily crochet inspiration be sure to follow me on Facebook, Instagram, Pinterest, YouTube, and Twitter.
To get notified of my free crochet patterns and future giveaways, sign up for my newsletter. I never share or sell your information to third parties — it stays private!
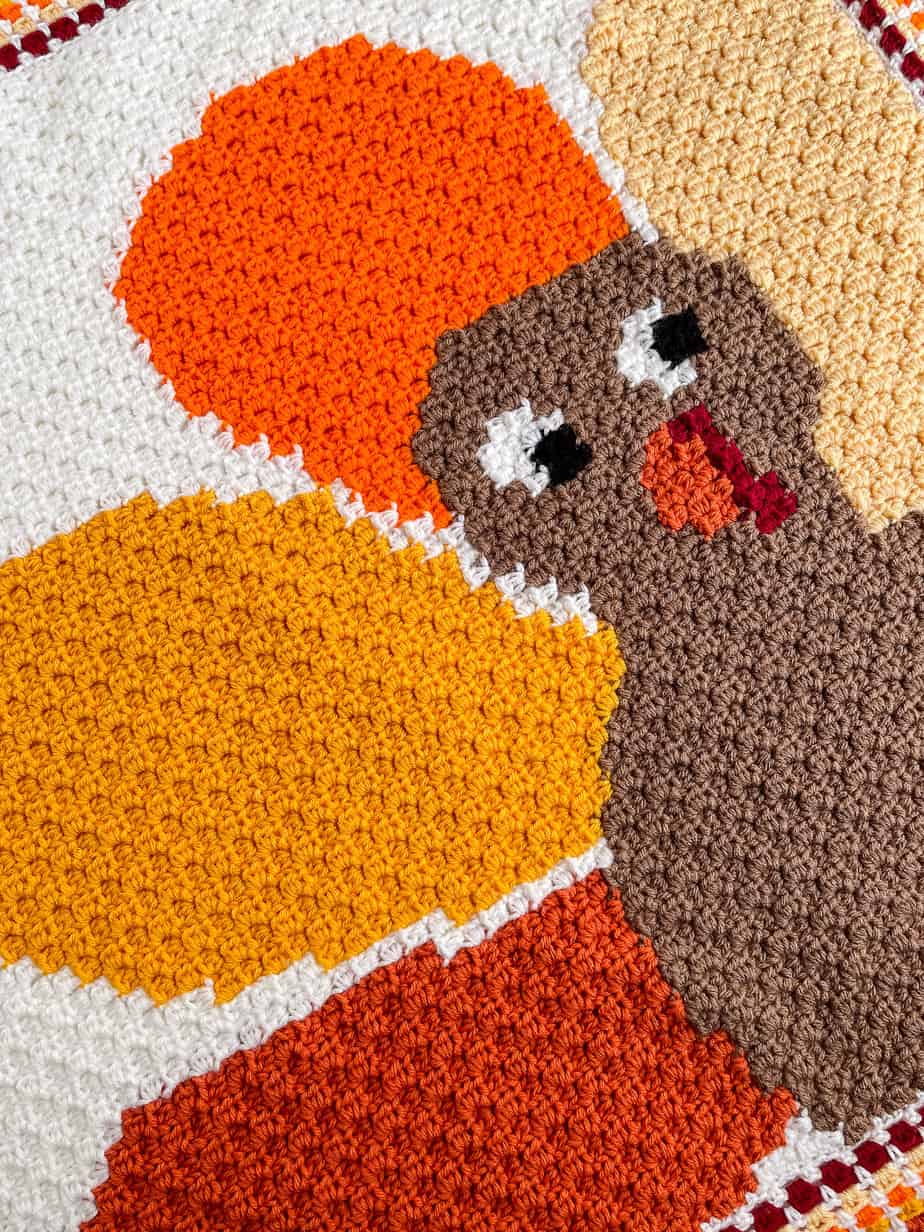
You may also like the following free Thanksgiving crochet patterns:
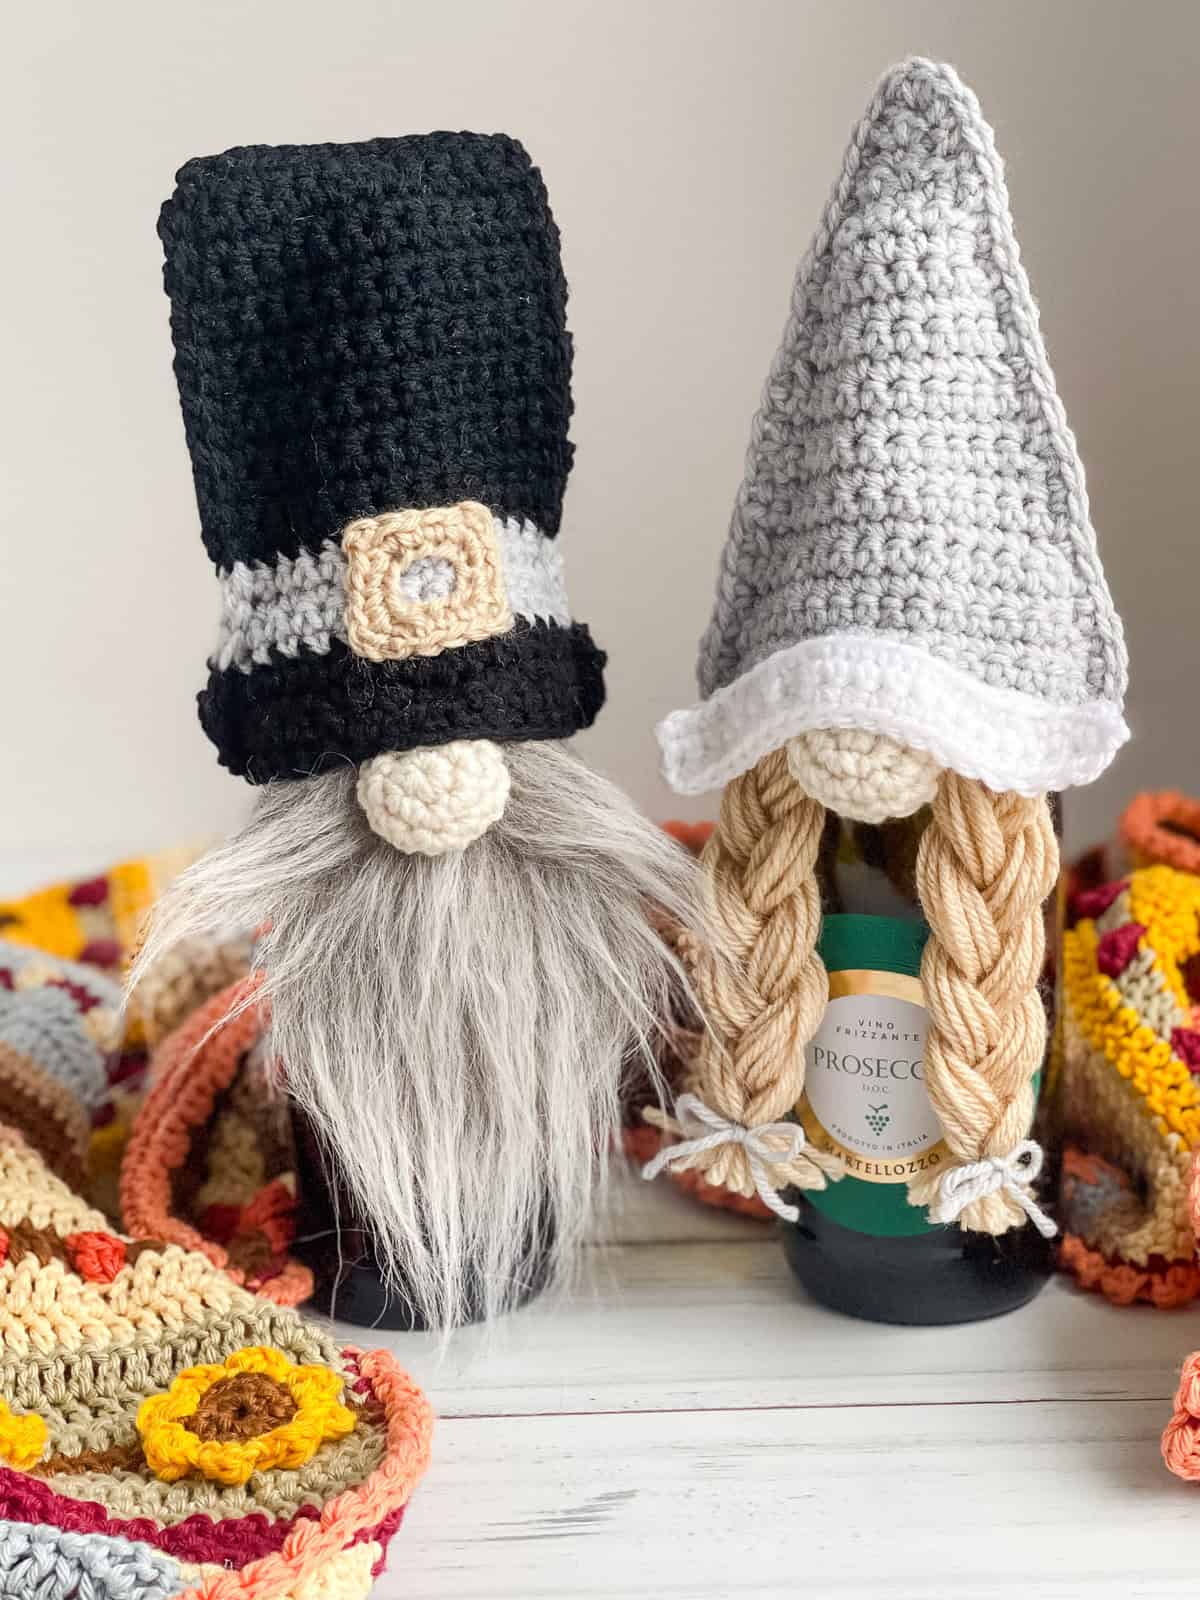

- 1. Thanksgiving Pilgrim Bottle Topper Free crochet pattern set
- 2. Wacky Waddles Turkey Hat free crochet pattern
- 3. Turkey C2C Blanket free crochet pattern
Crochet Mini Pumpkin Garland free pattern instructions
Pattern written in US crochet terminology
Supplies:
Lion Brand Heartland Weight 4 / Medium (100% acrylic)
- Color Acadia 0.6 oz / 31 yards (MC)
- Color Canyonlands 0.6 oz / 31 yards (MC)
- Color Yosemite 0.6 oz / 31 yards (MC)
Stem: Color Sequoia (BR)
Crochet hook size J (6.0 mm)
Scissors
Tapestry Needle large enough to get twine on needle
Twine
Poly-fil
Approximate finished size: 2 1/2” wide x 2” height before cinching
Abbreviations:
- MC = main color
- RS = right side
- Rnd(s) = round(s)
- ch(s) = chain(s)
- sl st = slip stitch
- sc = single crochet
- sk = skip
- csc = center single crochet (see special stitches section below)
Special Stitches:
csc = center single crochet: single crochet stitch is worked between the legs of the single crochet stitch from the previous round.
Pattern Notes:
- Pumpkin is worked from bottom up, leaving long tails for cinching bottom and top of pumpkins together.
- Worked in the round without joining or turning.
- Resize width of pumpkin smaller or larger by chaining in multiples of 2. Resize height by adding or subtracting rounds.
- To adjust proportions — measure the base width after the first round, double it, and subtract 1″ for the ideal height. Ex. 3″ wide after first round: 3×2=6 – 1” so your finished measurement = 3″ wide x 5″ tall before cinching closed.
Recommended Tutorials:
Crochet Rib Stitch Tutorial
Checkered Pumpkin Tutorial with Time Stamp for assembly.
Pattern Instructions
Pumpkin (make 9 total – 3 in each color)
With MC and leaving a long tail for cinching bottom of pumpkin, ch 24 and without twisting ch, sc in first ch to form a ring.
Rnd 1: Sc in each ch around. Do not sl st join at end. 24
Rnd 2: *Ch 1, sk next st, csc in next st,* repeat from * to * around.
Rnd 3. *Ch 1, sk ch-1, csc in next st,* repeat from * to * around.
Rnds 4 – 8: Repeat round 3.
Leaving a long tail for cinching top of pumpkin together, fasten off and weave in ends not left for sewing.
Stem
With BR, ch 4.
Row 1: Sc in second ch from hook and in each ch to end.
Fasten off.
Assembly
With long length of yarn left for sewing, use a gathering stitch to gather bottom of pumpkin together. Pull tightly; sew the bottom of the pumpkin shut. Weave in end. Stuff pumpkin – do not overstuff!
With long length of yarn, use a gathering stitch to gather top of pumpkin together. Pull tightly; sew the top of the pumpkin shut.
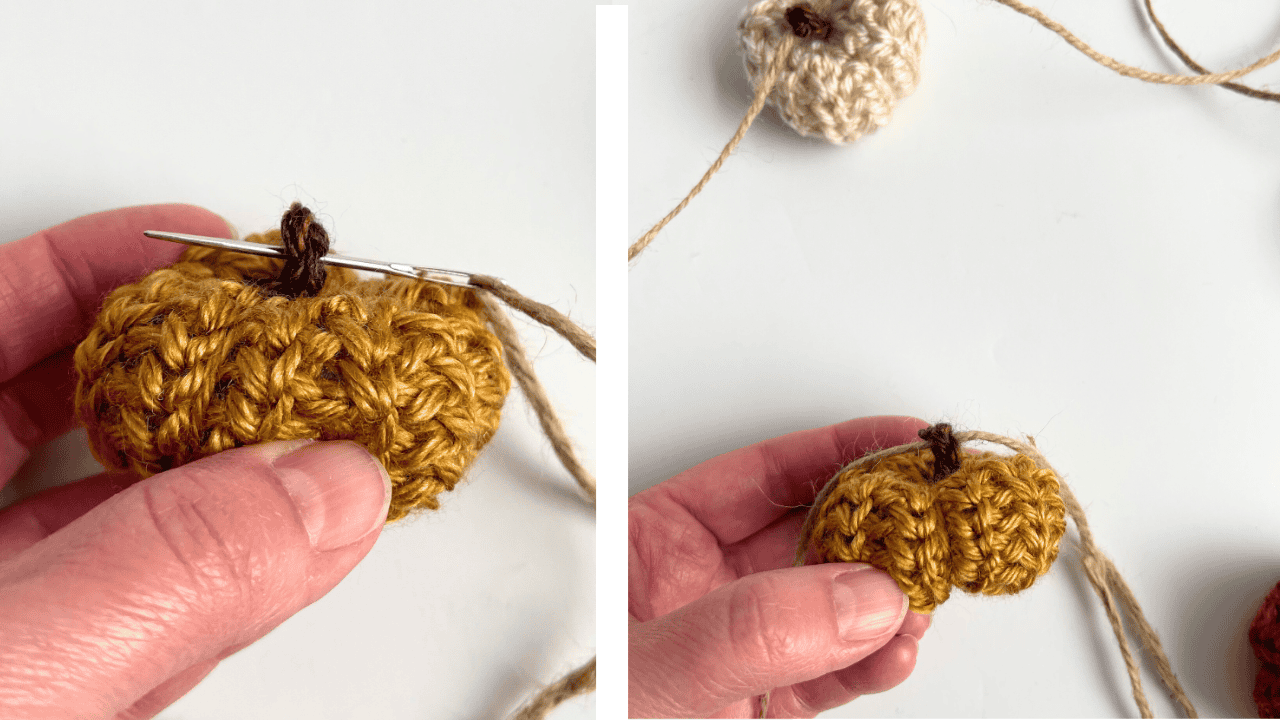
Create pumpkin segments by inserting needle from top of pumpkin through bottom 4 times evenly spacing these long stitches apart. Tighten each ridge stitch to desired look. Once complete, knot yarn and weave in end.
I have a video tutorial that shows you how to sew, stuff & add segments to your pumpkin: Checkered Pumpkin Tutorial with Time Stamp for assembly.
Repeat above steps for each pumpkin.

With long length of yarn, sew stem to top of each pumpkin.
Weave in any remaining ends.
Cut a length of twine long enough for your desired garland size, plus extra for hanging loops or ties at the ends (e.g., 2-3 feet for a short garland like the one in the image). Thread one end of the twine through the eye of the needle.
Insert the needle through the top center of the stem. Pull the needle and twine all the way through until the pumpkin slides freely along the twine. Push the pumpkin down toward the unthreaded end of the twine, leaving some space at the starting end for a hanging loop if desired.
Add Remaining Pumpkins: Repeat the threading process for each additional pumpkin. Work the needle through the top of the stem, pull the twine through, and then push the pumpkin down along the twine to position it next to the previous one. Space the pumpkins evenly for a balanced look—aim for 4-6 inches between each one, depending on your garland length.
Secure and Finish: Once all pumpkins are threaded, adjust their positions as needed. Tie knots or loops at both ends of the twine to prevent the pumpkins from sliding off and to create hanging points. You can also add decorative elements like beads or leaves between pumpkins if you want to customize further.
Copyright 2025 Tonya Bush / Nana’s Crafty Home, LLC.
Social Media links:
Facebook: https://www.facebook.com/nanascraftyhome
Instagram: https://www.instagram.com/nanascraftyhome/
Pinterest: https://www.pinterest.com/nanascraftyhome/
YouTube: https://www.youtube.com/c/TonyaBush
Twitter: https://twitter.com/nanascraftyhome
Facebook Group: https://www.facebook.com/groups/829792060522798
Sign up for my Newsletter: https://nanascraftyhome.com/sign-up-for-my-free-newsletter/
 Hi! Thank you so much for being here! I am Tonya the designer behind Nana's Crafty Home. As a wife, mother, Nana of 9 & with 2 fur babies, my days are filled with love, laughter, hugs and yarn! Here you will find colorful and creative crochet designs for yourself or loved ones. My hope is that you will be inspired to learn and create along with me!