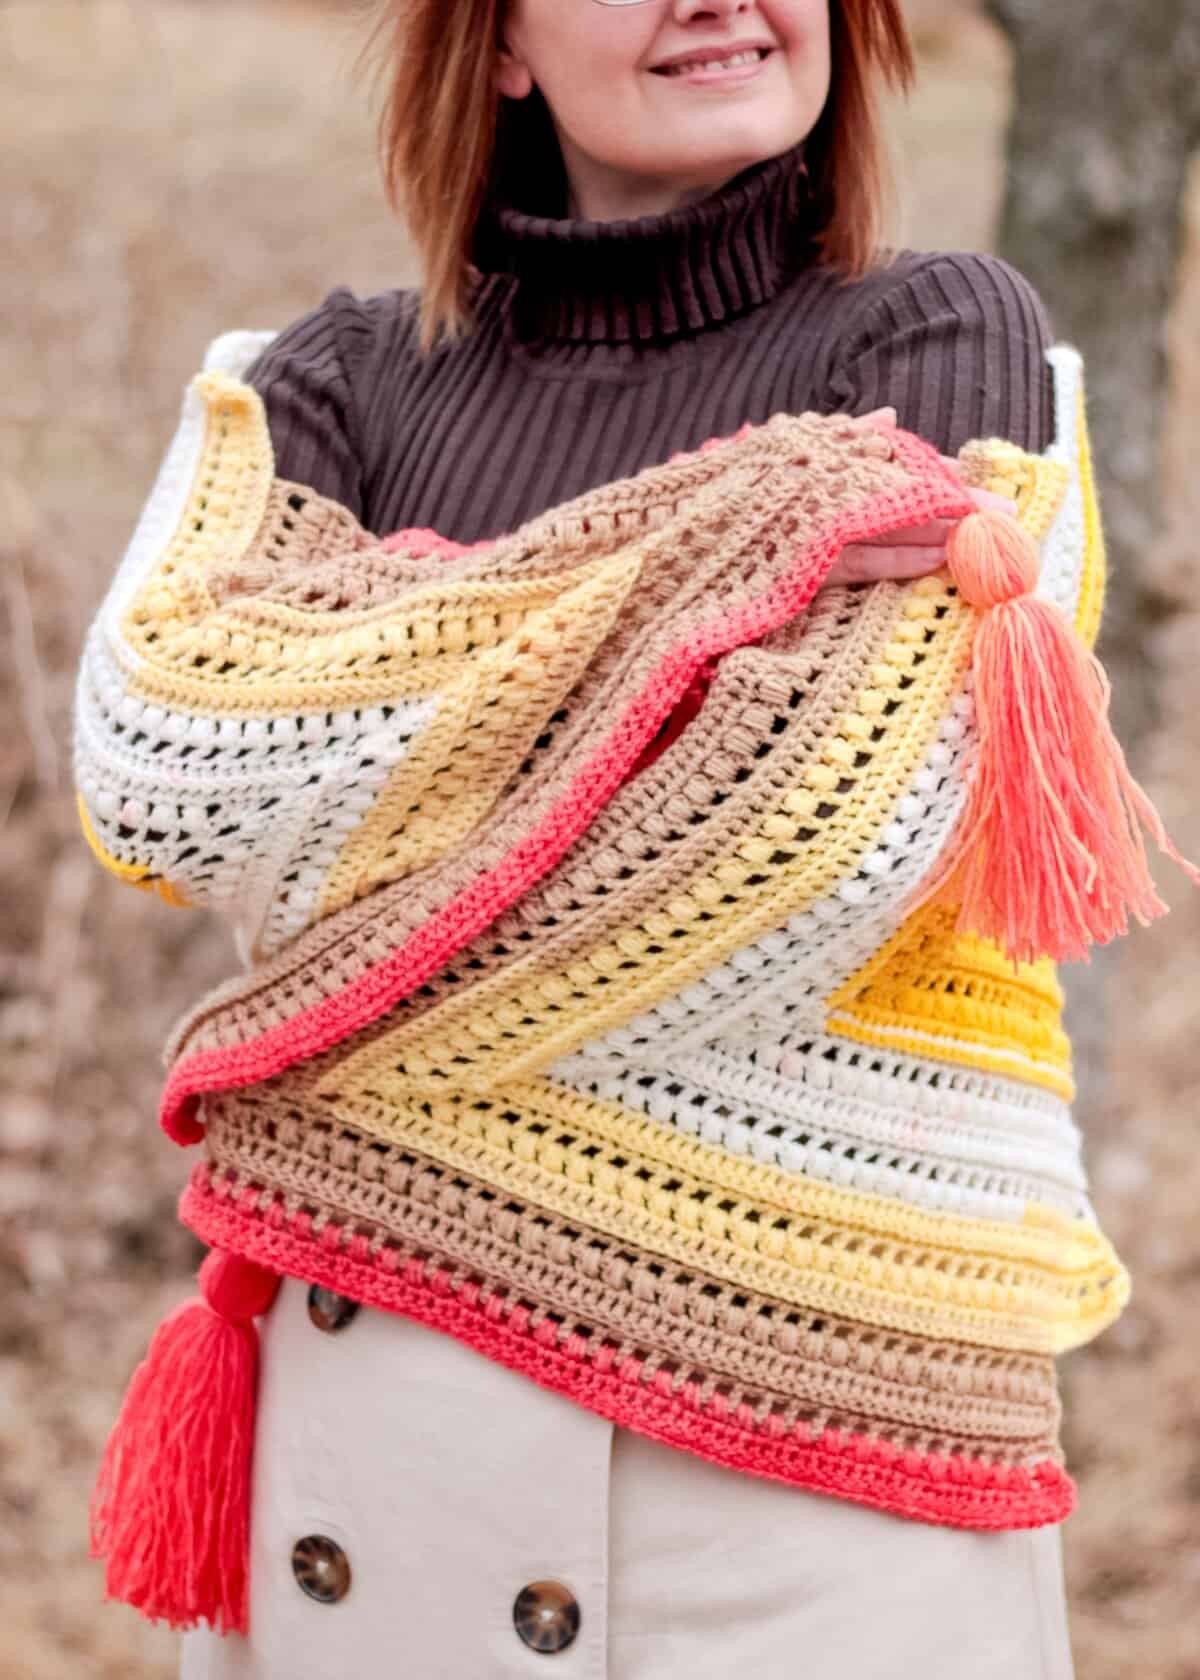
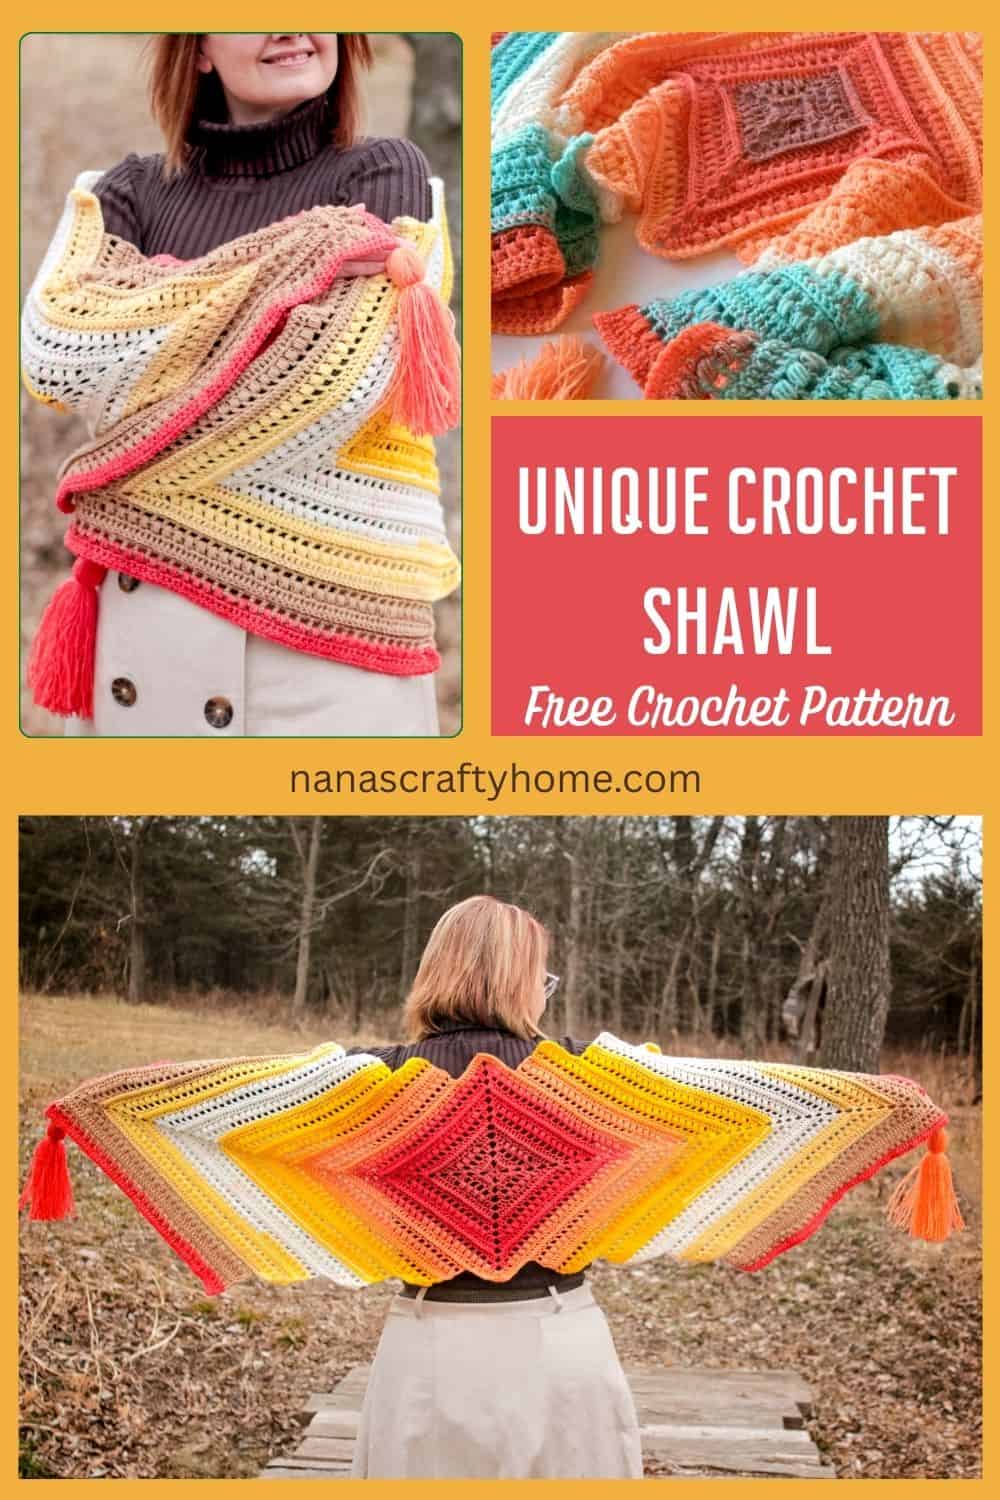
The Wrap Me in Sunshine Shawl is a stunning, textured crochet wrap that captures the essence of a bright, sunny day, perfect for chasing away winter blues with its warm, gradient colors. This center-out crochet shawl free pattern features a unique construction starting from an inner square, with “wing” sections added to either side, creating an interesting and unique shape that’s both elegant and eye-catching.
The gently textured stitch pattern combines puff stitches—for a bubbly, dimensional texture—and back post double crochets, adding depth and intrigue to the design. Worked with self-striping yarn, the shawl showcases seamless color transitions from deep reds and oranges to sunny yellows, whites, and earthy browns, mimicking a radiant sunrise.
The finished shawl drapes beautifully over the shoulders and is complete with playful tassels at the ends for added flair.

Crochet Shawl Pattern Details
For the full free written pattern instructions for the Wrap Me in Sunshine Shawl, scroll down below. You can also purchase the ad-free PDF of this pattern for a small fee. Or, become a Lifetime Member and never pay for a PDF again!
- This crochet shawl pattern is made from the center-out with a square.
- The textured stitch pattern is an easy-to-memorize 4-row repeat.
- Once the square is complete you will work on one side edge of the square to make the first “wing” of your crochet shawl.
- Then repeat the same instructions for the second “wing” to complete the main body of the shawl.
- Add large tassels to each end to finish. Completely optional!
- FYI – I did do some color controlling on my wrap. Typically I just let the colors flow with any self-striping cake I am using — that is rather the point after all! However, I wanted the wing sections to look similar as they came out of the center so I did control the color on the second wing to match the first. It really wasn’t a big deal — I just started my second cake at the point I needed to for the second wing.
- I have a complete video tutorial to walk you through each step of the shawl as well!
Supplies for the Wrap Me in Sunshine Shawl Crochet Pattern
*This post contains affiliate links. You can click on any yarn or material highlighted to purchase. I will receive a small commission if you purchase but it won’t cost you any extra! As an Amazon Associate I earn from qualifying purchases.
I made my crochet shawl with Lion Brand Cupcake in Sunny Day* which is sadly now discontinued. However, Lion Brand Mandala yarn makes the perfect substitute! Lion Brand Mandala is a light #3 weight acrylic yarn and each cake contains a substantial 590 yards in each cake. If you are looking for a color way that would look similiar to the original shown in the photos, I would recommend the Mandala Sandman color way.
Just a note about the number of cakes used for this pattern. I used a total of 2 cakes — every little bit. However, my testers had to break into a 3rd cake to finish. You should count on having 3 cakes on hand for this pattern just in case.
Purchase the ad-free PDF of the Wrap Me in Sunshine Shawl
This pattern is also available as an ad-free, printable PDF! You can purchase the individual pattern, or if you love PDFs, you might want to check out my Lifetime Membership. It’s an awesome deal! Never pay for one of my PDFs again!! (Or, scroll down for the free version!)


To get notified of my free crochet patterns and future giveaways, sign up for my newsletter. I never share or sell your information to third parties — it stays private!
You may also like the following free crochet shawl patterns:


- Mountain Trail Triangle Scarf free crochet pattern
- Mandala Pretty Puffs Triangle Shawl free crochet pattern
- So Long Summer Scarf free crochet pattern
Wrap Me in Sunshine Crochet Shawl free crochet pattern instructions
Pattern written in US crochet terminology
Supplies:
2 (possibly 3) Lion Brand Cupcake Sunny Day 10.6 oz / 1180 yds
Note: Lion Brand Cupcake is now discontinued. I am recommending Lion Brand Mandala in Sandman colorway
Size H (5 mm) crochet hook
Stitch markers
Tapestry Needle
Scissors
Approximate finished size: approx 63” long (without tassels) x 24” wide
Gauge: 10 rows = 4” /15 dc st = 4”
Abbreviations:
- ch = chain
- dc = double crochet
- sp = space
- sl st = slip stitch
- BPdc = back post double crochet (see special stitch section below)
- st = stitch
- sk = skip
- hdc = half double crochet
- RS = right side
- yo = yarn over
Pattern Notes:
- Ch 3 & ch 2 at beginning of row counts as st throughout pattern.
- Wrap is worked from the middle out, a square to start and then “wings” added to both sides of square working in sections.
Recommended Tutorials:
Wrap Me in Sunshine Shawl Complete Video Tutorial
Special stitches:
Puff stitch: yo, insert hook in stitch, *yo, pull up a loop*, repeat between * * 3 more times, (9 loops on hook), yo, pull through all 9 loops, ch 1 to complete st.
BPdc: back post double crochet = when you work back post stitches, you will be working around the dc post from the previous row inserting your hook from the back of the work towards the front of the work. When you first insert your hook, the post that you want to crochet around will be sitting in “back” of your hook
Row 1: (RS) ch 4 (counts as first st), 2 dc in 4th ch from hook, ch 3, *3 dc, ch 3 in same sp* repeat between * * 2 more times, sl st top of ch 3. (12)
Row 2: sl st next 2 st, sl st into ch 3 corner sp, ch 3, (dc, ch 3, 2 dc) in same sp, BPdc in each st to next corner sp, *(2 dc, ch 3, 2 dc) in corner sp, BPdc in each st to next corner sp,* repeat between * * to end, sl st top of ch 3. (28)
Row 3: sl st next st, sl st into corner sp, ch 3, (dc, ch 3, 2 dc) in same sp, ch 1, sk next st, *dc in next st, ch 1, sk next st,* repeat between * * to next corner sp, [(2 dc, ch 3, 2 dc) in corner sp, ch 1, sk next st, *dc in next st, ch 1, sk next st,* repeat between * * to next corner sp], repeat between [ ] to end, sl st top of ch 3. (28)
Row 4: sl st next st, sl st into corner sp, ch 3, (dc, ch 3, 2 dc) in same sp, dc in next st, ch 1, sk next st, *puff st in next ch 1 sp, sk next st* repeat between * * to last ch 1 sp, puff st in last ch 1 sp, [sk next st, dc in next st, (2 dc, ch 3, 2 dc) in corner sp, dc in next st, ch 1, sk next st, *puff st in next ch 1 sp,* repeat between * * to last ch 1 sp], repeat between [ ] to last ch 1 sp, sk next st, dc in last st, sl st top of ch 3. (40)
Row 5: sl st next st, sl st into corner sp, ch 3, (dc, ch 3, 2 dc) in same sp, dc in each st and ch 1 sp to corner sp, *(2 dc, ch 3, 2 dc) in corner sp, dc in each st and ch 1 sp to next corner sp,* repeat between * * to end, sl st top of ch 3. (76)
Row 6: sl st next st, sl st into ch 3 sp, ch 3, (dc, ch 3, 2 dc) in same sp, BPdc in each st to next corner sp, *(2 dc, ch 3, 2 dc) in corner sp, BPdc in each st to next corner sp,* repeat between * * to end, sl st top of ch 3. (92)
Row 7 – 13: repeat rows 3 – 6, ending on row 5.
Fasten off.
Wing
With RS facing, count 10 st from any ch 3 corner sp, place stitch marker, count 10 st from opposite corner sp, place 2nd st marker. Attach yarn around post of first st marker.
Round 1: ch 2 (counts as st here and throughout), BPdc in next st and in each st to corner, (2 dc, ch 3, 2 dc) in corner sp, BPdc in each st to next st marker. Turn
Round 2: ch 4 (counts as first st + ch 1), sk next st, *dc in next st, ch 1, sk next st,* repeat between * * to corner sp, (2 dc, ch 3, 2 dc) in corner sp, ch 1, sk next st, *dc in next st, ch 1, sk next st* repeat between * * to last st, dc in last st. Turn
Round 3: ch 2, puff st in each ch 1 sp to last ch 1 sp, sk next st, dc in next st, (2 dc, ch 3, 2 dc) in corner sp, dc in next st, sk next st, ch 1, puff st in each ch 1 sp to end, hdc in last st. Turn
Round 4: ch 3, dc in each ch 1 sp and in each st to corner sp, (2 dc, ch 3, 2 dc) in corner sp, dc in each st and ch 1 sp to end, dc in last st. Turn
Round 5 – 8: repeat rounds 1 – 4.
Fasten off.
Count 11 st from beginning of row, place st marker, count 11 st from end of row, place 2nd st marker. Attach yarn around post of first st marker.
Repeat rows 1 – 8: 3 more times beginning each new section at st 11 from beginning and end of round. You will have a total of 4 sections for the wing.
Edging
Once you have 4 sections for wing, do not fasten off. Turn.
Row 1: ch 1, sc in same st, *ch 1, sc in next st*, repeat between * * to corner sp, (sc, ch 2, sc) in corner sp, *ch 1, sc in next st,* repeat between * * to end.
Fasten off.
Repeat wing section on the opposite side of the shawl.
Weave in ends.
Make two large tassels by using an 8” tall piece of cardboard with 70-80 wraps for each tassel.
Attach 1 tassel to each end of wrap.
Copyright 2026 Tonya Bush / Nana’s Crafty Home, LLC
Follow me on social media:
Social Media links:
Facebook: https://www.facebook.com/nanascraftyhome
Instagram: https://www.instagram.com/nanascraftyhome/
Pinterest: https://www.pinterest.com/nanascraftyhome/
YouTube: https://www.youtube.com/c/TonyaBush
Twitter: https://twitter.com/nanascraftyhome
Facebook Group: https://www.facebook.com/groups/829792060522798
Disclaimer: This pattern is for personal use or small-scale crafting. If you intend to sell the finished product in the EU, ensure it complies with the General Product Safety Regulation (EU) 2023/988, including safety, labeling, and traceability requirements.
 Hi! Thank you so much for being here! I am Tonya the designer behind Nana's Crafty Home. As a wife, mother, Nana of 9 & with 2 fur babies, my days are filled with love, laughter, hugs and yarn! Here you will find colorful and creative crochet designs for yourself or loved ones. My hope is that you will be inspired to learn and create along with me!
What a lovely shawl pattern. I like the colors you used.