
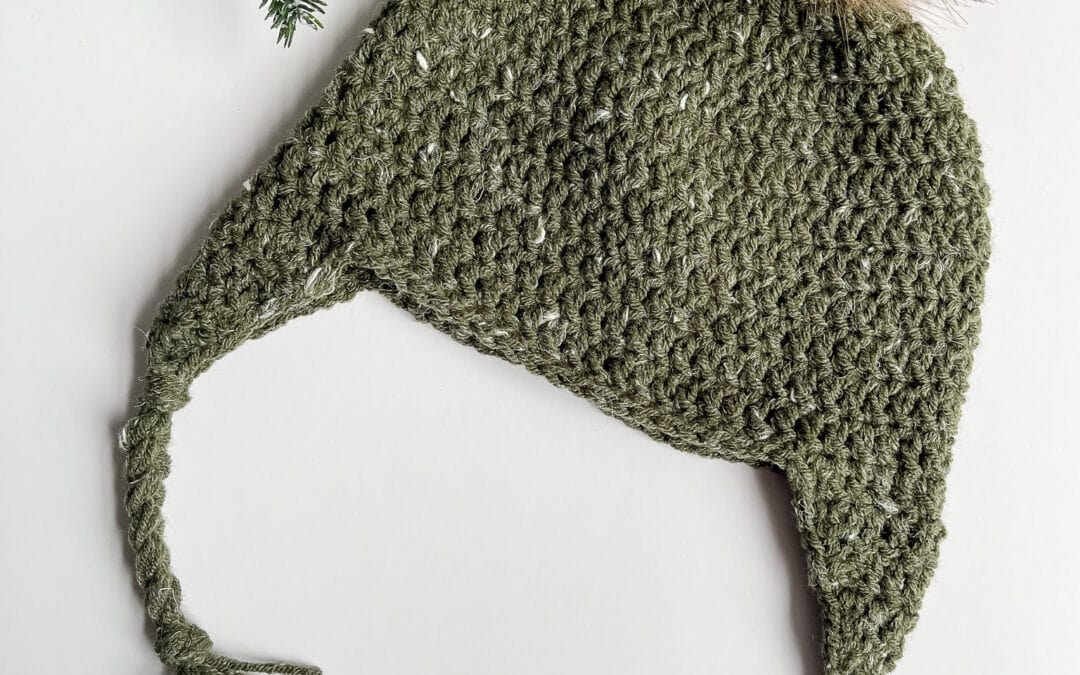
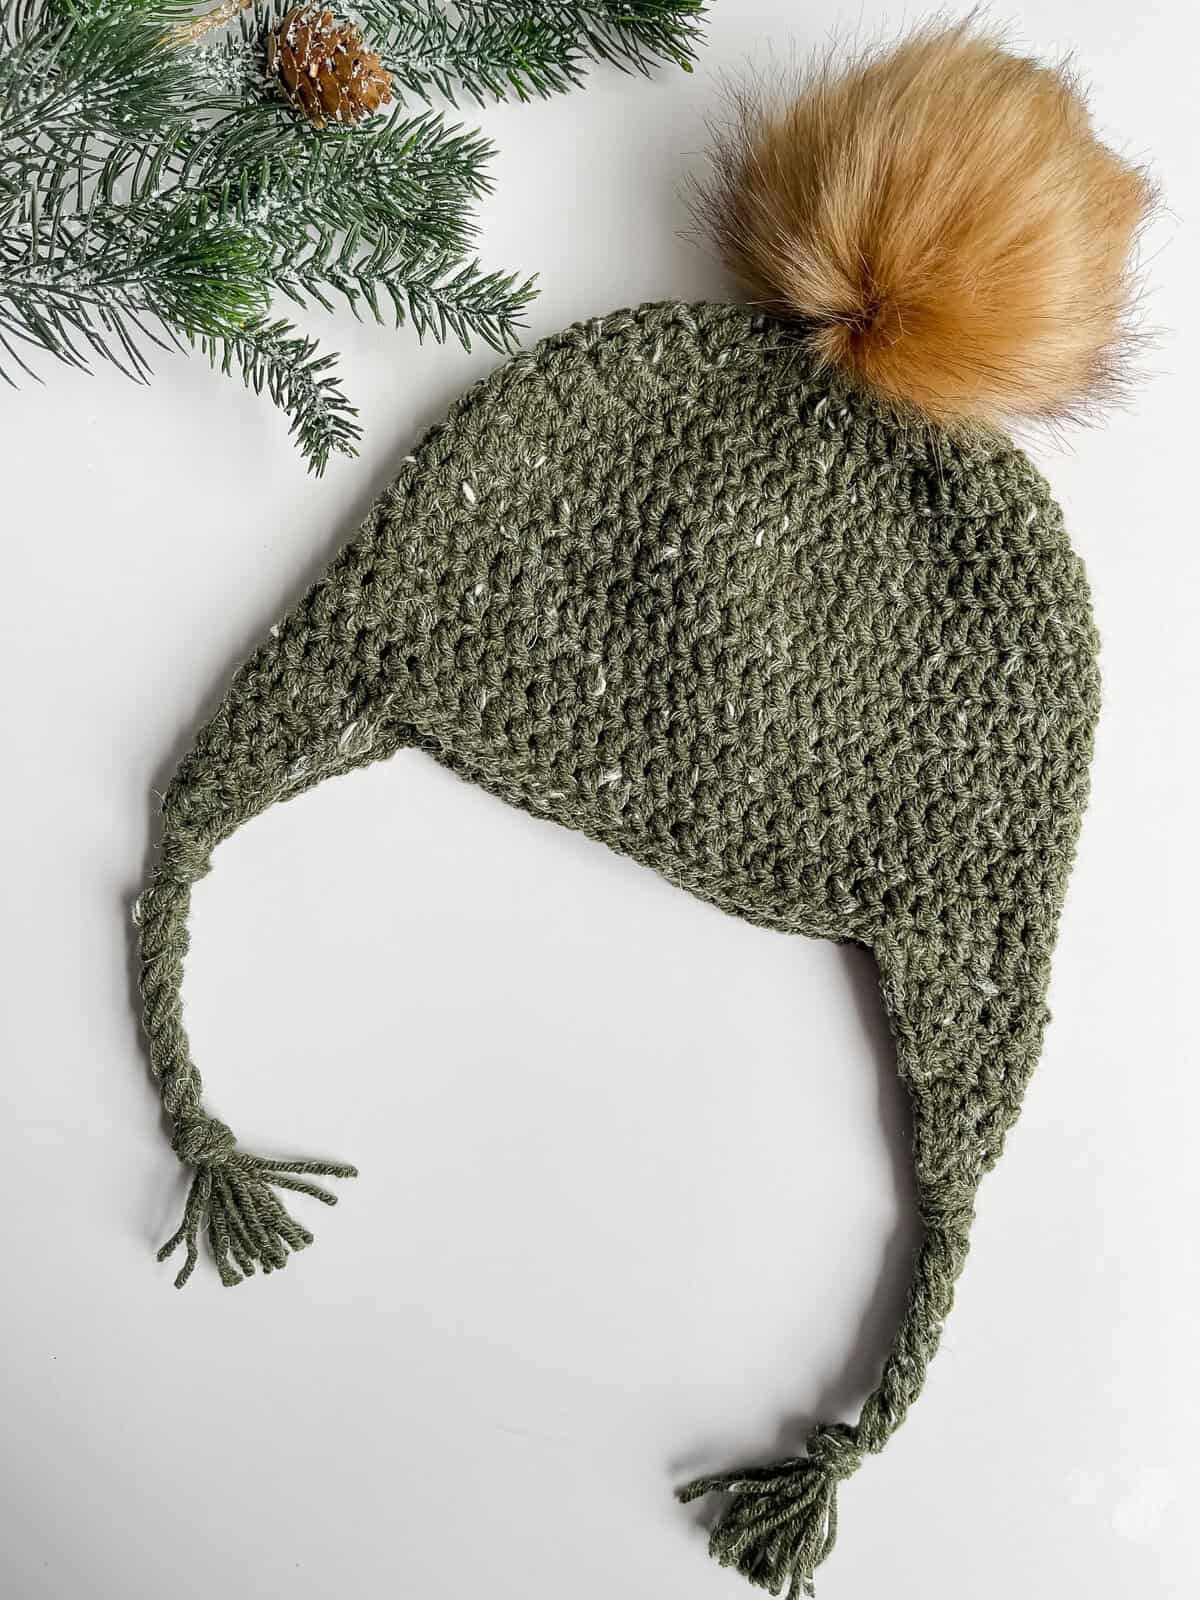
If you've been searching for the perfect crochet hat with ear flaps, I think you're going to fall in love with this one. The DC All Day Ear Flap Hat is exactly what its name promises: a (mostly!) all double crochet hat you can wear (or gift), with ear flaps that keep the wind out and the cozy in.
I designed this crochet hat with ear flaps to be as beginner-friendly as possible. Every stitch from the crown to the ear flaps is worked in double crochet, so if you can chain and double crochet, you can absolutely make this hat. Add just one round of single crochet stitches at the end to give your hat a polished finished look. It works up quickly, too, which makes it a great last-minute gift or a satisfying weekend project when you want to see real progress fast.
And since this pattern includes 10 sizes from preemie all the way up to adult large, you can make a whole matching set for the entire family.
Plus I have to tell you a little secret — this DC All Day Ear Flap Hat is going to be the base for a whole new collection I'm working on! I'm turning the squares from my Wildlife Animal Blanket into their own adorable ear flap hats, so keep an eye out for some seriously cute critter-inspired patterns coming your way soon. 🐼 🐨

Why You’ll Love This Crochet Hat with Ear Flaps
Beginner-Friendly: This earflap hat pattern is built on my DC All Day Crochet Beanie pattern which uses just double crochet, a simple dc decrease, (and a final round of single crochet for a professional finish), so it's a wonderful project if you're newer to crochet or want a relaxing, no-fuss make.
Quick to Stitch Up: Worked from the top down in simple increase rounds, this hat moves fast. You could easily finish an adult size in an evening.
10 Sizes Included: From Preemie 5 lb all the way through Adult Large, this pattern has you covered for the whole family — babies, toddlers, kids, teens, and grown-ups alike.
Cozy & Warm: The double crochet fabric is thick and warm, and the ear flaps add extra coverage for chilly walks, sledding days, or the school run.
Easy to Customize: Dress it up with a faux fur pom pom, add braided tassels to the ear flap ties, or keep it simple and streamlined — this crochet hat with ear flaps looks great every way.
Video Tutorial Available: Want to follow along stitch by stitch? I've got a full video tutorial on my YouTube channel to walk you through the pattern.
Grab the Crochet Ear Flap Hat Ad-Free Printable PDF
| Want an ad-free, printer-friendly version of the DC All Day Ear Flap Hat? The printable PDF is available in my shop! It’s perfectly formatted, easy to read while you’re working, and great for keeping in your pattern binder.👉 [LINK TO PDF ] If you love PDFs, you might want to check out my Lifetime Membership. It’s an awesome deal! Never pay for one of my PDFs again! |
You can also find it on Ravelry or Etsy!



Show Off Your Hats! 🧶
I can't wait to see yours! I've opened the Nana's Crafty Home Community, a free place where crocheters can gather, share their projects, ask questions, and cheer each other on.
The Nana's Crafty Home Community is free to join and to hang out with your crochet besties - share your makes, ask questions and see all of the fabulous crochet fun!
Looking for More Free Crochet Hat Patterns?
If you love this crochet hat with ear flaps, I have tons of free crochet hat patterns right here on the blog, from cozy winter beanies to fun seasonal accessories. And if you don’t want to miss a single new release – be sure to sign up for my free newsletter! You’ll get new patterns, tutorials, and crafty inspiration delivered straight to your inbox.
👉 Sign up for my free newsletter here!
Let’s Stay Connected!
I love seeing your finished makes – tag me on social media so I can cheer you on!
Check out these beginner-friendly free crochet patterns!


- 1. DC All Day Beanie free crochet pattern
- 2. DC All Day Triangle Shawl free crochet pattern
- 3. DC All Day Rectangle Blanket free crochet pattern

Basic Crochet Hat with Ear Flaps free pattern instructions
Pattern written in US crochet terminology
Supplies:
Yarn Bee Rustic Romantic Weight 4 / Medium (85% acrylic / 15% hemp)
- 5 lb Preemie 0.6 oz / 40 yards
- 6 lb Preemie 0.7 oz / 45 yards
- Newborn 0.8 oz / 55 yards
- 1 - 6 Months 1.0 oz / 65 yards
- 6 - 12 Months 1.2 oz / 80 yards
- Toddler 1.4 oz / 90 yards
- Child 1.6 oz / 105 yards
- Teen (Adult Small) 1.7 oz / 120 yards
- Adult Medium 1.9 oz / 130 yards
- Adult Large 2.2 oz / 145 yards
Size I (5.5 mm) crochet hook
Scissors
Tapestry Needle
Gauge: First 3 rounds = 3 1/2"
Abbreviations:
- Rnd(s) = round(s)
- RS = right side
- MC = magic circle
- ch(s) = chain(s)
- dc = double crochet
- sl st = slip stitch
- st(s) = stitch(es)
- dc2tog = double crochet 2 together (See Special Stitches Section Below)
- yo = yarn over
- sk = skip
- sc = single crochet
Special Stitches:
dc2tog: Yo, insert hook into next stitch and pull up a loop (three loops on hook), yo, pull through two loops (two loops on hook), yo, insert hook into next st, pull up a loop (four loops on hook), yo, pull through two loops (three loops on hook), yo, pull through remaining three loops on hook.
Pattern Notes:
- Hat is worked from the top-down.
- Ch-3 at beginning of each round counts as first stitch.
- Ch-2 at beginning of a row does not count as stitch.
Approximate finished sizes:
Recommended Tutorials:
Easiest Magic Circle Tutorial
DC All Day Beanie Tutorial
Add Ear Flaps to DC All Day Beanie Tutorial
Pattern Instructions
Start With the Base Hat
This ear flap pattern is built right on top of my DC All Day Beanie. Before you start on the ear flaps below, head over to the free base pattern and work your hat through the mid-ear instructions for your size:
https://nanascraftyhome.com/easy-crochet-hat-pattern-for-beginners/
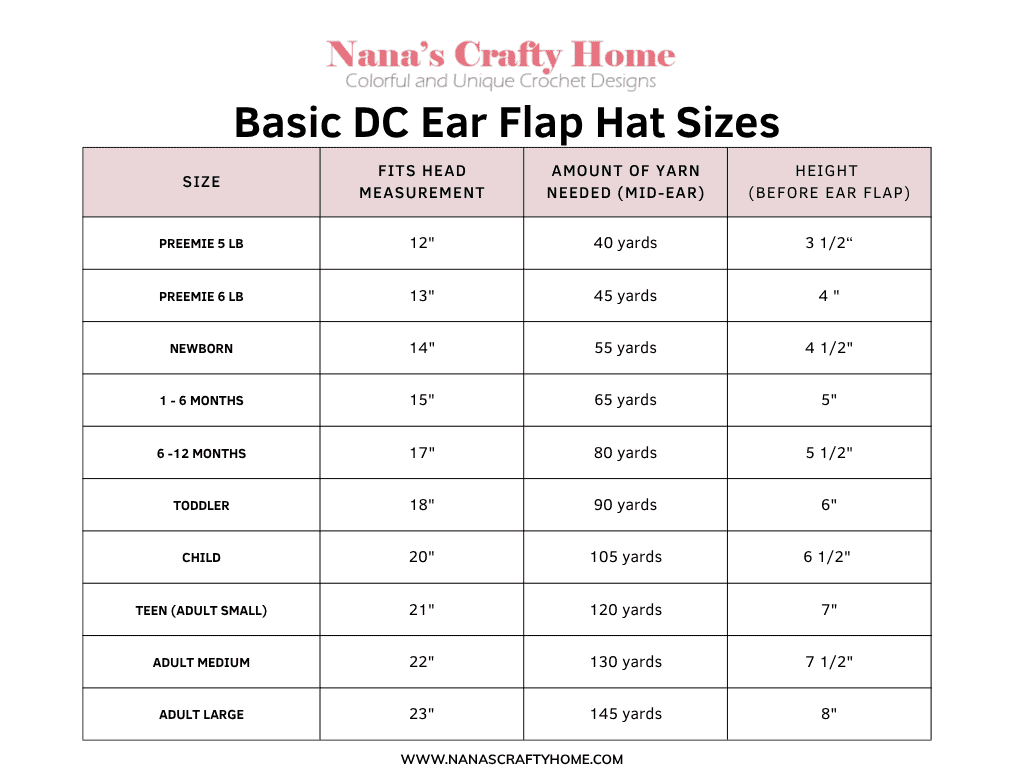
Use the chart below to find the mid-ear height for your size, then stop at the matching point in the DC All Day Beanie pattern. Once your hat is worked through mid-ear, fasten off, weave in your ends, and come right back here to add the ear flaps!
Ear Flap
Preemie 5 lb & Preemie 6 lb
With RS facing, locate the seam (first st of last round). Working in the same direction as your last round, skip 7 (Preemie 5 lb) or 8 (Preemie 6 lb) sts, join with sl st in next st.
Row 1: (RS) Ch 2 (does not count as st), 1 dc in same st, 1 dc in next 3 sts. Turn. (4)
Row 2: Ch 2, dc2tog x 2. (2)
Fasten off.
With RS facing, continuing in the same direction, skip next 16 (Preemie 5 lb) or 17 (Preemie 6 lb) sts, join with sl st in next st. Repeat instructions for second ear flap.
Do not fasten off. Turn.
Sc evenly around outside edge of hat, sl st in first st.
Fasten off, weave in ends.
Newborn, 1-6 Months & 6-12 Months
With RS facing, locate the seam (first st of last round). Working in the same direction as your last round, skip 7 (Newborn), 8 (1-6 months) or 9 (6-12 months) sts, join with sl st in next st.
Row 1: (RS) Ch 2 (does not count as st), 1 dc in same st, 1 dc in next 7 sts. Turn. (8)
Row 2: Ch 2, dc2tog, 1 dc in next 4 sts, dc2tog. Turn. (6)
Row 3: Ch 2, dc2tog, 1 dc in next 2 sts, dc2tog. Turn. (4)
Row 4: Ch 2, dc2tog x 2. (2)
Fasten off.
With RS facing, continuing in the same direction, sk next 15 (Newborn), 16 (1-6 months) or 17 (6-12 months) sts, join with sl st in next st. Repeat instructions for second ear flap.
Do not fasten off. Turn.
Sc evenly around outside edge of hat, sl st in first st.
Fasten off, weave in ends.
Toddler & Child
With RS facing, locate the seam (first st of last round). Working in the same direction as your last round, sk 9 (Toddler) or 10 (Child) sts, join with sl st in next st.
Row 1: (RS) Ch 2 (does not count as st), 1 dc in same st, 1 dc in next 9 sts. Turn. (10)
Row 2: Ch 2, dc2tog, 1 dc in next 6 sts, dc2tog. Turn. (8)
Row 3: Ch 2, dc2tog, 1 dc in next 4 sts, dc2tog. Turn. (6)
Row 4: Ch 2, dc2tog, 1 dc in next 2 sts, dc2tog. Turn. (4)
Row 5: Ch 2, dc2tog x 2. (2)
Fasten off.
With RS facing, continuing in the same direction, sk next 18 (Toddler) or 20 (Child) sts, join with sl st in next st. Repeat instructions for second ear flap.
Do not fasten off. Do NOT Turn.
Sc evenly around outside edge of hat, sl st in first st.
Fasten off, weave in ends
Teen, Adult Medium & Adult Large
With RS facing, locate the seam (first st of last round). Working in the same direction as your last round, sk 10 (Teen), 11 (Adult Medium) or 12 (Adult Large) sts, join with sl st in next st.
Row 1: (RS) Ch 2 (does not count as st), 1 dc in same st, 1 dc in next 11 sts. Turn. (12)
Row 2: Ch 2, dc2tog, 1 dc in next 8 sts, dc2tog. Turn. (10)
Row 3: Ch 2, dc2tog, 1 dc in next 6 sts, dc2tog. Turn. (8)
Row 4: Ch 2, dc2tog, 1 dc in next 4 sts, dc2tog. Turn. (6)
Row 5: Ch 2, dc2tog, 1 dc in next 2 sts, dc2tog. Turn. (4)
Row 6: Ch 2, dc2tog x 2. (2)
Fasten off.
With RS facing, continuing in the same direction, sk next 20 (Teen), 22 (Adult Medium) or 24 (Adult Large) sts, join with sl st in next st. Repeat instructions for second ear flap.
Do not fasten off. Turn.
Sc evenly around outside edge of hat, sl st in first st.
Fasten off, weave in ends.
Add tassels, pom poms or braids to end of each ear flap if desired.
Braided Tails
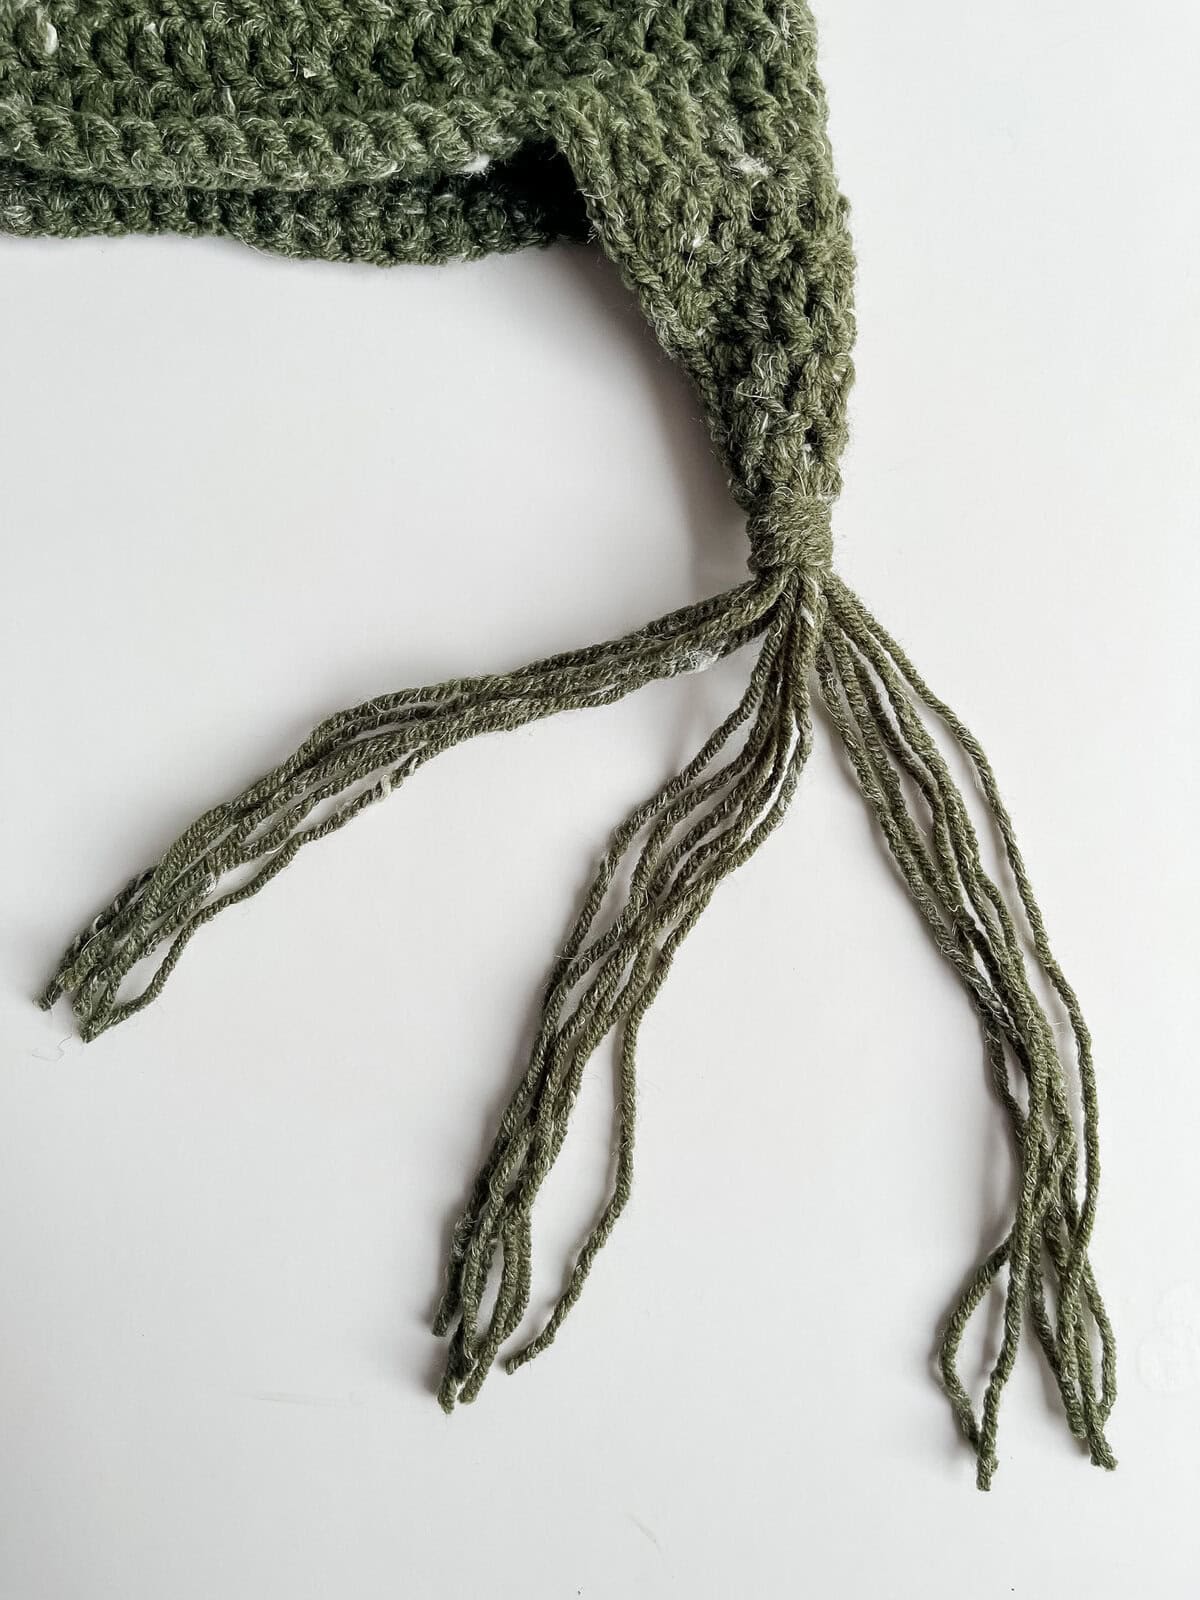
Cut 9 strands of yarn approximately 20 inches long. Pass through bottom edge of earflap and knot at edge of earflap. You will have 18 strands to braid with. To braid, separate yarn strands into 3 sections of 8 strands per section. Braid, knot and trim ends. Repeat for second braid.
Basically adding braids to your ear flap hat starts out by adding a long tassel to the end of the ear flap. I have photos below:

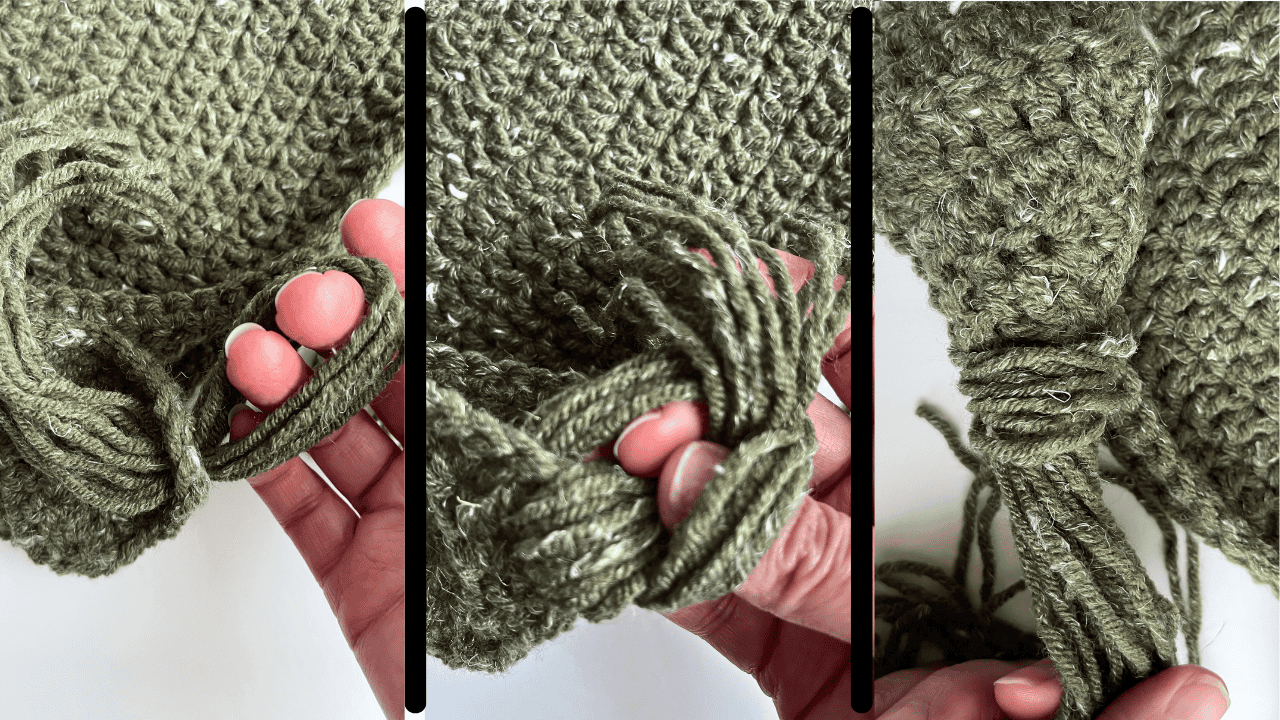
Once the tassels are added you will separate the yarn into 3 equal parts and braid:

Weave in remaining ends.
Copyright 2026 Tonya Bush / Nana’s Crafty Home, LLC.
Social Media links:
Community: https://community.raptive.com/nanascraftyhome
Facebook: https://www.facebook.com/nanascraftyhome
Instagram: https://www.instagram.com/nanascraftyhome/
Pinterest: https://www.pinterest.com/nanascraftyhome/
YouTube: https://www.youtube.com/c/TonyaBush
Twitter: https://twitter.com/nanascraftyhome
Facebook Group: https://www.facebook.com/groups/829792060522798
Sign up for my Newsletter: https://nanascraftyhome.com/sign-up-for-my-free-newsletter/
Disclaimer: This pattern is for personal use or small-scale crafting. If you intend to sell the finished product in the EU, ensure it complies with the General Product Safety Regulation (EU) 2023/988, including safety, labeling, and traceability requirements.

 Hi! Thank you so much for being here! I am Tonya the designer behind Nana's Crafty Home. As a wife, mother, Nana of 9 & with 2 fur babies, my days are filled with love, laughter, hugs and yarn! Here you will find colorful and creative crochet designs for yourself or loved ones. My hope is that you will be inspired to learn and create along with me!