This year, turn every gift card into a handmade hug with these adorable free Crochet Gift Card Holder patterns shaped like tiny Santa and elf hats!
Let’s be honest—slipping a gift card into an envelope feels a little… meh. It’s practical, yes, but where’s the magic? Where’s the “oh my gosh, this is adorable” moment when they open it? Enter these ridiculously cute crochet Santa and Elf Hat Gift Card Holders—the free pattern your holiday gifting has been waiting for!
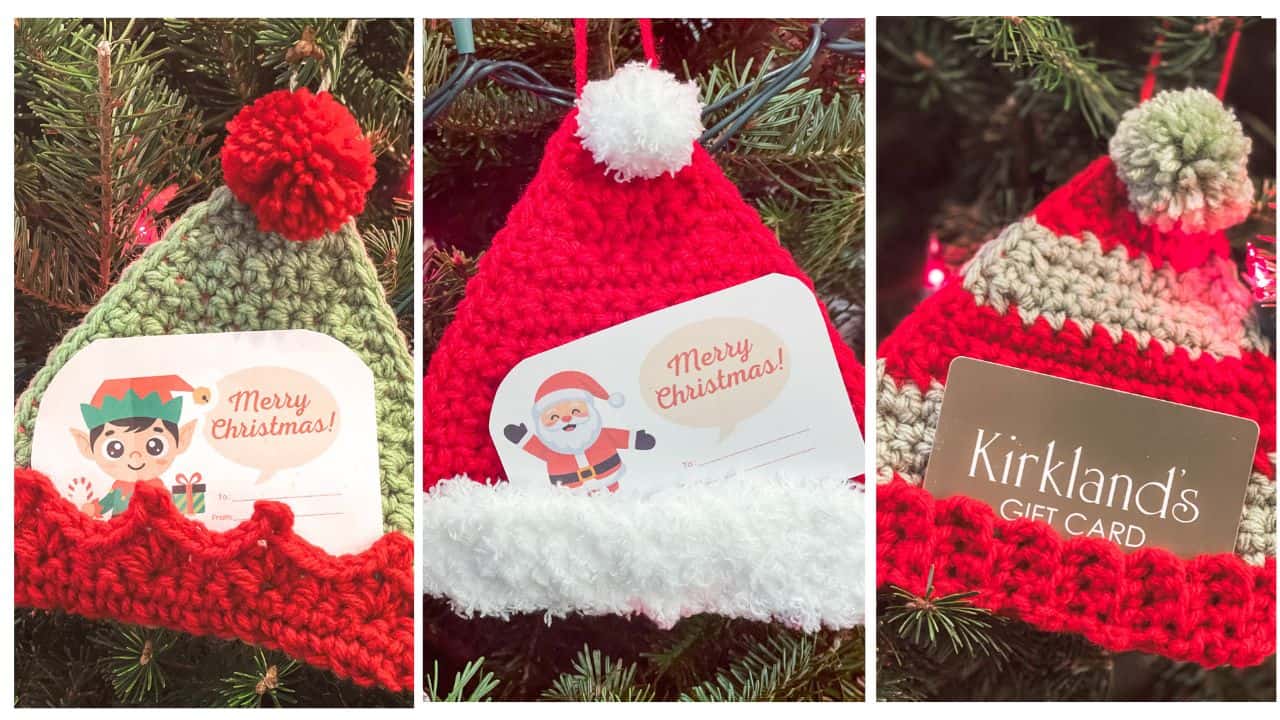
Featuring a sweet Santa hat with a fluffy white brim and pompom, a cheeky little elf hat complete with a pointy brim, or a striped option with ribbed brim, all designed to snugly hold a standard gift card (or even a sweet handwritten note). Hang them on the tree as ornaments or tie them onto a gift bag—either way, they turn an ordinary gift card into something handmade, heartfelt, and 100% cute!
These little hats work up lightning-fast (perfect for last-minute gifting), use only small amounts of yarn (hello, stash-busting!), and they’re beginner-friendly. Whether you’re making a whole army of them for teachers, coworkers, neighbors, or as a fun way to spread Christmas cheer, these tiny hats are guaranteed to make everyone smile before they even see what’s inside.


How to Make Crochet Gift Card Holders for Christmas
For the full free written pattern instructions for the Elf & Santa Hat Gift Card Holders, scroll down below. You can also purchase the ad-free PDF of this pattern for a small fee. Or, become a Lifetime Member and never pay for a PDF again!
These little cuties are completely customizable; think of it as a choose-your-own-adventure crochet project! You get to decide:
- Hat style: classic Santa, Gnome or mischievous Elf
- Color combo: Santa red, solid color with contrasting band, or festive red-and-green stripes.
- Band finish: ribbed band, pointy elf band or fluffy Santa fur!
Let’s walk through it step by step:
- The Hat Panel
The entire hat is worked flat in simple single crochet (sc) rows. You’ll start with a wide base and decrease with sc2tog stitches every few rows to shape the pointy top. When you reach the tip, sc evenly around the outside, then create a small hanging loop (perfect for turning it into an ornament!), then fasten off. - Choose & Attach Your Band
Pick your personality:- Classic ribbed band (worked in back-loop single crochet stitches)
- Pointy elf band
- Fluffy Santa fur (using fuzzy yarn for that cozy trim)
Sew the band along the side edge and bottom of the hat panel, leaving the top edge of the band open; this creates the little pocket that holds a standard gift card (or a folded note) perfectly.
- Add the Pom-Pom Magic
Make a tiny 1–1.5 inch pom-pom with leftover yarn or grab pre-made pom-poms from the craft store. Stitch it securely to the tip of the hat for that final “aww” factor. - Slip in your gift card or note, and watch faces light up! These work up iso quickly, making them the ultimate last-minute gift upgrade!
Bonus: If you grab the ad-free PDF version from my shop, I’ve included a printable page of darling Santa and Elf gift tags that tuck perfectly inside the holders; just print, sign, and slide in with the card!That’s it; so quick, so cute, and guaranteed to make your gift cards the most memorable ones on (or under!) the tree this year.
Wishing you the coziest, merriest Christmas filled with yarn and joy! 🎄
Happy crocheting,
Tonya

Supplies for the Crochet Gift Card Holder
*This post contains affiliate links. You can click on any yarn or material highlighted to purchase. I will receive a small commission if you purchase but it won’t cost you any extra! As an Amazon Associate I earn from qualifying purchases.
I made my Elf & Santa Hat gift cards with Red Heart Super Saver, which is a sturdy and economical medium worsted weight acrylic yarn. If you substitute with another yarn I do recommend a sturdier yarn that will hold its shape. These little hats are perfect for scrap busting your yarn stash!
I used my smallest Clover Pom Pom maker to make my yarn pom poms. Small pom poms can be easily found in craft stores which could be glued to the top of your hats. These glittery pom poms in Christmas colors from Amazon would be perfect!

Purchase the ad-free PDF
You can purchase the ad-free PDF of this Christmas Crochet Gift Card Holder Crochet Pattern Set for a small fee. You can purchase the individual pattern, or if you love PDFs, you might want to check out my Lifetime Membership. It’s an awesome deal! Never pay for one of my PDFs again!!
Paid PDF includes a page of printable Santa & Elf gift cards as well!


If you would like daily crochet inspiration be sure to follow me on Facebook, Instagram, Pinterest, YouTube, Twitter and Tumblr!
To get notified of my free crochet patterns and future giveaways, sign up for my newsletter. I never share or sell your information to third parties — it stays private!
You may also like the following free Christmas crochet patterns by Nana’s Crafty Home:


- 1. Set of 7 Christmas Appliques free crochet patterns
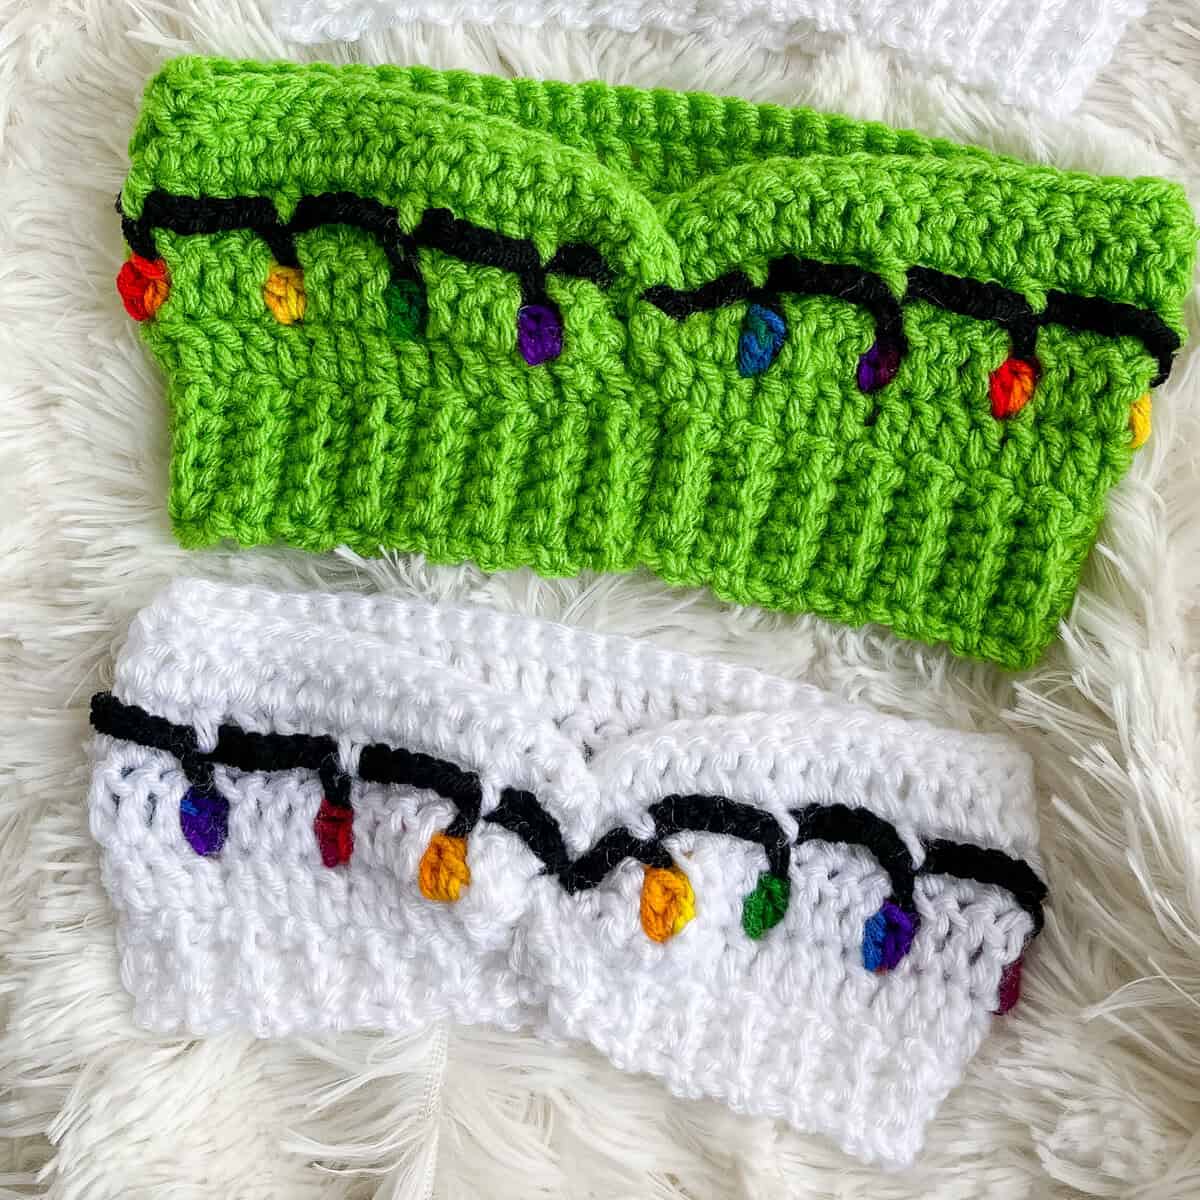
- 2. Christmas Lights Headband free crochet pattern
- 3. Set of Christmas Pony Tail Holders free crochet patterns
Elf & Santa Hat Crochet Gift Card Holder Set free crochet patterns
Pattern written in US crochet terminology
Supplies:
Red Heart Super Saver Weight 4/Medium (100% acrylic)
- Frosty Green (Green)
- Cherry Red (Red)
Bernat Pipsqueak Weight 5/Bulky
Whitey White (Fuzzy)
Size I (5.5 mm) crochet hook
Scissors
Stitch marker (optional)
Tapestry needle
Approximate finished size: 5” x 5”
Abbreviations:
- ch = chain
- sc = single crochet
- hdc = half double crochet
- st(s) = stitch(es)
- sk = skip
- sl st = slip stitch
- WS = wrong side
- RS = right side
- sc2tog = single crochet 2 sts together (see special stitches section below)
- yo = yarn over
- BLO = back loop only
- MC = magic circle
Special Stitches:
Picot: Ch 3, sl st in third ch from hook.
sc2tog = (insert hook into next st, yo and pull up a loop) twice, yo and pull through all 3 loops on hook.
Pattern Notes:
- Hat band of hat is worked separately and then sewn to front of panel.
Pattern Instructions
Hat Panel
With Green, ch 16.
Row 1: Sc in second ch from hook and in each ch to end. Turn. (15)
Rows 2 – 6: Ch 1, sc in each st. Turn.
Row 7: Ch 1, sc2tog, sc in each st to last 2 sts, sc2tog. Turn. (13)
Row 8: Ch 1, sc in each st. Turn.
Rows 9-18: Repeat rows 7 – 8. (3 sts at end of row 17)
Without fastening off, sc evenly around outside edge of hat. Note: To create an ornament, stitch a large loop at top of hat before fastening off.
Fasten off. Weave in ends.
Elf Hat Band
With Red, chain 18.
Row 1: (RS) Sc in second ch from hook and in each ch to end. Turn. (17)
Row 2: Ch 1, 1 sc in each st. Turn.
Row 3: Ch 1, sc in same st, *sk next st, (2 hdc, picot, 2 hdc) in next st, sk next st, sc in next st,* repeat from * to * to end. (4 ch-3 crowns)
Fasten off, leaving a long tail for sewing.
Sew the band along the side edge and bottom of the hat panel, leaving the top edge of the band open; this creates the little pocket that holds a standard gift card (or a folded note) perfectly.
Weave in ends.
Make one small pom pom approximately 1 3/8” size with red yarn. Attach pom pom to top of hat.
Striped Hat
Repeat instructions for Hat Panel with following color changes:
- Rows 1 – 2: Red
- Rows 3 – 6: Green
- Rows 7 – 10: Red
- Rows 11 – 14: Green
- Rows 15 – 18: Red
Single crochet evenly all the way around the outside edge, switching colors to line up with your stripes. Carry the unused color along the edge and crochet over it as you go
Ribbed Hat Band
Ch 4.
Row 1: Sc in second ch from hook and in each ch to end. Turn. (3)
Rows 2 – 14: Working in BLO, ch 1, sc in each st. Turn.
Fasten off, leaving a long tail for sewing.
With long tail left for sewing, sew hat band along bottom edge of hat.
Make one small pom pom approximately 1 3/8” size with green yarn. Attach pom pom to top of hat.
Santa Hat
With Red, repeat Hat Panel instructions.
Santa Hat Band
With Fuzzy, ch 18.
Row 1: Sc in second ch from hook and in each ch to end. Turn. (17)
Rows 2 – 3: Ch 1, 1 sc in each st. Turn.
Fasten off, leaving a long tail for sewing.
With long tail left for sewing, sew hat band along bottom edge of hat.
Pom Pom
With fuzzy, make MC.
Round 1: (RS) Ch 1, 6 sc in MC. (6)
Round 2: 2 sc in each st. (12)
Fasten off, leaving a long tail for sewing.
With long tail, weave through stitches of round 2, cinch and close pom pom. Sew to top of hat.
Gnome Santa Hat crochet pattern
With Red, repeat Hat Panel instructions.
Gnome Santa Hat Band
Row 1: Sc in second ch from hook and in each ch to end. Turn. (17)
Rows 2 – 5: Ch 1, 1 sc in each st. Turn.
Fasten off, leaving a long tail for sewing.
Nose (worked in seamless rounds)
With Cream make MC.
Round 1: Ch 1, 6 sc sts in MC, place a stitch marker in the first sc made. Do not join with sl st to first st after last sc st. (6)
Note: Continue moving up your stitch marker to the first st of each round.
Round 2: 2 sc in each st. (12)
Round 3: *1 sc in next 3 sts, 2 sc in next st,* repeat from * to * to end. (15)
Round 4: 1 sc in each st. (15)
Round 5: *1 sc in next 3 sts, 1 sc2tog,* repeat from * to * to end. (12)
Stuff nose
Round 6: Sc2tog x 6. Join with sl st to first st. (6).
Fasten off. Pull yarn through last st, sew yarn end through front loop of each of the 6 sts, pull tight to close the circle. Note: I recommend stuffing the nose right before the last sc2tog. Weave in end.
Beard Fringe
Cut approximately 38 pieces of 8” fringe in fuzzy yarn. With RS of hat facing up, insert hook into a bottom corner st and grab two strands of fringe. Pull up loop, insert fingers through loop just made and pull fringe tails through the loop. Gently tighten.
Attach fringe in every stitch along bottom edge of hat. Trim beard fringe as desired.
Sew nose to center bottom edge of hat above fringe.
Sew hat band to bottom edge of hat aligning bottom and side edges of band with hat.
Weave in any remaining ends.
Copyright 2025 Tonya Bush/Nana’s Crafty Home, LLC.
Social Media links:
Facebook: https://www.facebook.com/nanascraftyhome
Instagram: https://www.instagram.com/nanascraftyhome/
Pinterest: https://www.pinterest.com/nanascraftyhome/
YouTube: https://www.youtube.com/c/TonyaBush
Twitter: https://twitter.com/nanascraftyhome
Facebook Group: https://www.facebook.com/groups/829792060522798
Sign up for my Newsletter: https://nanascraftyhome.com/sign-up-for-my-free-newsletter/

 Hi! Thank you so much for being here! I am Tonya the designer behind Nana's Crafty Home. As a wife, mother, Nana of 9 & with 2 fur babies, my days are filled with love, laughter, hugs and yarn! Here you will find colorful and creative crochet designs for yourself or loved ones. My hope is that you will be inspired to learn and create along with me!
0 Comments