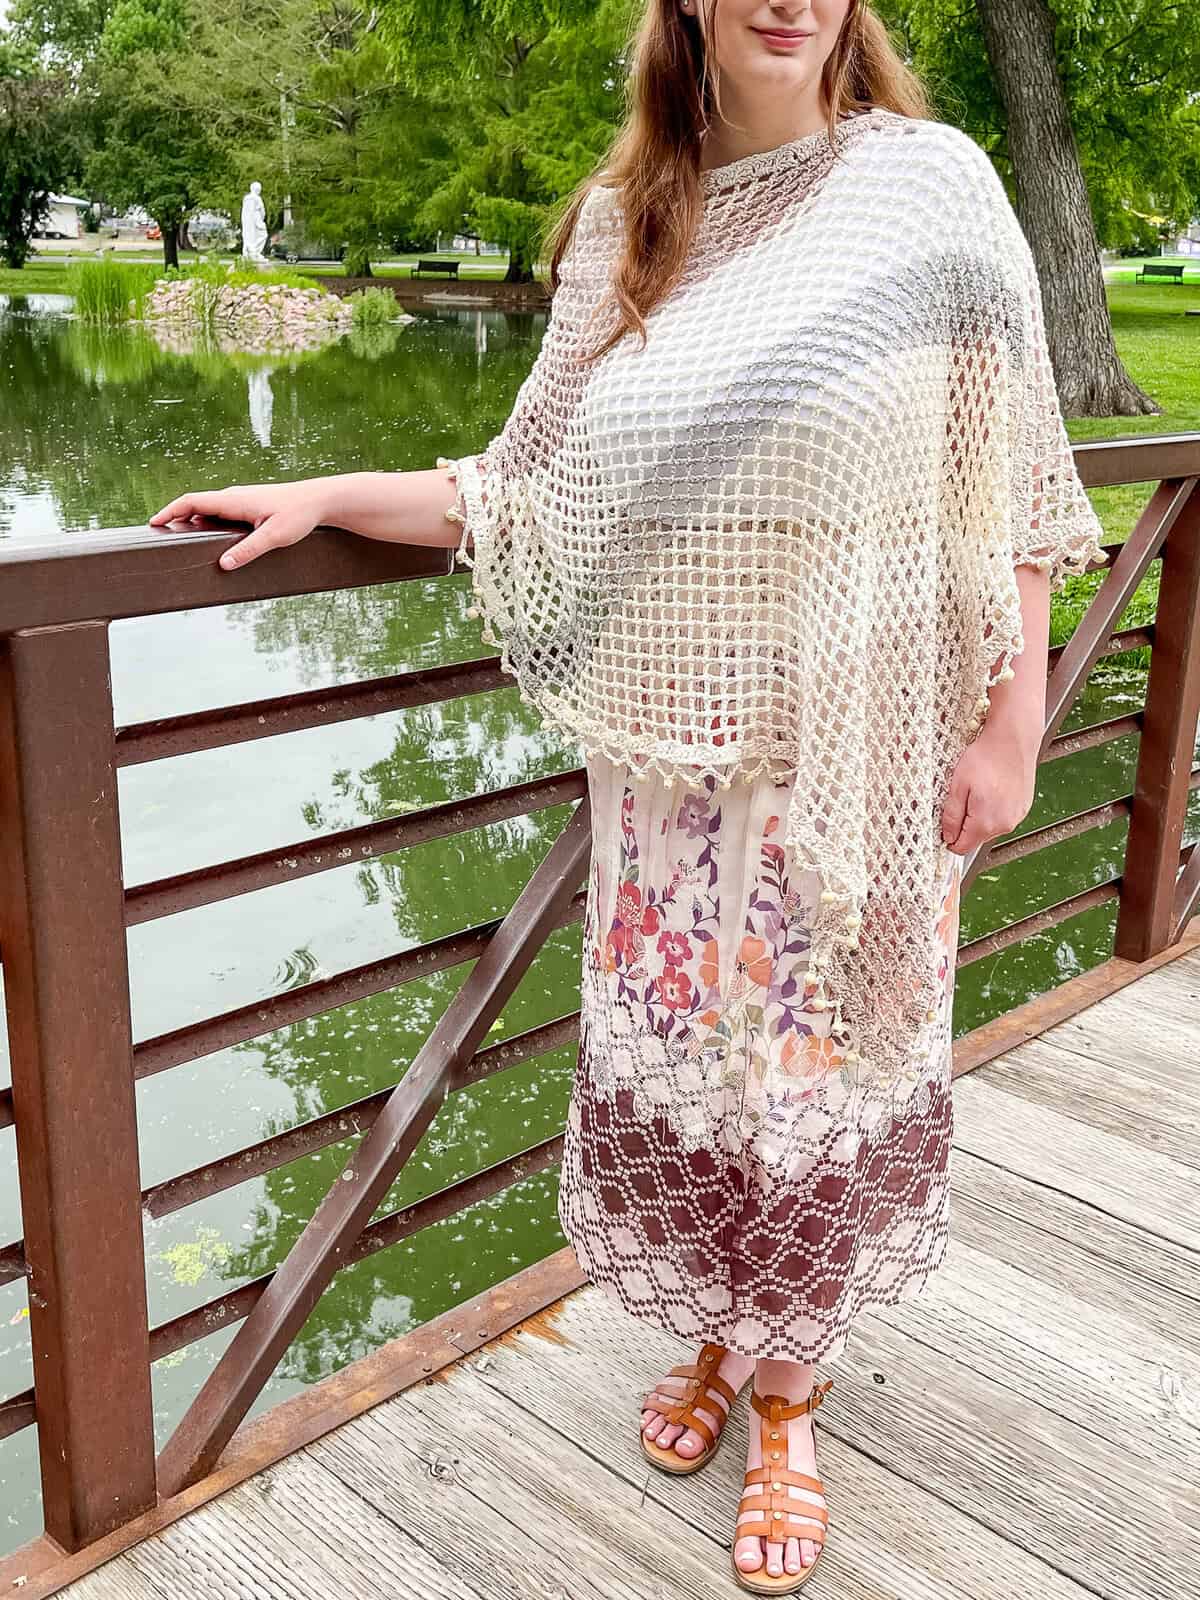
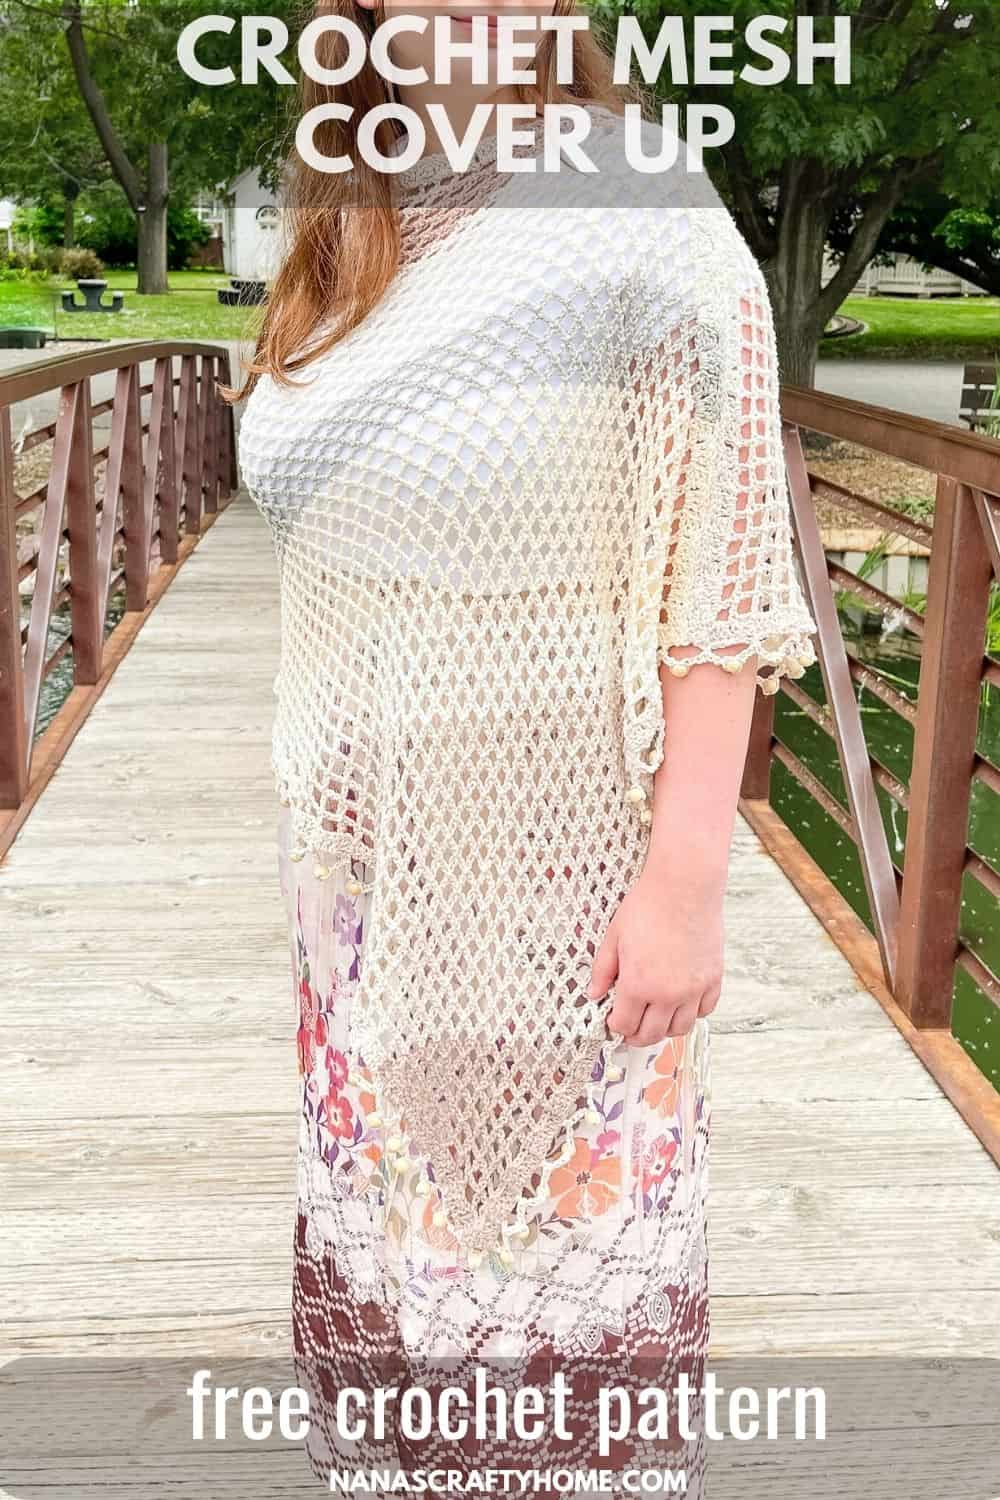
So excited to unveil the Bonjour Belle crochet cover up asymmetrical poncho, a stunning crochet cover-up that’s as enjoyable to crochet as it is to wear. Made from a single corner-to-corner (C2C) rectangle with a simple mesh crochet stitch worked on the bias, this crochet cover-up requires minimal seaming for an easy, relaxing make.
I chose a cotton blend self-striping yarn for effortless color changing, and added a charming wood bead fringe for a boho flair. Perfect for an evening stroll or a sunny beach day, the Bonjour Belle Poncho is your ideal lightweight crochet cover-up for chic, breezy style. A fabulous addition to your summer wardrobe!
This crochet cover-up, with its delicate mesh stitch and flowing asymmetrical design, drapes effortlessly transforming your summer beach ensemble into a vision of timeless elegance. The soft, self-striping cotton blend yarn echo the colors of the soft sands, while the wood bead fringe sways gently in the ocean breeze, whispering bohemian charm.
Ideal for a relaxed evening walk or as an attractive and flattering swimsuit cover, this poncho adds a stylish touch, enhancing your beach experience with effortless elegance.

How to Make a Crochet Cover Up
For the full written pattern instructions for the Bonjour Belle Cover Up, scroll down below. You can purchase the ad-free PDF of this poncho for a small fee. Or, become a Lifetime Member and never pay for a PDF again!

1. This light crochet cover up is made with the Mesh C2C Stitch also used for my Bonjour Belle Market Bag and the Blushing Moon Scarf. This easy corner to corner stitch works on the diagonal making it very easy to adjust for size!
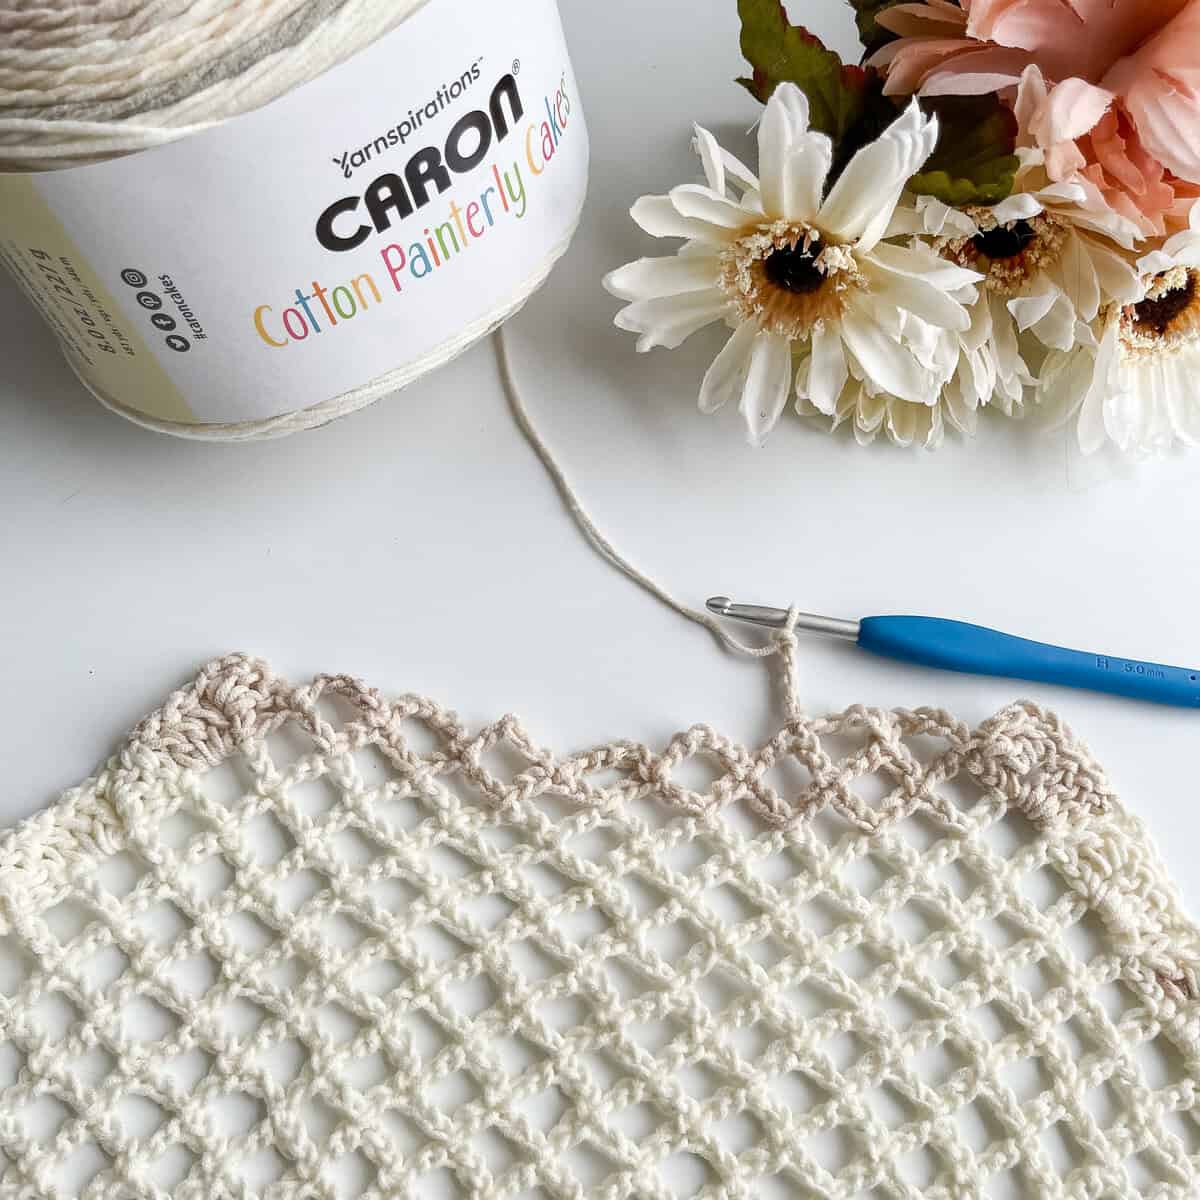
2. I have a complete photo and video stitch tutorial for this easy c2c mesh stitch. Such a perfect stitch for summer projects!
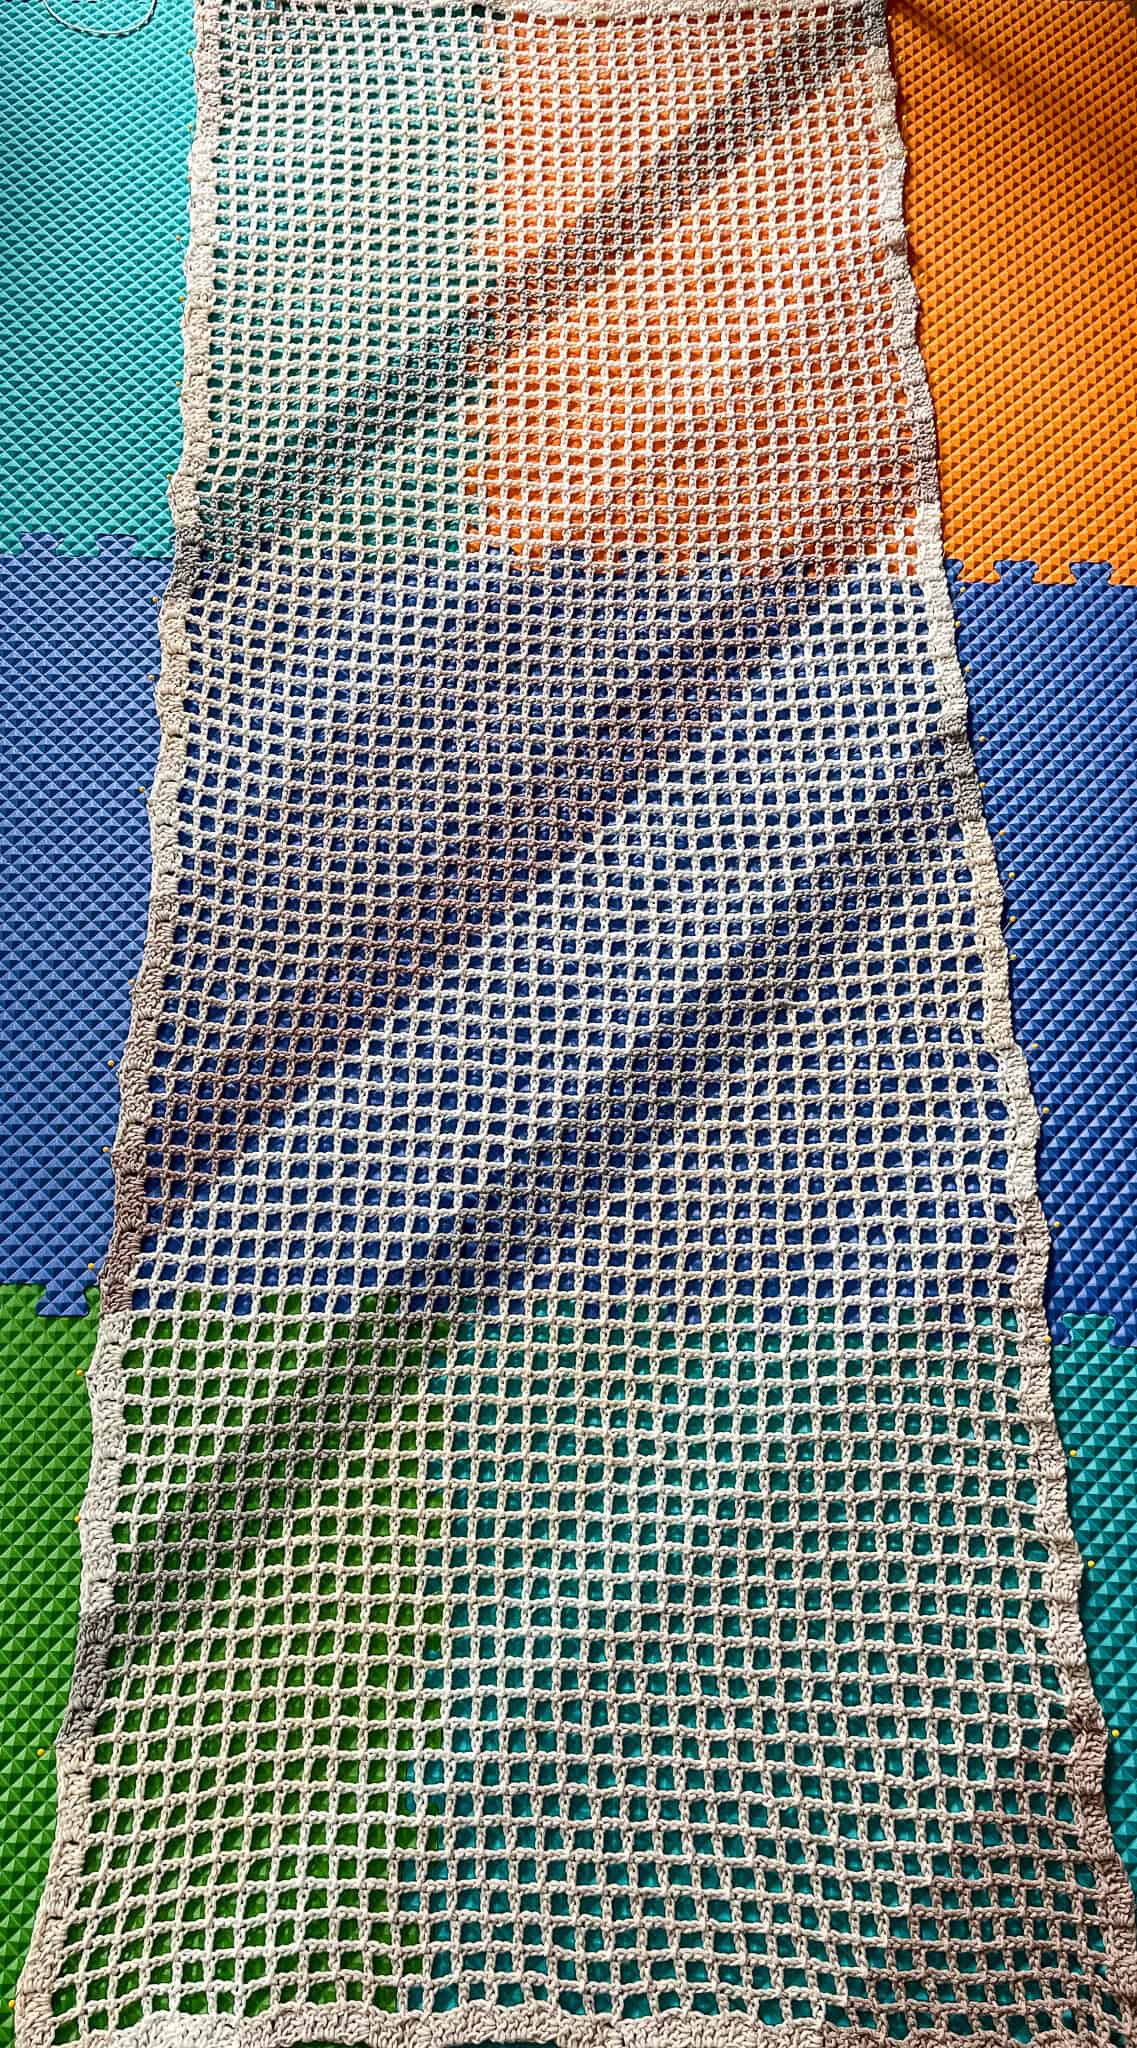
3. This pattern includes instructions for multiple sizes: Small/Medium, Large/1X, and 2X/3X. Want to customize the size? It’s easy! Since you’re crocheting a large rectangle, just measure the width as you go. Once it reaches your desired width, stop increasing on that edge. Then, keep increasing the height until it’s the length you want. When you’re ready, stop increasing and start decreasing on both edges until you finish.
4. Once your rectangle is complete, I do recommend a wet block to open up those stitches and create a more finished and polished look. I have a complete tutorial if you need some additional help on wet blocking your crochet.
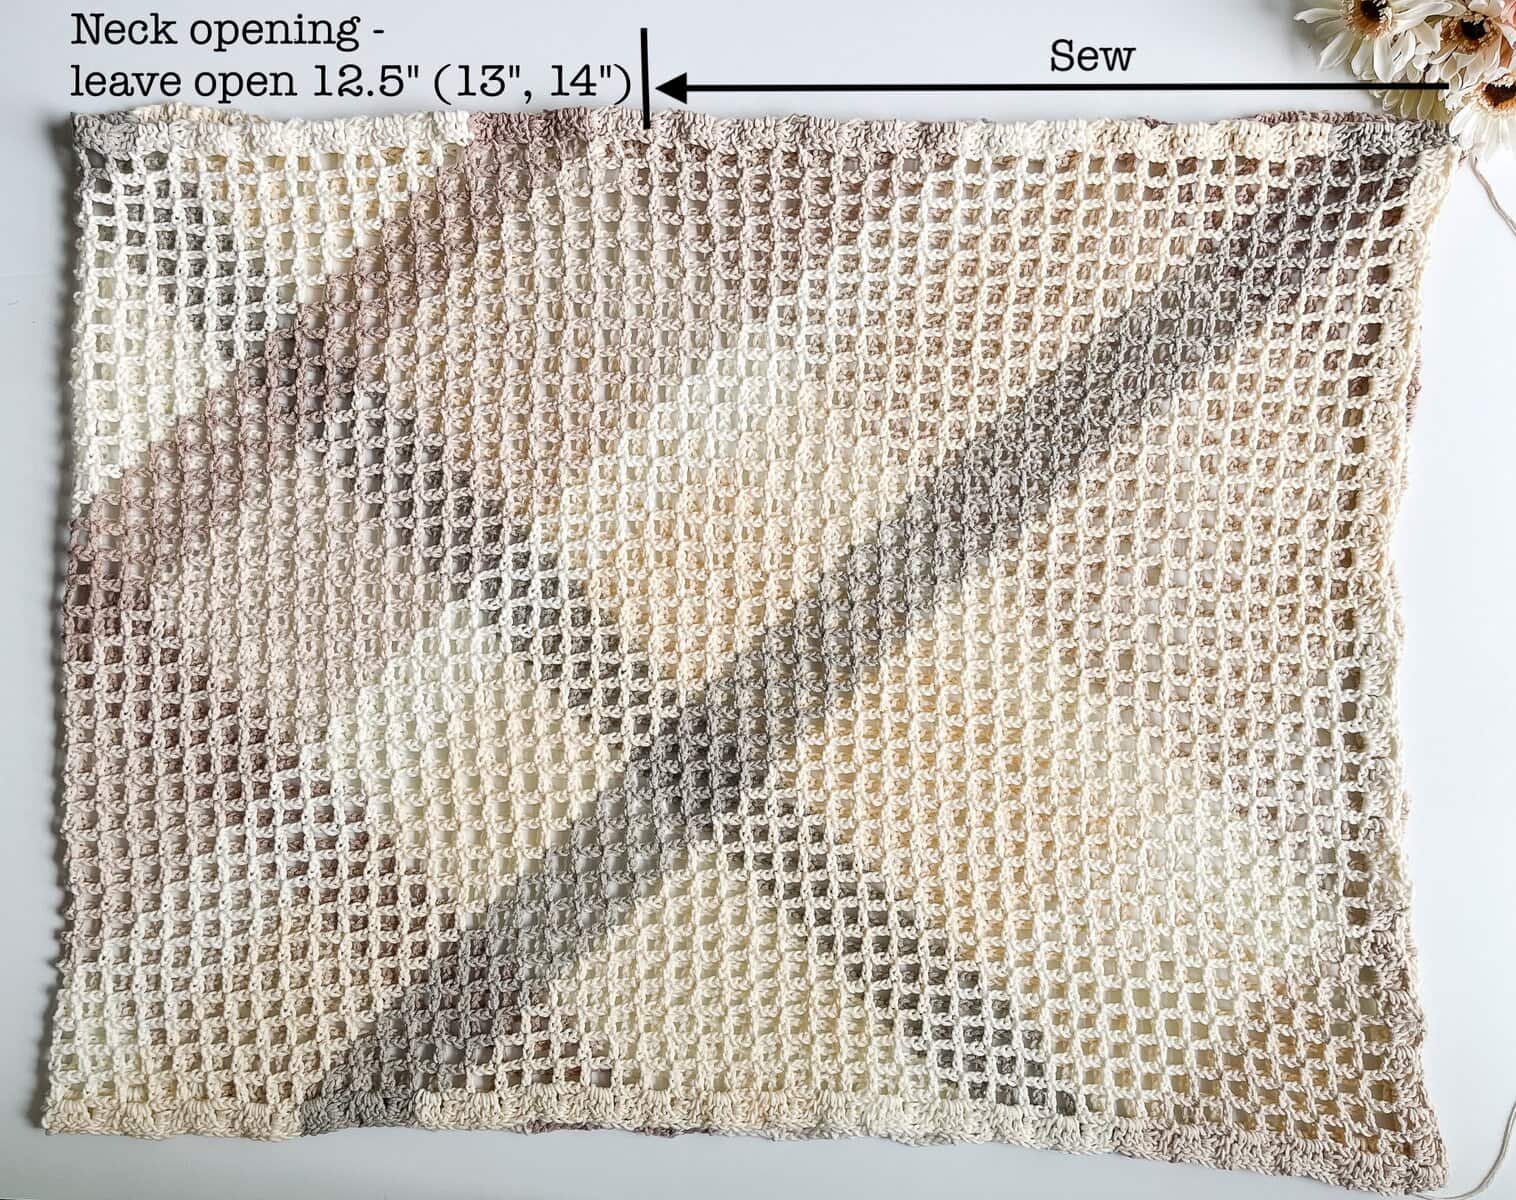
5. Once your rectangle is completely dry, fold the ends together and seam along the top edge, making sure to leave an opening for the neck.
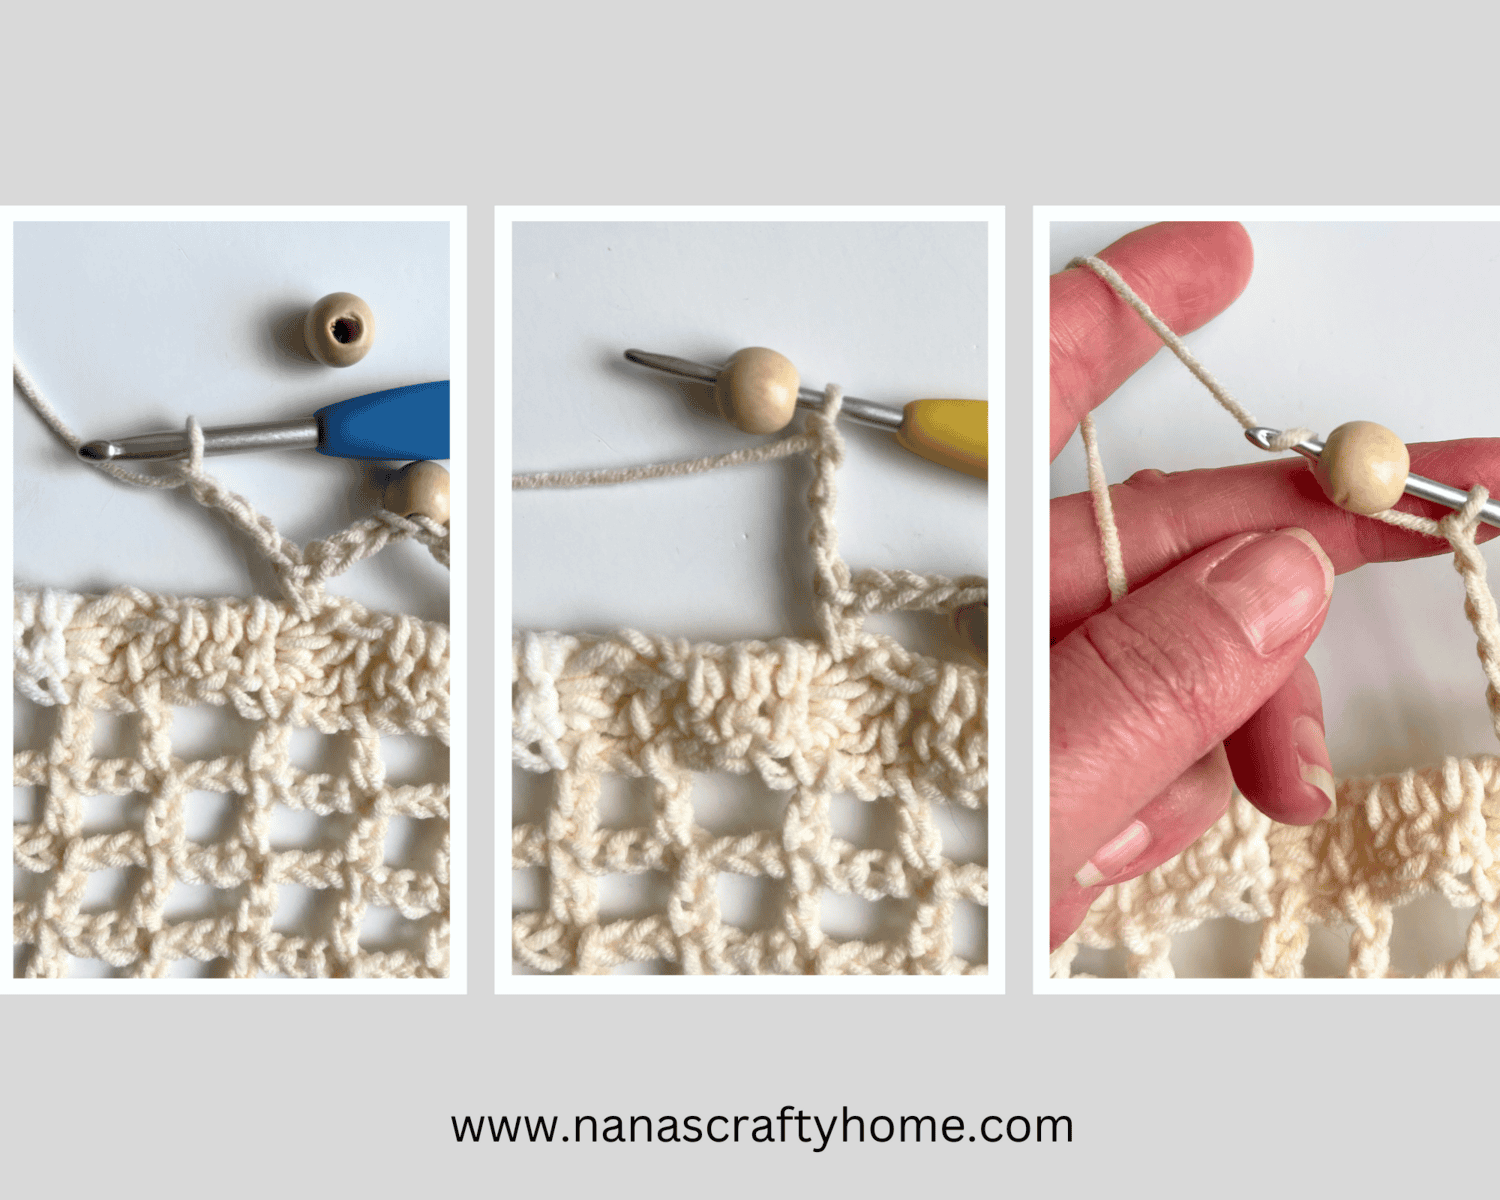
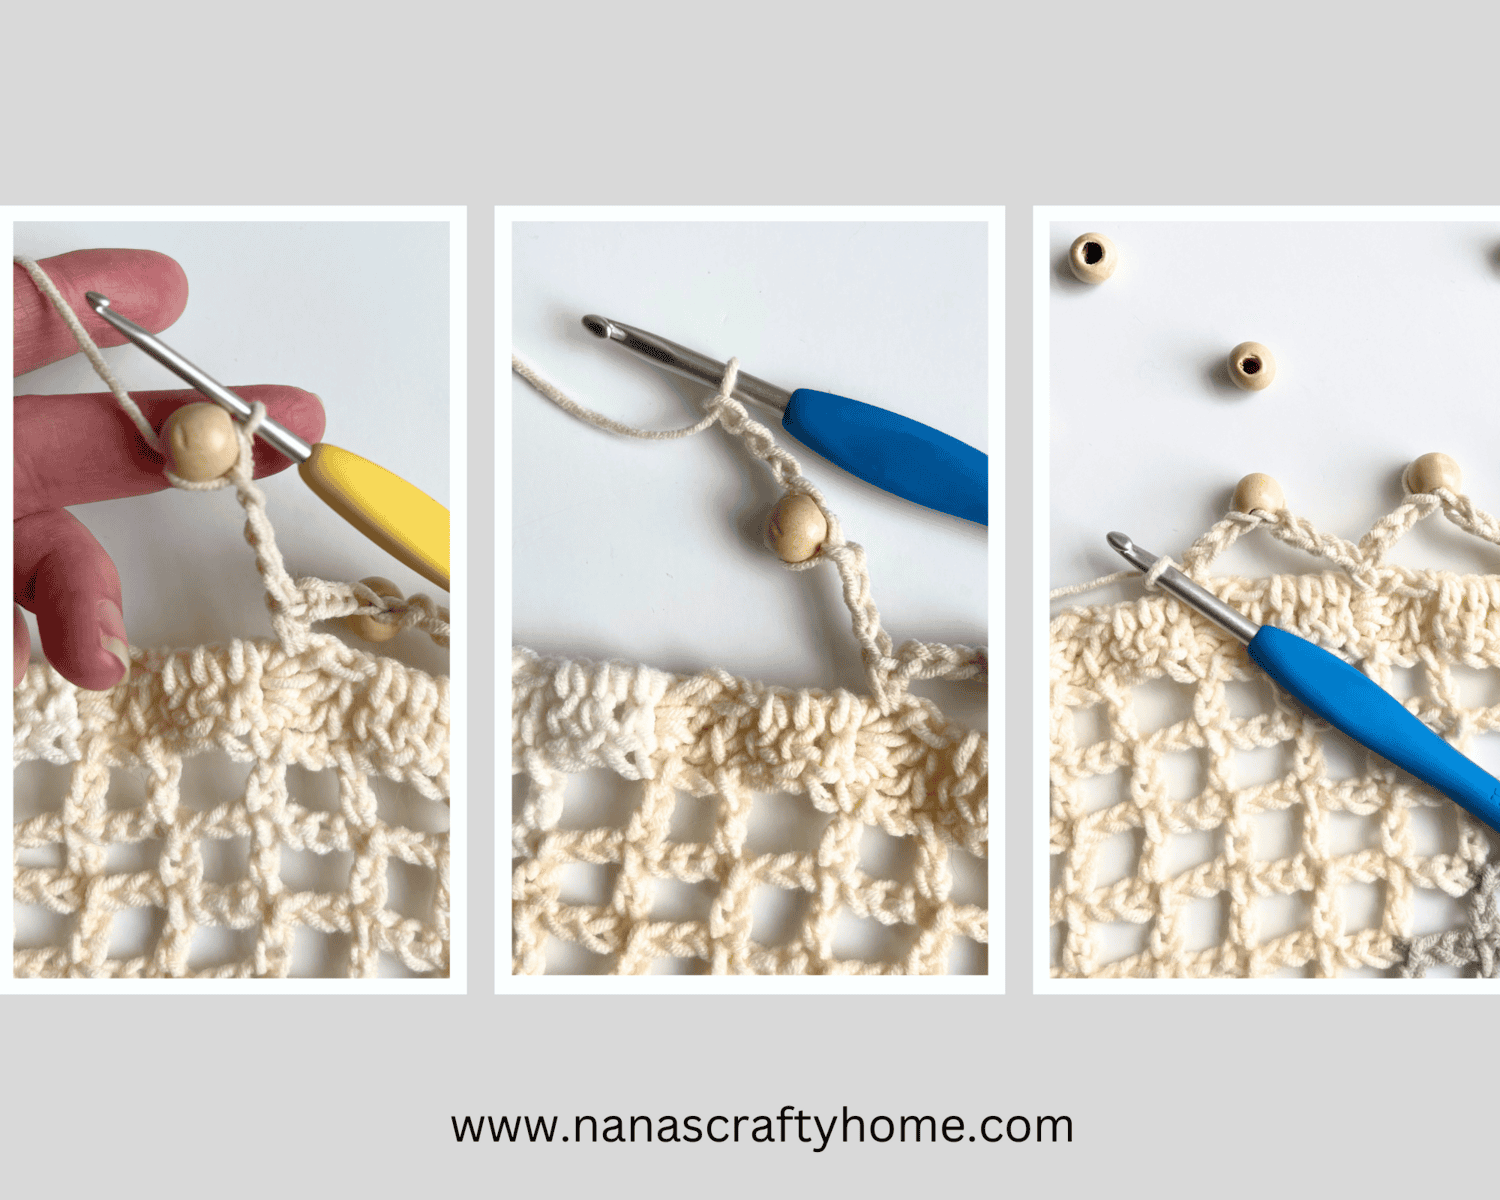
5. I added a simple wood bead edging along the entire bottom of the poncho for a bohemian vibe—totally optional! If you’re new to adding beads to your crochet, I kept it super easy, and I’ve put together a short video to guide you!
That’s it! I hope you enjoyed making this easy beach cover up with its unique and simple style.
Tonya 💕
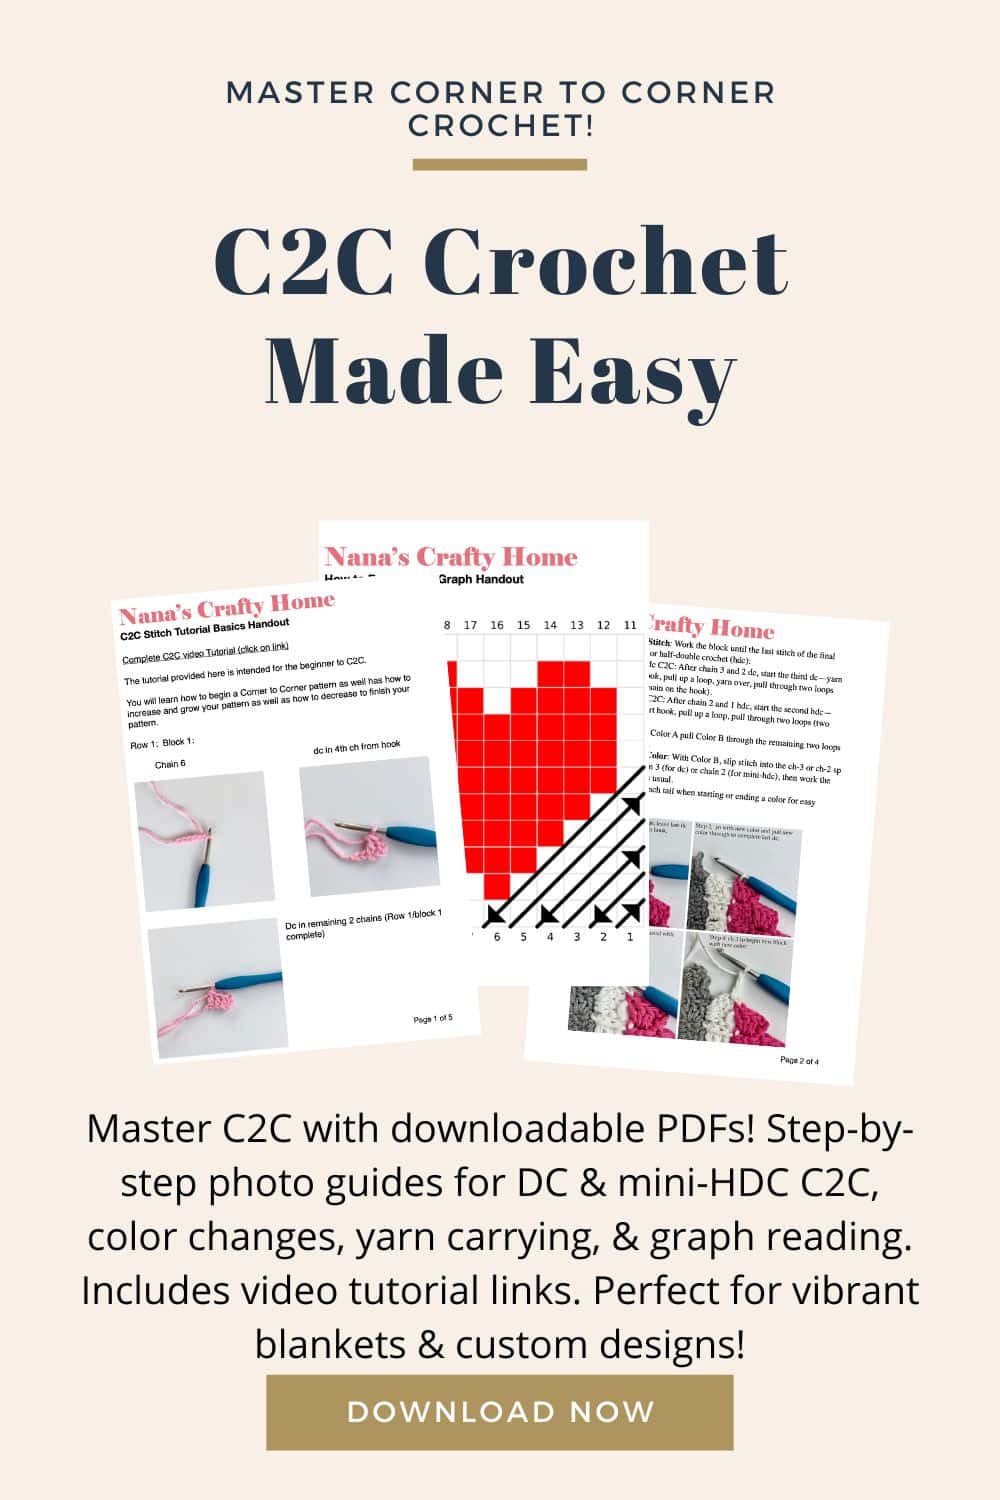
Ready to dig deeper into corner to corner crochet and master this versatile technique? Our Ultimate Guide to C2C Crochet: Techniques and Tips is the foundational c2c resource on the blog, packed with everything beginners and for those that need a c2c refresher! From standard DC and mini-HDC C2C basics to seamless color changes, efficient yarn carrying, custom graph design with Stitch Fiddle, and troubleshooting common issues, this comprehensive C2C crochet guide includes step-by-step tutorials, video links, and free pattern ideas to get you started. Whether you’re tackling your first C2C project or refining your skills, head over to the guide now for all the FREE essential C2C crochet tips and resources in one place!
New to corner to corner crochet? Check out my Ultimate Guide to C2C Crochet with all the resources you need to get started with this amazing crochet technique! Or, grab the bundle with all the printables, photo tutorials, video tutorials and instructions to master this crochet color work technique!
Bonjour Belle Poncho Supplies
*This post contains affiliate links. You can click on any yarn or material highlighted to purchase. I will receive a small commission if you purchase but it won’t cost you any extra! As an Amazon Associate I earn from qualifying purchases.
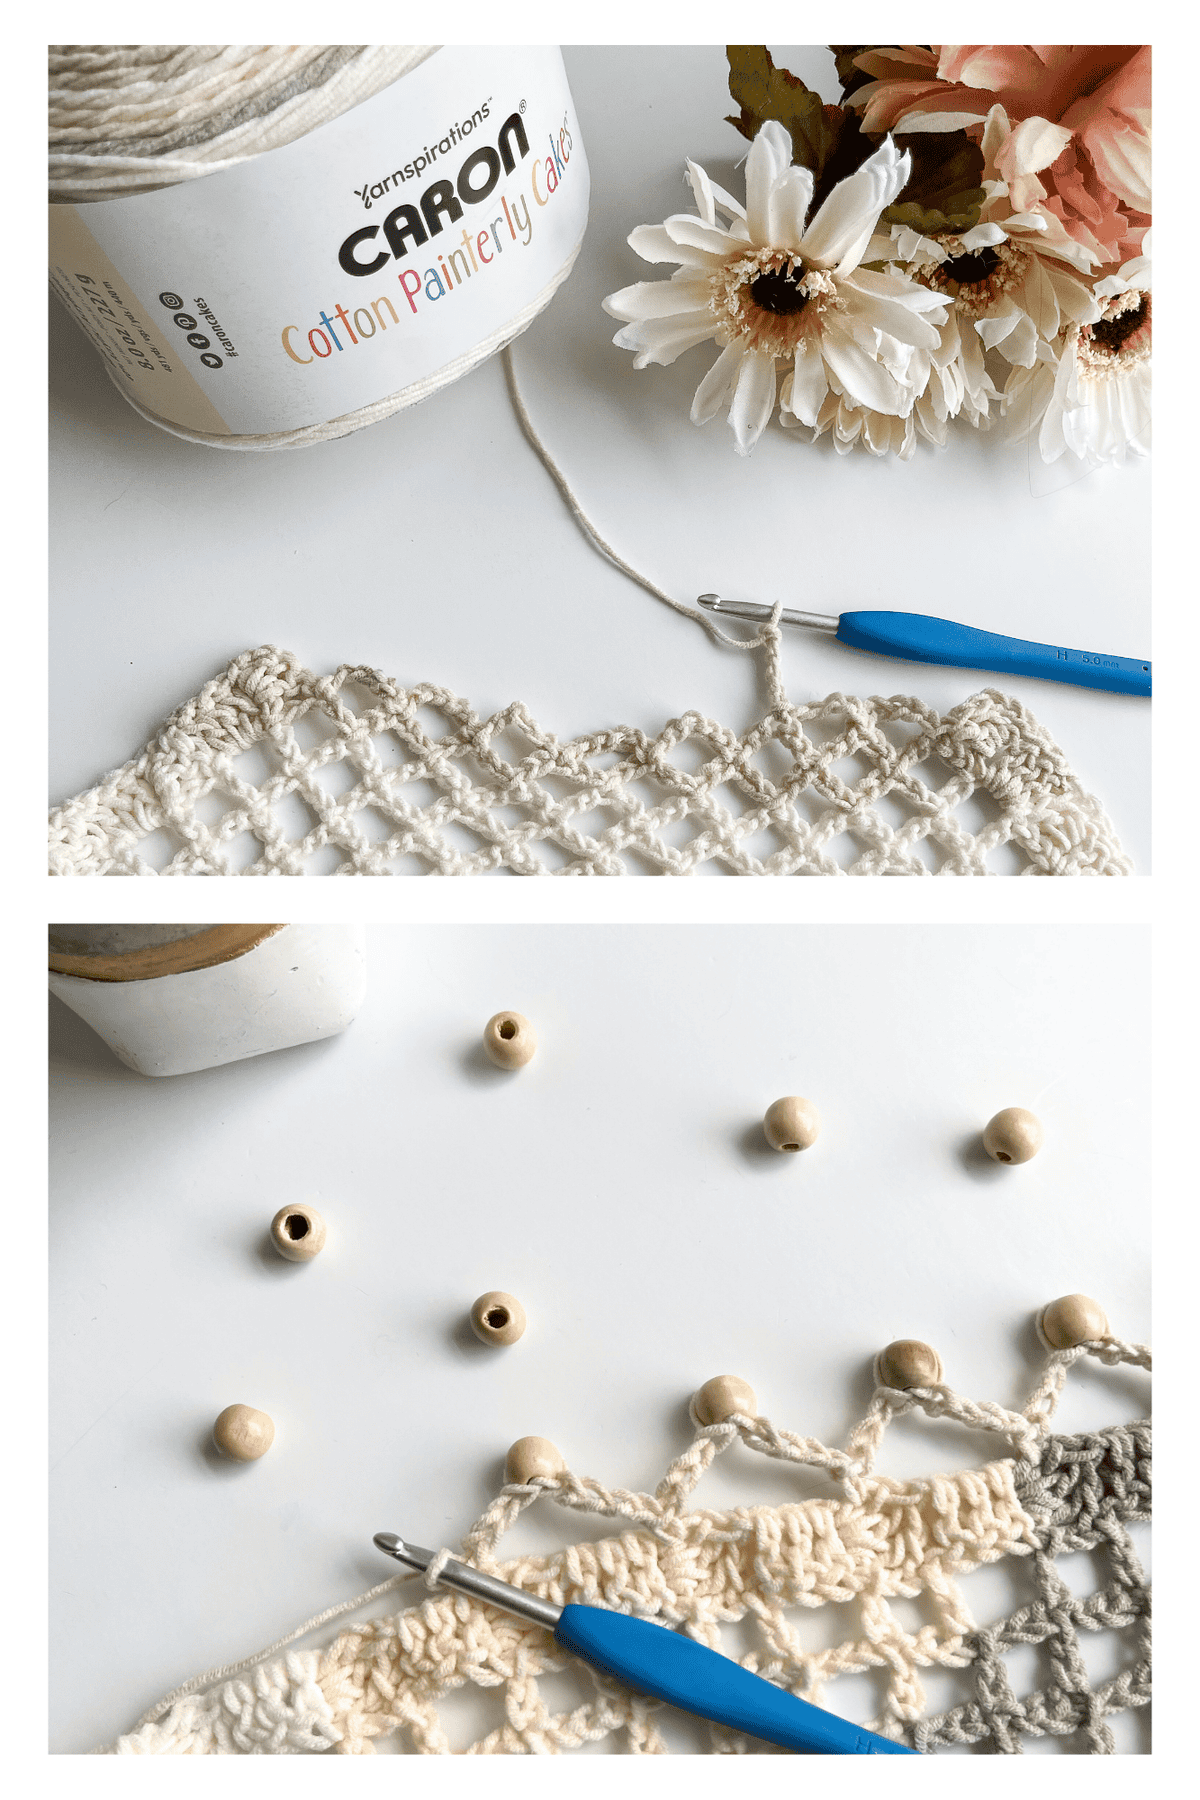
I used Caron Cotton Painterly Cakes which is a variation of my favorite Caron Cotton Cakes! These self-striping cakes are a medium worsted #4 weight cotton/acrylic blend. So soft and comfortable – a dream to work with! A mercerized cotton yarn would be a suitable substitute but it won’t be as soft as the blended yarn.
This is a pretty large rectangle so you will want to use a large mat for wet blocking. I purchased a set of interlocking children’s play mat tiles at Sam’s several years ago which work beautifully! You can find similar styles of mats on Amazon for an inexpensive option! Be sure to get stainless straight pins as well which won’t rust! If I didn’t already have these play mats I would definitely get these blocking board mats instead which are a bit pricier but have lines on the mat which would make it easier to keep a straight edge while blocking.
I used a small wood bead in a blonde color for the edging. However, you could use any bead you choose! You will want a bead with a larger hole to make it easier to insert your hook through the center. I used a smaller hook size to add the beads to my crochet edge.
This easy crochet cover up poncho pattern is also available as an ad-free, printable PDF! You can purchase the individual pattern, or if you love PDFs, you might want to check out my Lifetime Membership. It’s an awesome deal! Never pay for one of my PDFs again!! (Or, scroll down for the free version!)


If you would like daily crochet inspiration be sure to follow me on Facebook, Instagram, Pinterest, YouTube, Twitter and Tumblr!
To get notified of my free crochet patterns and future giveaways, sign up for my newsletter. I never share or sell your information to third parties — it stays private!
You may also like the following free lacy poncho crochet patterns at Nana’s Crafty Home!


- Bijou Asymmetrical Poncho free crochet pattern
- Midnight Madness Poncho free crochet pattern
- Whimsical Waves Poncho free crochet pattern
Bonjour Belle Poncho free written pattern instructions
Pattern written in US crochet terminology
Supplies:
Caron Cotton Painterly Cakes, Weight 4/Medium (60% cotton / 40% acrylic) 8.0 oz / 481 yds
(2 balls) Fresh Baked Bread 10 (11, 13) oz / 610 (670, 785) yards
Crochet hook size H (5.0 mm)
Crochet hook size E (3.5 mm) or size to fit through center of bead
Stitch Markers (4)
83 (S), 85 (L), 91 (2X) wood beads approximately 10 mm or .4″ in size
Scissors
Tapestry Needle
Approximate finished size:
- S/M: 24” wide x 60” long
- L/1X: 26” wide x 66” long
- 2X/3X: 28” wide x 68” long
Gauge: first 6 x 6 block rows = 4”
Recommended Tutorials:
Abbreviations:
- ch(s) = chain(s)
- dc = double crochet
- WS = wrong side
- RS = right side
- sl st = slip stitch
- sp = space
Pattern Notes:
- Poncho is worked in one long rectangle which is then folded and seamed together.
- Blocks refer to group of (ch 3, 3 dc) worked together.
- Instructions are written for size S/M with sizes L/1X, 2X/3X in parentheses as S/M (L/1X, 2X/3X), and when one number is given it pertains to all sizes.
Crochet Cover Up Pattern Instructions
Ch 6.
Row 1: (WS) 1 dc in fourth ch from hook and in each ch to end. (1 block)
Row 2: (RS) Ch 6, dc in fourth ch from hook and in next 2 chs, flip row 1 block to sl st to top of ch-3 from last block of row 1, ch 3, 3 dc in ch-3 sp. (2 blocks)
Row 3: Ch 6, dc in fourth ch from hook and in next 2 chs, flip work to sl st to top of ch-3 from last block of row 2, ch 5, sl st to top of ch-3 from first block of row 2, ch 3, 3 dc in ch-3 sp. (2 blocks + 1 ch-5 sp)
Row 4: Ch 6, dc in fourth ch from hook and in next 2 chs, flip work to sl st to top of last block made in row 3, ch 5, sl st in third ch of ch-5 from previous row, ch 5, sl st to top of ch-3 from next block, ch 3, 3 dc in ch-3 sp. (2 blocks + 2 ch-5 sp)
Row 5 (increase): Ch 6, dc in fourth ch from hook and in next 2 chs, flip work to sl st to top of ch-3 of next block, ch 5, *sl st in third ch of ch-5 from previous row, ch 5,* repeat from * to * to last block, sl st to top of ch-3 of last block, ch 3, 3 dc in ch-3 sp. (2 blocks + 3 ch-5 sp)
Row 6 – 34 (37, 40): Continue repeating increase row.
Row 35 (38, 41) (decrease one side only): Turn, sl st in next 2 sts and in top of ch-3, ch 3, 2 dc in ch-3 sp, sl st in third ch of ch-5 from previous row, *ch 5, sl st in third ch of ch-5 from previous row,* repeat from * to * to last block, ch 5, sl st to top of ch-3 of last block, ch 3, 3 dc in ch-3 sp. Note: you are only working 2 dc in the ch-3 sp of the first block of the decrease rows as the skipped chains from the first ch-5 slip stitch will line up and provide the third “dc” of your block.
Row 36 (39, 42) (increase one side only): Ch 6, dc in fourth ch from hook and in next 2 chs, flip work to sl st to top of ch-3 of next block, *ch 5, sl st in third ch of ch-5 from previous row,* repeat from * to * to last block, ch 3, 3 dc in remaining ch-2 sp of last ch-5 sp, sl st to ch-3 of last block.
Rows 37 (40, 43) – 85 (93, 96): Continue repeating previous 2 rows alternating decrease and increase rows.
Rows 86 (94, 97): (decrease both sides): Turn, sl st in next 2 sts and in top of ch-3, ch 3, 2 dc in ch-3 sp, sl st in third ch of ch-5 from previous row, *ch 5, sl st in third ch of ch-5 from previous row,* repeat from * to * to last block, ch 3, 3 dc in remaining ch-2 sp of last ch-5 sp, sl st to ch-3 of last block.
Rows 87 (95, 98) – 117 (129, 134): Continue decreasing on both sides until all ch-5 sps have been used.
Row 118 (130, 135) (final row): Turn, sl st in next 2 sts and in top of ch-3, ch 3, 3 dc in ch-3 sp, sl st to ch-3 sp of block from previous row.
Fasten off. Weave in ends.
I recommend a wet block of your rectangle prior to seaming.
Fold rectangle panel in 2 equal parts. Pin together with stitch markers. Beginning at side edge of row 1, sew shoulder seam, leaving approximately 12.5 (13, 14) inches unsewn for neck opening.
Beaded Edge
Attach yarn to outside bottom edge at any corner, ch 1, sc in same st, *ch 4, change to smaller hook size, insert hook into bead, pull through a loop and through loop on hook, change to larger hook size, ch 4, sk 2 blocks on edge of poncho, sc at end of second block,* repeat from * to * around outside edge of poncho, sl st to first st.
Fasten off and weave in ends.
Copyright 2025 Tonya Bush/Nana’s Crafty Home, LLC.
Social Media links:
Facebook: https://www.facebook.com/nanascraftyhome
Instagram: https://www.instagram.com/nanascraftyhome/
Pinterest: https://www.pinterest.com/nanascraftyhome/
YouTube: https://www.youtube.com/c/TonyaBush
Twitter: https://twitter.com/nanascraftyhome
Facebook Group: https://www.facebook.com/groups/829792060522798
Sign up for my Newsletter: https://nanascraftyhome.com/sign-up-for-my-free-newsletter/
 Hi! Thank you so much for being here! I am Tonya the designer behind Nana's Crafty Home. As a wife, mother, Nana of 9 & with 2 fur babies, my days are filled with love, laughter, hugs and yarn! Here you will find colorful and creative crochet designs for yourself or loved ones. My hope is that you will be inspired to learn and create along with me!