A crochet Easter basket pattern for all the little bunny lovers!
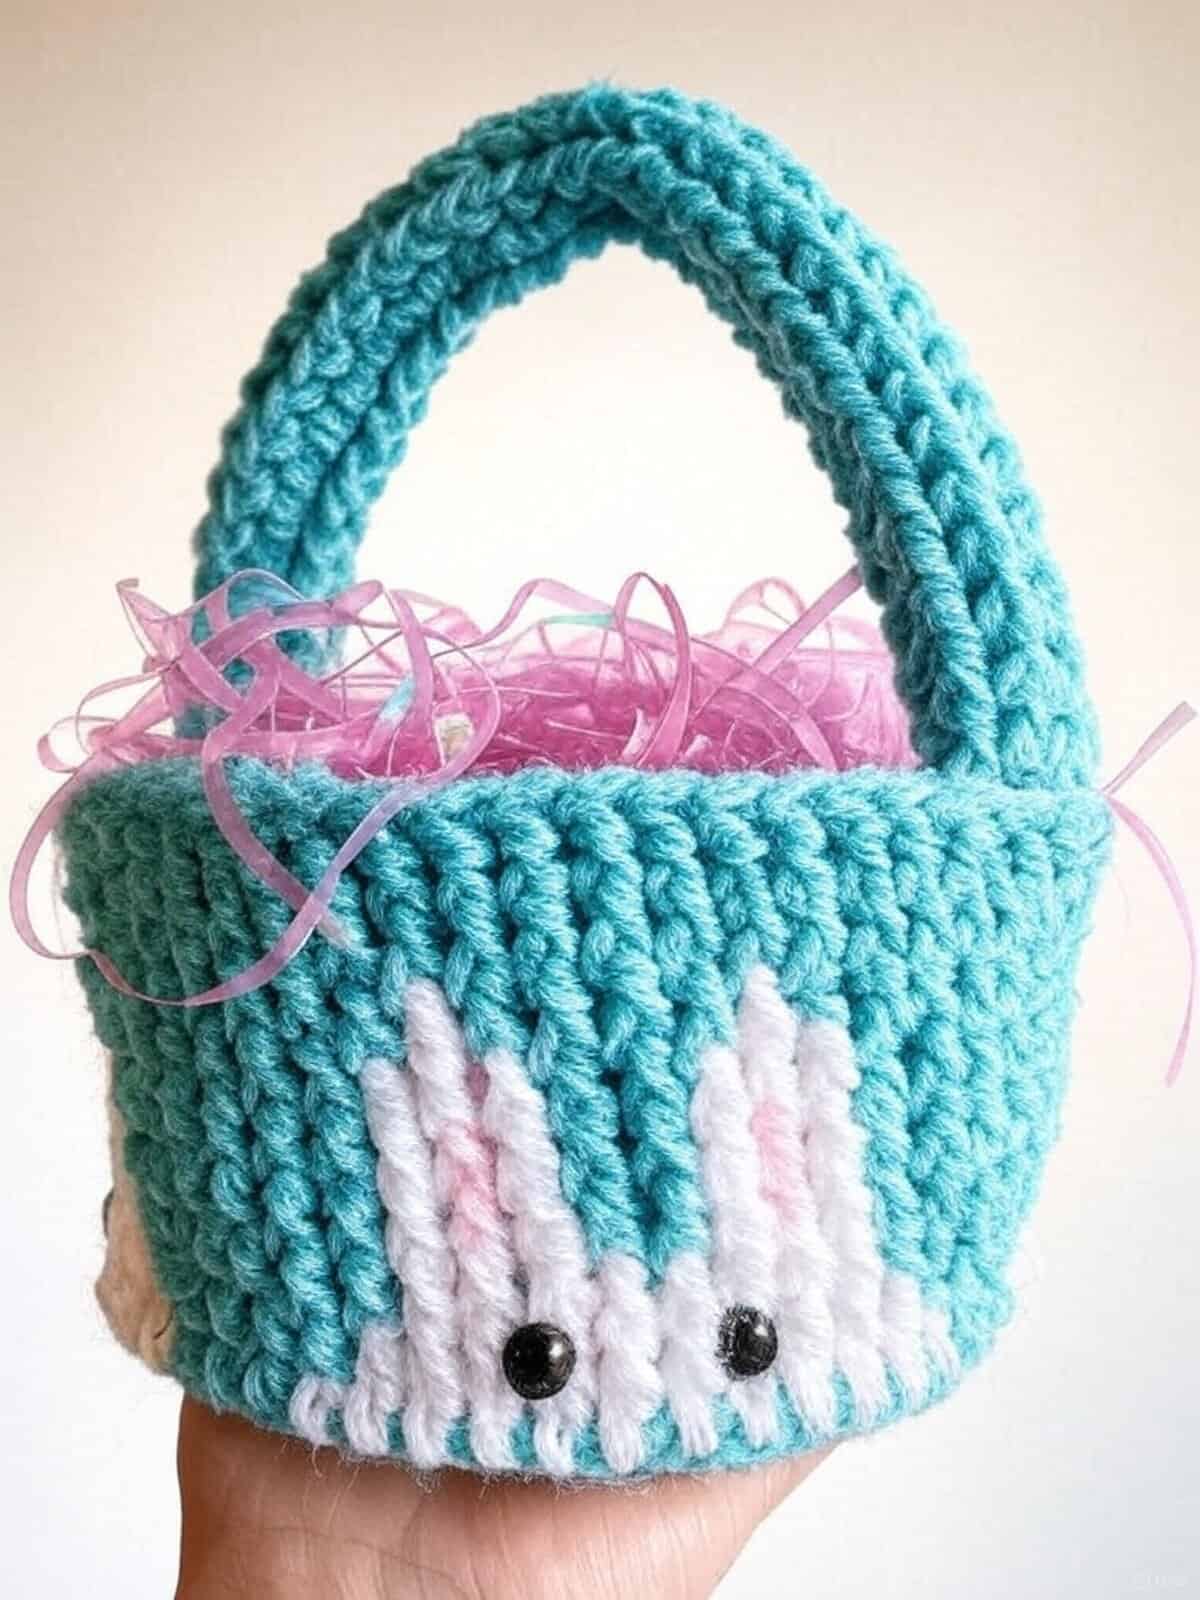
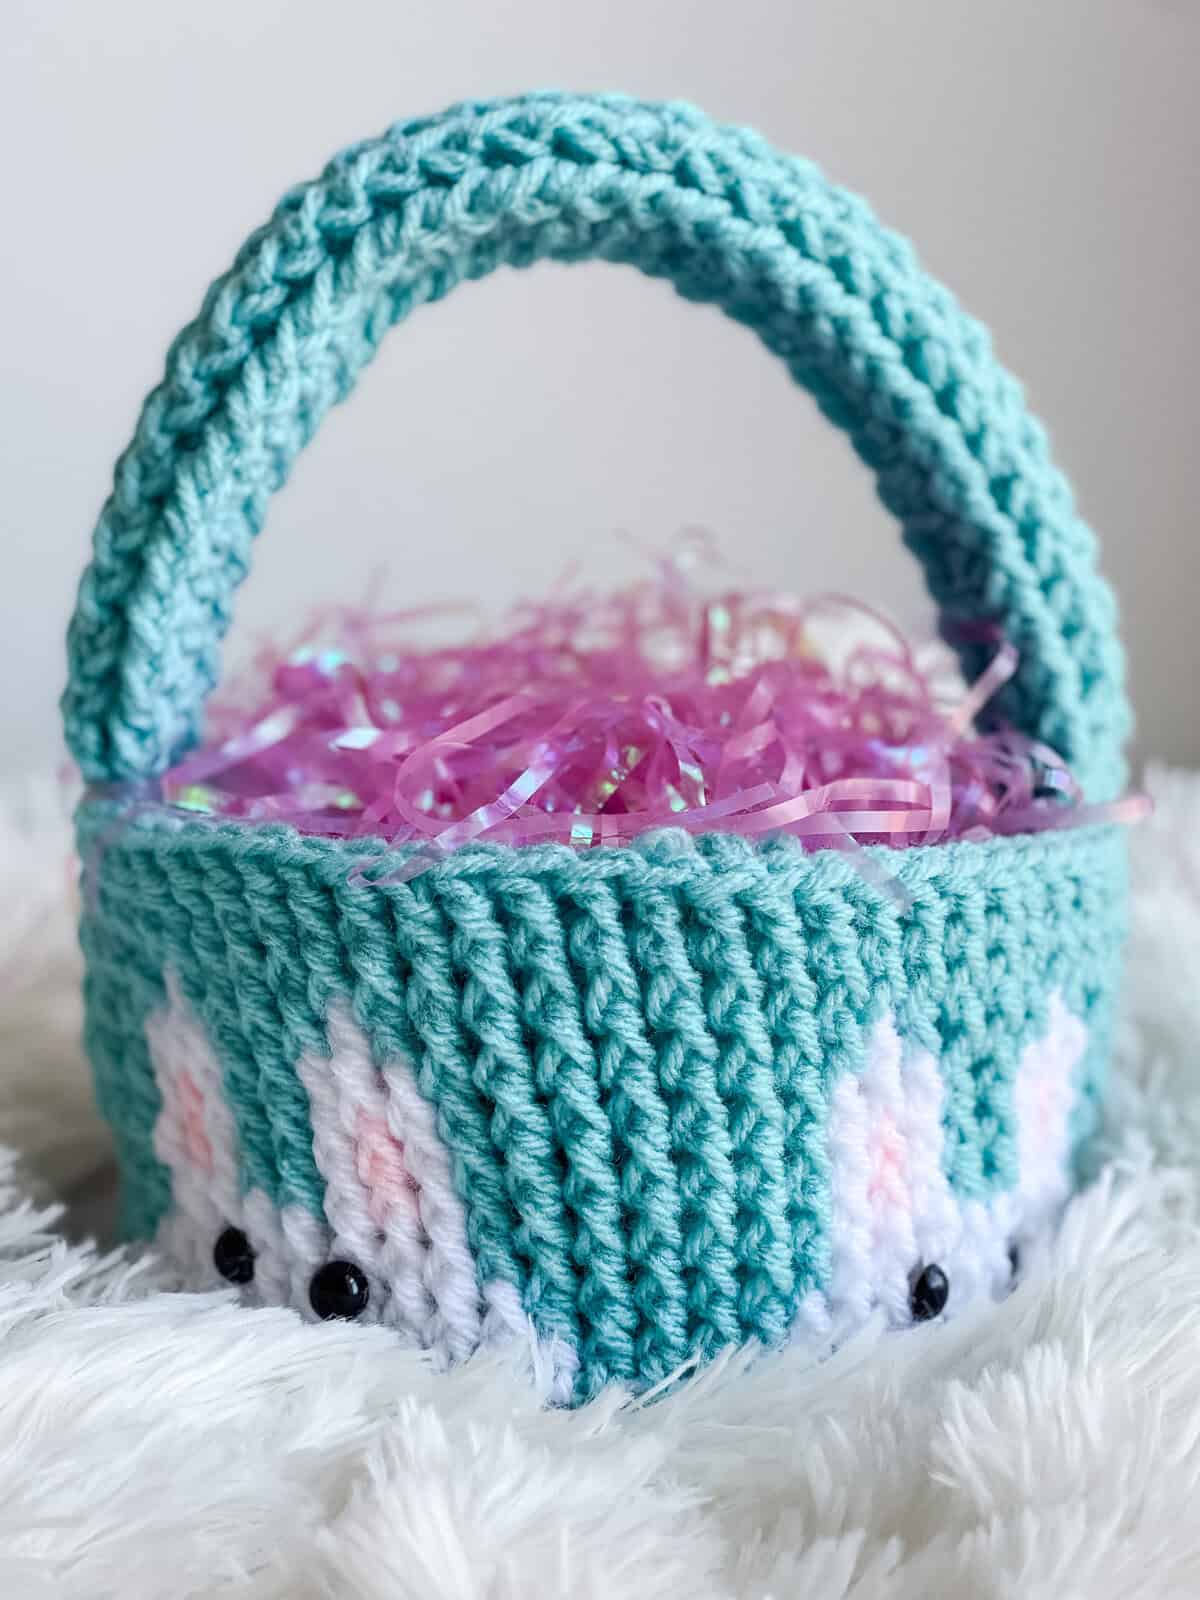
Hop into spring with my Peek-a-Boo Bunny Basket, a free crochet basket pattern that’s as adorable as it is functional! This charming basket, with its cute bunny face peeking out, is perfect for Easter egg hunts or a sweet handmade gift.
The Peek a Boo Bunny design first made an appearance in my Peek a Boo Bunny Hat and then came a set of mini Easter Baskets and a set of Easter Cup Cozies all featuring a Peek a Boo Bunny Design. And I am sure you will agree I needed a full-size Peek a Boo Bunny Easter Basket for making this year!

How to Make the Peek a Boo Crochet Easter Basket Pattern
For the full written pattern instructions for the Peek a Boo Basket, scroll down below. You can purchase the ad-free PDF of this bunny basket for a small fee. Or, become a Lifetime Member and never pay for a PDF again!
1. Worked from the bottom up starting with a circle bottom made with double crochet stitches.
2. Then the sides of this Easter bunny basket is made using the FPdc color work technique. This easy color work crochet technique is made with all double and front post dc stitches throughout.
3. I have a complete video tutorial to help walk you through this technique including how to read graphs!
4. Since colors are carried along the back of your work with this color work technique, the inside of the basket is a bit chaotic looking. So, without fastening off after completing the sides of the basket, you will begin working a double crochet flap that is folded down into the basket to hide all those carries!
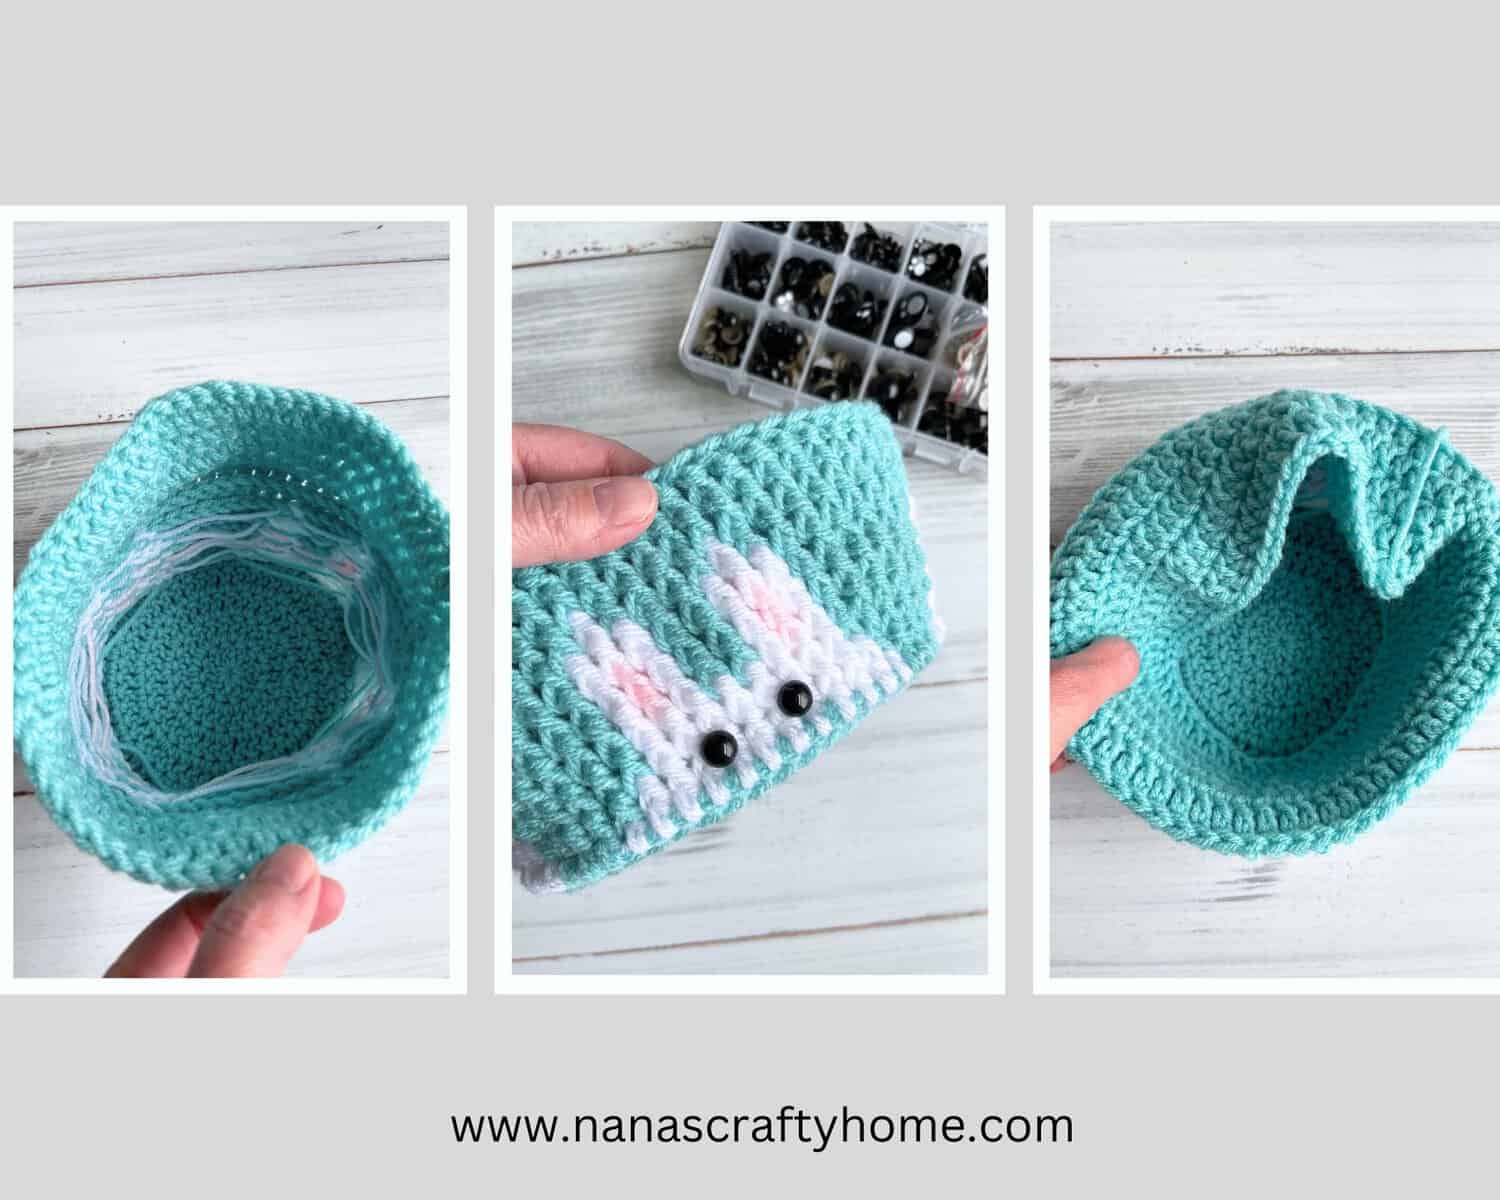
5. The first round of your inside flap is worked in the third loop of the dc stitches from the last round of the sides of the basket. Similar to working in the third loop of an hdc stitch. Then the remaining rounds of dc stitches are worked as usual.
6. Before folding down the flap you will add your safety eyes to each bunny. These can be the same dome buttons used for my hat or you could use safety eyes instead.
7. Fold down the flap to cover the yarn carries and then tack down the edge to the bottom of the basket. Tacking down is optional as since I am adding grass to the inside of the basket.
8. Then the handle is made with front post dc stitches worked in the round to length desired. I worked mine to approximately 12″ in length before sewing to each side of the basket.
9. The thickness of the sides and the handle with this stitch provides quite a bit of stiffness so I didn’t find it necessary to use any plastic canvas to make the sides rigid. You could insert a pipe cleaner into your handle but I think it is fine without that addition.
I hope you enjoy the Peek a Boo Bunny Basket!
Tonya
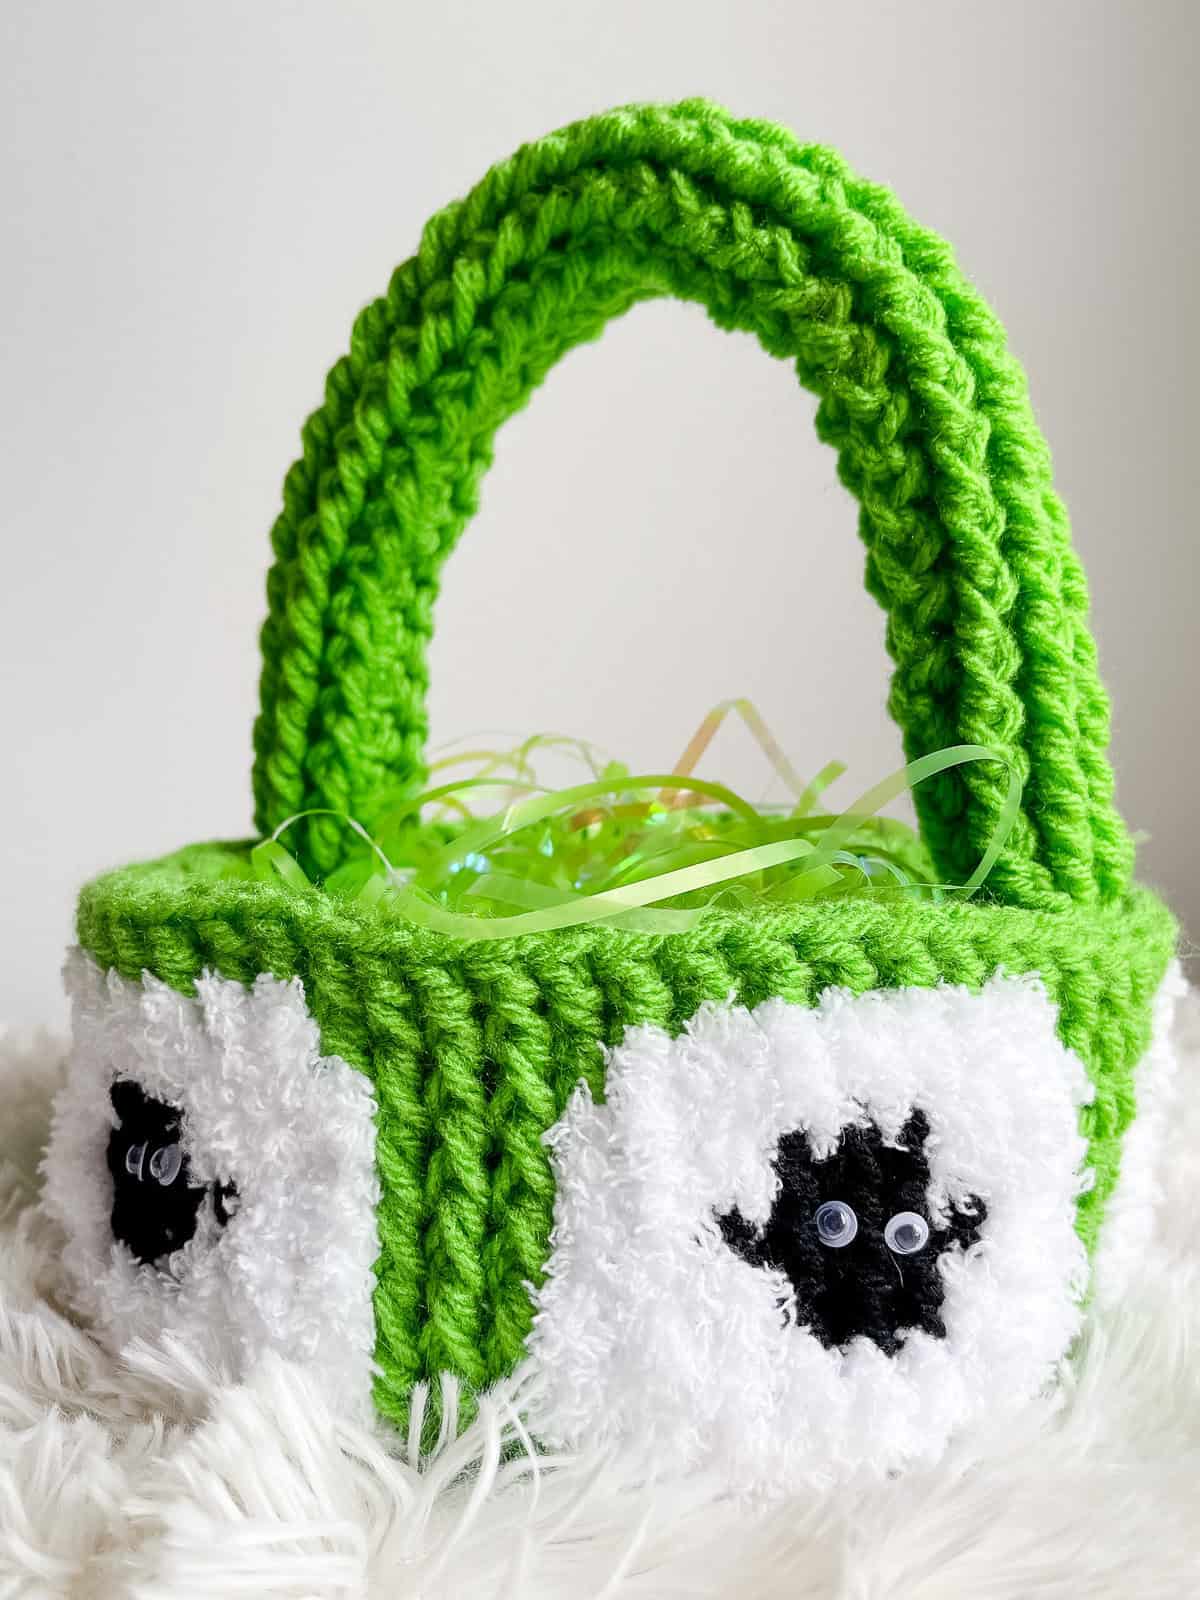
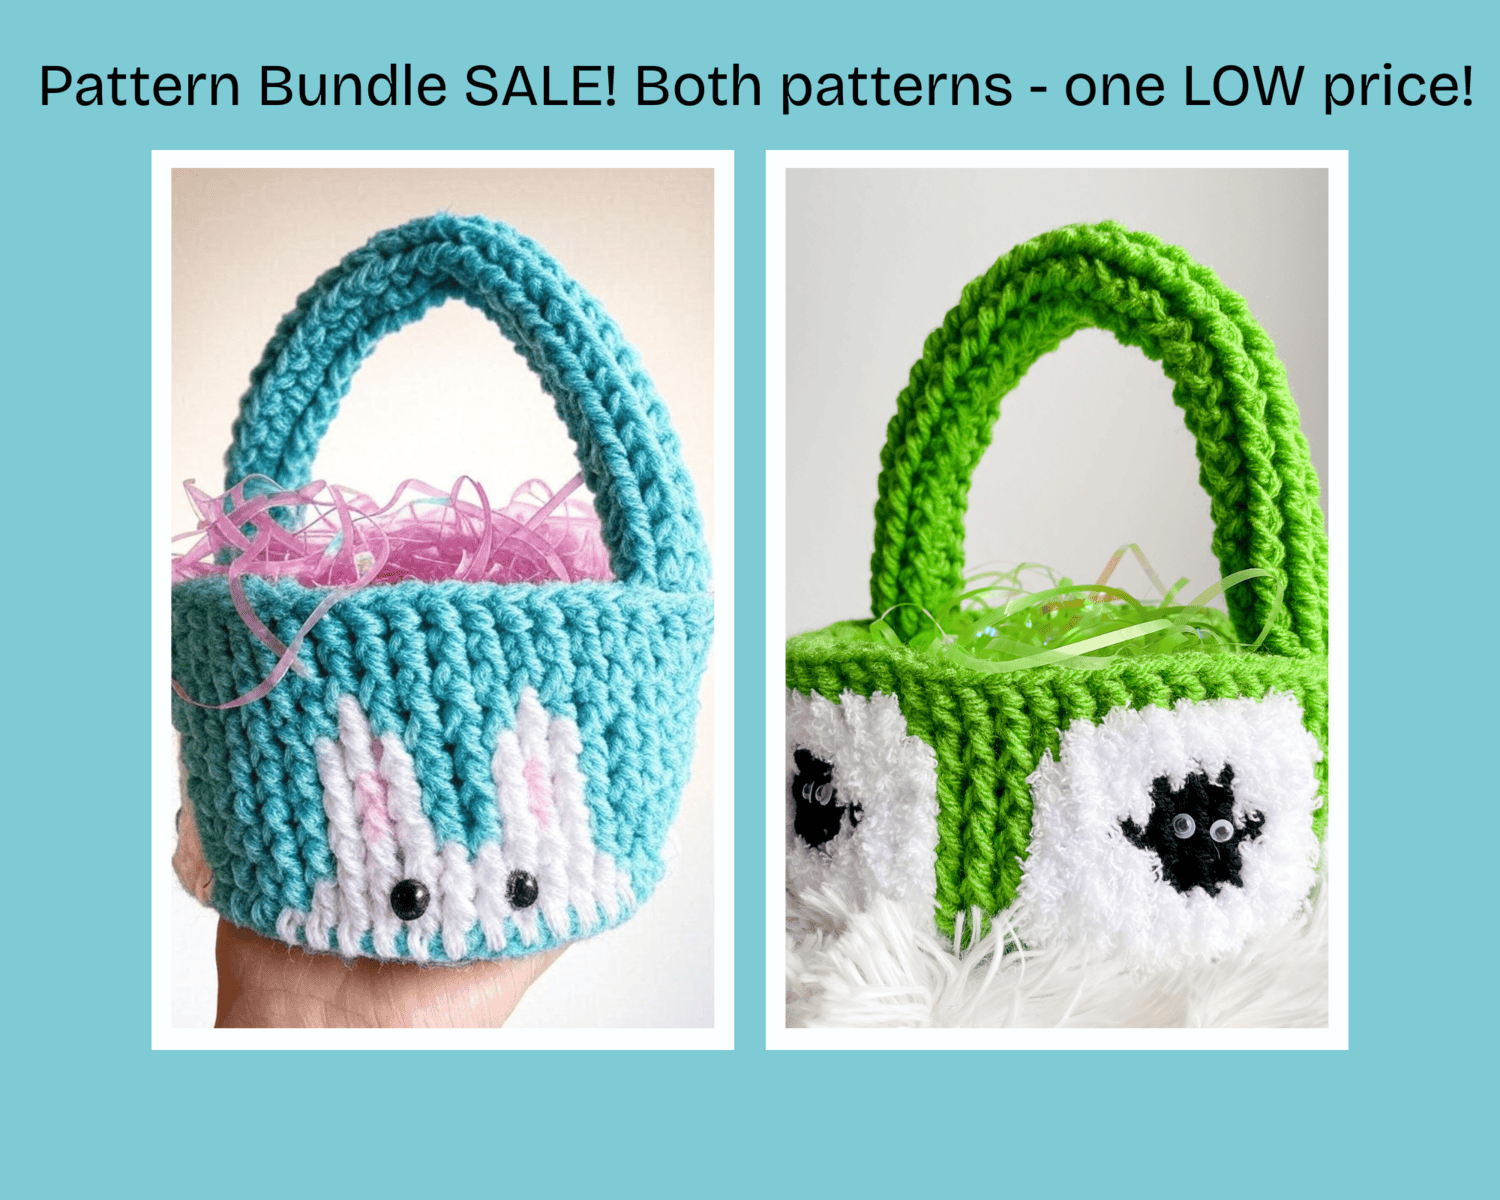
The Counting Sheep Basket is also available to my Lifetime Members for FREE or you can purchase for a small fee! This adorable basket is made with the same FPdc colorwork technique! I also have both the Peek a Boo Bunny Basket and Counting Sheep Basket available as a pattern bundle in my Etsy shop for a special price!
Peek a Boo Bunny Basket Supplies
*This post contains affiliate links. You can click on any yarn or material highlighted to purchase. I will receive a small commission if you purchase but it won’t cost you any extra! As an Amazon Associate I earn from qualifying purchases.
My Peek a Boo Bunny Basket uses Red Heart Super Saver* which is a medium worsted weight acrylic yarn. Very economical and with plentiful color options! You can certainly substitute your favorite worsted weight yarn – Hobby Lobby’s I Love This Yarn!, Red Heart With Love, Paintbox Simply Aran, Vanna’s Choice, Big Twist Value, Caron Simply Soft, Caron One Pound and so many more!
For the eyes of each bunny I used plastic safety eyes but you could also sew on those black dome buttons you used for your hat if you still have some on hand!
This Easter basket pattern is also available as an ad-free, printable PDF! You can purchase the Peek a Boo Bunny Basket pattern, or if you love PDFs, you might want to check out my Lifetime Membership. It’s an awesome deal! Never pay for one of my PDFs again!! (Or, scroll down for the free version!)


If you would like daily crochet inspiration be sure to follow me on Facebook, Instagram, Pinterest, YouTube, Twitter and Tumblr!
To get notified of my free crochet patterns and future giveaways, sign up for my newsletter. I never share or sell your information to third parties — it stays private!
You may like the following free crochet patterns by Nana’s Crafty Home:


- 1. Some Bunny Loves You Basket free crochet Easter basket pattern
- 2. Flower Easter Basket free crochet pattern
- 3. Gingham Bunny Cuddler free crochet pattern
Peek a Boo Bunny Crochet Easter Basket Pattern
Pattern written in US crochet terminology
Supplies:
Red Heart Super Saver, Weight 4 Medium (100% acrylic)
- Color Aruba Sea 2.6 oz / 136 yards (MC)
- Color White 0.8 oz / 42 yards (W)
- Color Sweet Pink 0.2 oz / 11 yards (P)
Crochet hook size I (5.5 mm)
Crochet hook size H (5.0 mm)
(8) 9 mm Black Plastic Safety Eyes
Scissors
Tapestry Needle
Approximate finished size: 6” wide x 3 1/2” tall (excluding handle)
Gauge: Rounds 1 – 5 = 6” circle
Abbreviations:
- MC = main color
- W = white
- P = pink
- RS = right side
- ch(s) = chain(s)
- dc = double crochet
- sl st = slip stitch
- yo = yarn over
- FPdc = front post double crochet (see special stitches section below)
- BLO = back loop only
- FPdc2tog = front post 2 double crochet stitches together (see special stitches section below)
- Rnd(s) = round(s)
Special Stitches:
FPdc (front post double crochet stitch): Yo and insert your hook from front to back to front around the dc stitch post from the row below, yo, pull up a loop (3 loops on hook), yo, pull through 2 loops, yo, pull through remaining 2 loops.
FPdc2tog: Yo, insert hook from front to back to front around the dc stitch post from the row below, yo, pull up a loop (three loops on hook), yo, pull through two loops (two loops on hook), yo, insert hook from front to back to front around the next dc stitch post from the row below, yo, pull up a loop (four loops on hook), yo, pull through two loops (three loops on hook), yo, pull through remaining three loops on hook.
Pattern Notes:
- Ch-3 counts as first st throughout pattern.
- Basket is worked from the bottom-up starting with the basket bottom.
- Graph is worked as FPdc around the stitch in the round directly below, with the exception of the first round which is a round of double crochet.
- Each pixel of the graph corresponds to 1 FPdc (rounds 2 – 8 of the side of basket) or dc (round 1) stitch.
- Basket is worked in the round without turning.
- Slip stitch join at the end of each FPdc round is worked into the top of the first FPdc, not the beginning ch-2.
- To work color changes, work last dc stitch before new color until there are two loops on the hook, pull in new color with last yo.
- To reduce ends to weave in, I carried the non-working yarn as yarn “floats” on the wrong side of the basket.
- Ch-2 at beginning of each round of sides does not count as a stitch.
- Bottom and Sides of the basket are worked with larger crochet hook, inside is worked in the smaller crochet hook size.
Recommended Tutorial:
How to change colors and read graph for FPdc
Pattern Instructions
Bottom
With MC, make magic circle.
Rnd 1: (RS) Ch 3, 11 dc in MC, join with sl st in top of ch-3 and tighten ring. (12)
Rnd 2: Ch 3, 1 dc in same st, 2 dc in each st around, sl st in top of ch-3. (24)
Rnd 3: Ch 3, 1 dc in same st, 1 dc in next st, *2 dc in next st, 1 dc in next st,* repeat from * to * to end, sl st in top of ch-3. (36)
Rnd 4: Ch 3, 2 dc in next st, *1 dc in next 2 sts, 2 dc in next st,* repeat from * to * to last st, 1 dc in last st, sl st in top of ch-3. (48)
Rnd 5: Ch 3, 1 dc in same st, 1 dc in next 3 sts, *2 dc in next st, 1 dc in next 3 sts,* repeat from * to * to end, sl st in top of ch-3. (60)
Side
Due to pattern and color change, Round numbers will restart at 1.
Rnd 1: (Begin color changes see below and working in BLO) (RS) Ch 2 (does not count as st), dc in same st and in each ch to end, sl st in top of first dc st. (60)
Rnd 1 color changes: MC1, W12, [MC3, W12] 3 times, MC2.
Rnd 2: Ch 2, FPdc in st below ch-2 (first dc st), FPdc in each st around, sl st in first st.
Rnd 2 color changes: MC2, W10, [MC5, W10] 3 times, MC3.
Rnds 3-8: Repeat as for Round 2 with the following color changes:
Rnd 3: MC3, W8, [MC7, W8] 3 times, MC4.
Rnd 4: MC3, W1, P1, W1, MC2, W1, P1, W1, [MC7, W1, P1, W1, MC2, W1, P1, W1] 3 times, MC4.
Rnd 5: Repeat round 4.
Rnd 6: MC3, W3, MC2, W3, [MC7, W3, MC2, W3] 3 times, MC4.
Rnd 7: MC4, W1, MC4, W1, [MC9, W1, MC4, W1] 3 times, MC5.
Rnd 8: MC60.
Inside Layer
Change to smaller crochet hook.
Rnd 9: Ch 1 (does not count as a stitch), dc in third loop (behind top two loops) in each st around, sl st to first st. (60)
Rnd 10: Ch 3 (counts as first st), dc in each st (now working as normal in top two loops), sl st in top of ch-3.
Rnds 11 – 13: Repeat round 10.
Fasten off leaving a long tail for tacking down the inside layer.
Handle
With larger crochet hook and MC leaving a long tail left for sewing, ch 7, sl st to first st to form a ring.
Rnd 1: Ch 3, dc in each st around, sl st in top of ch-3. (7)
Rnd 2: Ch 2, FPdc in st below ch-2 (first dc st), FPdc in each st around, sl st in first st.
Rnds 3 – 30: Repeat round 2. Will measure approximately 13” long.
Leaving a long tail for sewing, fasten off.
Assembly
Attach safety eyes to each bunny.
Fold down inside layer towards the bottom of the basket and with the long end on your needle, tack down the inside layer to the bottom inside of the basket.
Weave in end.
Sew handle to each side of basket using the long tails left for sewing.
Weave in remaining ends.
Color Graph
Copyright 2025 Tonya Bush / Nana’s Crafty Home
Social Media links:
Facebook: https://www.facebook.com/nanascraftyhome
Instagram: https://www.instagram.com/nanascraftyhome/
Pinterest: https://www.pinterest.com/nanascraftyhome/
YouTube: https://www.youtube.com/c/TonyaBush
Twitter: https://twitter.com/nanascraftyhome
Facebook Group: https://www.facebook.com/groups/829792060522798
Sign up for my Newsletter: https://nanascraftyhome.com/sign-up-for-my-free-newsletter/
Disclaimer: This pattern is for personal use or small-scale crafting. If you intend to sell the finished product in the EU, ensure it complies with the General Product Safety Regulation (EU) 2023/988, including safety, labeling, and traceability requirements.

 Hi! Thank you so much for being here! I am Tonya the designer behind Nana's Crafty Home. As a wife, mother, Nana of 9 & with 2 fur babies, my days are filled with love, laughter, hugs and yarn! Here you will find colorful and creative crochet designs for yourself or loved ones. My hope is that you will be inspired to learn and create along with me!