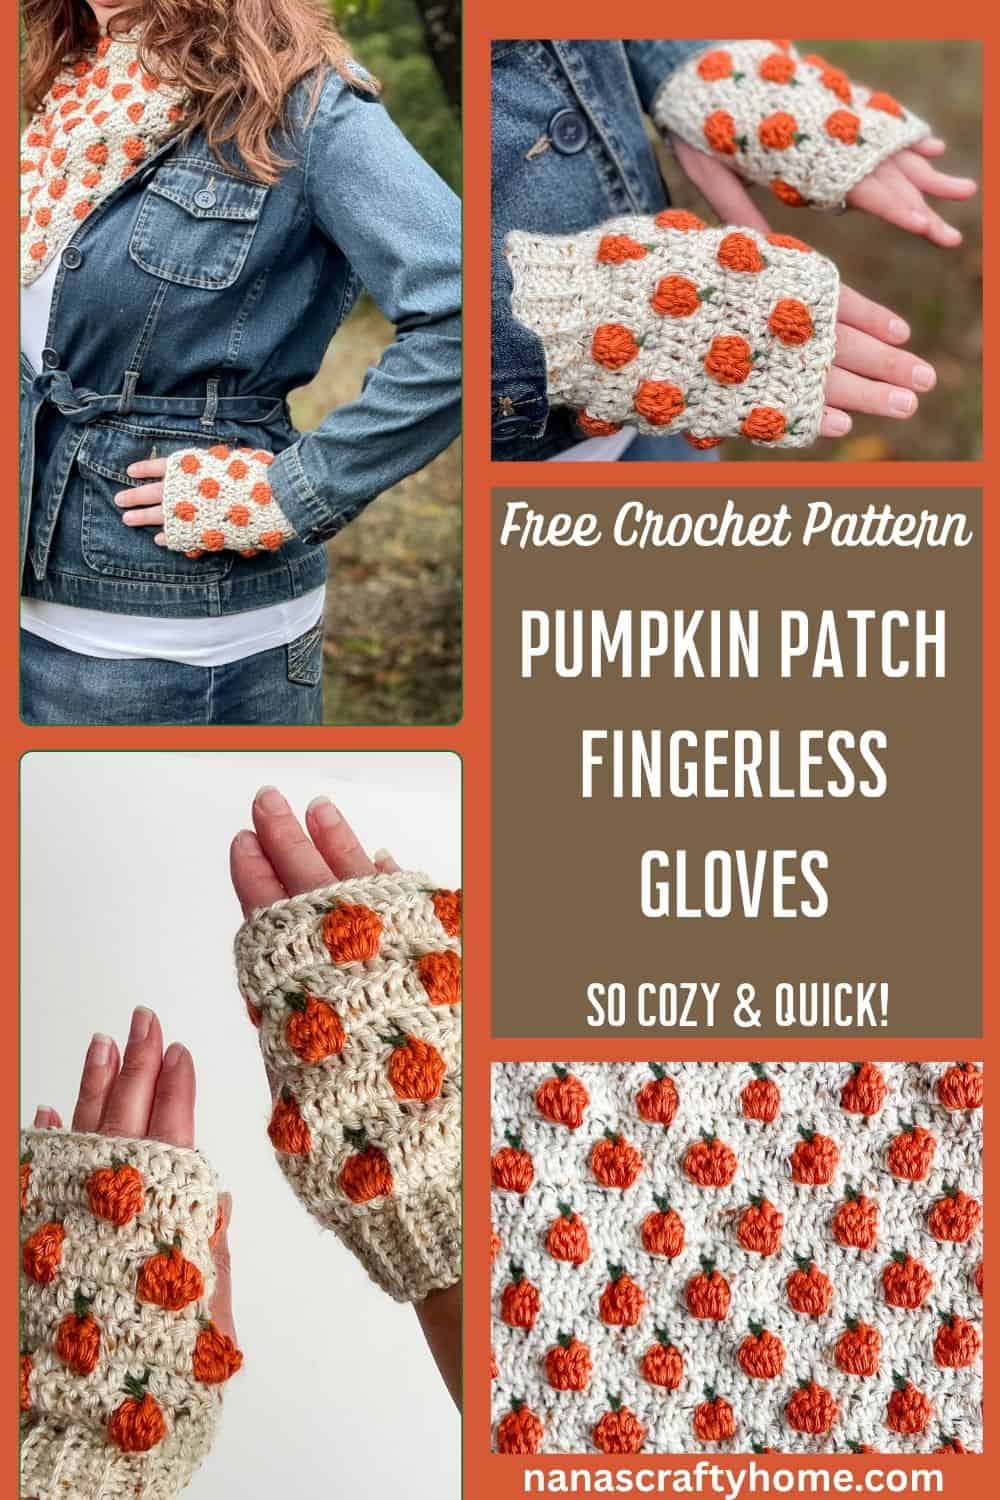
As the leaves turn golden and the air carries that crisp hint of pumpkin spice, there’s nothing quite like wrapping your hands in something handmade, warm, and whimsically autumnal. Enter the Pumpkin Patch Fingerless Gloves—a delightful free crochet pattern that’s as quick to whip up as it is adorable to wear.
These fingerless mitts aren’t just accessories; they’re a loving homage to pumpkin patch season, perfect for typing up cozy recipes, sipping hot cider, or keeping warm with your favorite pumpkin spice latte!
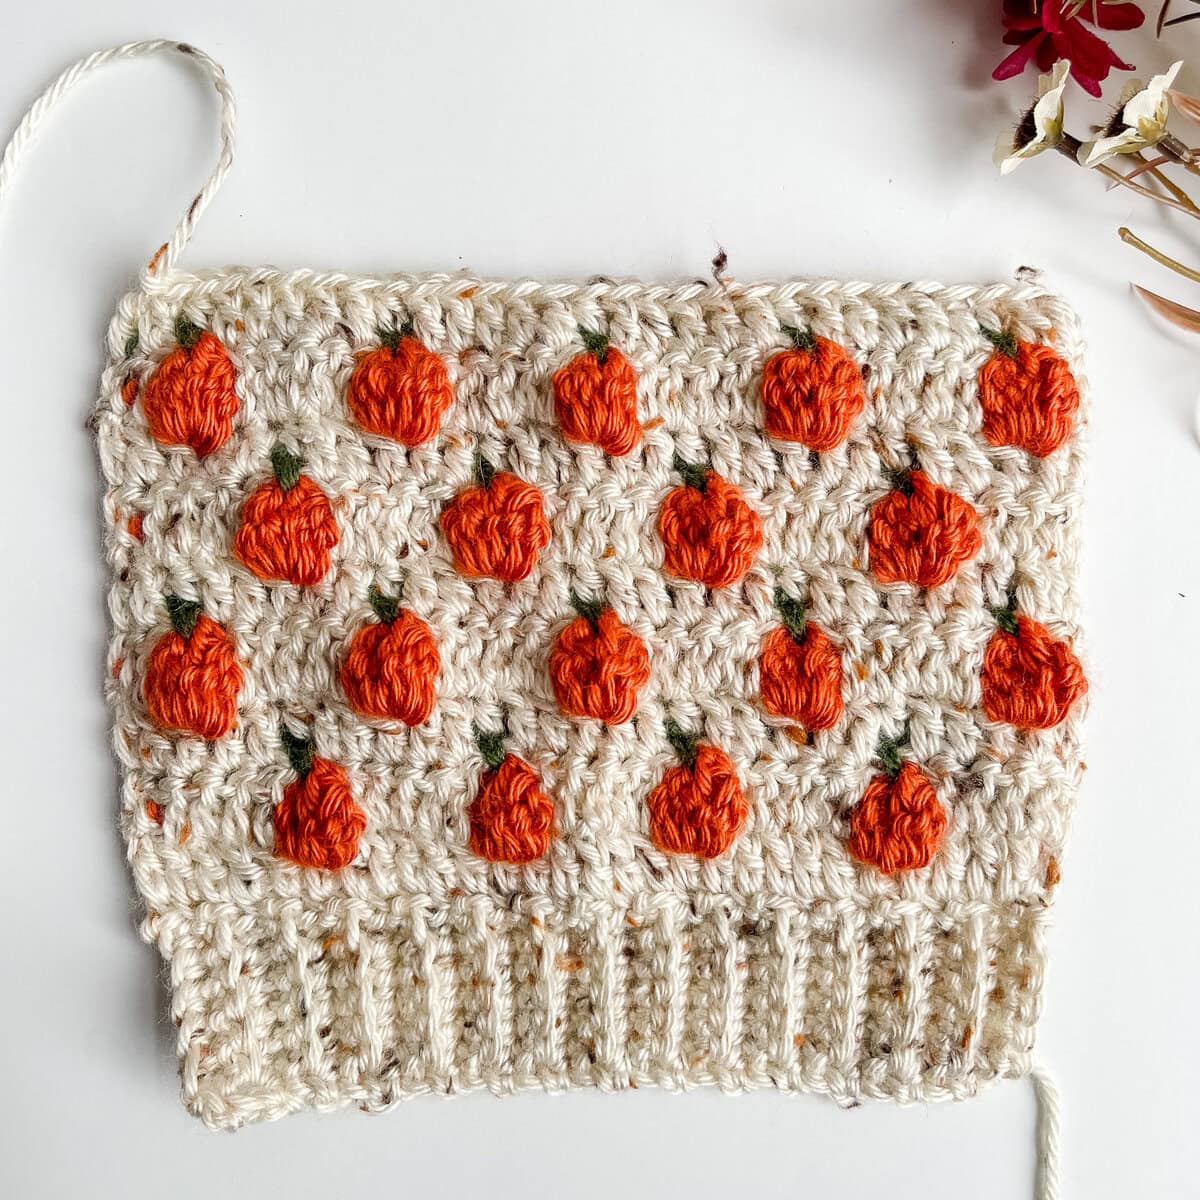
Made with the charming Pumpkin Patch crochet stitch, a textured technique that mimics those bumpy, bountiful gourds without a single appliqué in sight. And the best part? This pattern is designed for speed and simplicity!
But wait, there’s more harvest bounty to reap! This pattern is just one gem in the Pumpkin Patch Crochet Pattern Bundle, a curated collection of fall-inspired designs that’ll keep your hooks busy through sweater weather and beyond. Snag the free gloves pattern below to get started, and dive into the bundle for even more seasonal magic.
Ready to stitch your way into autumn bliss? Grab your yarn, fire up that free tutorial, and let’s get crocheting a pair of crochet fingerless gloves!


How to Make the Pumpkin Patch Crochet Fingerless Gloves
For the full free written pattern instructions for the Pumpkin Patch Fingerless Gloves Pattern, scroll down below. You can purchase the ad-free PDF of this pattern for a small fee. Or, become a Lifetime Member and never pay for a PDF again!
1. Made with my Pumpkin Patch Stitch with a complete photo and video tutorial available!
2. Begin by making the main body of the gloves using the Pumpkin Patch Stitch in a rectangle.
3. Once you have the main body complete, add the crochet ribbing at the bottom using the unused loops from your foundation chain.
4. If you have never added crochet ribbing to one of your projects I recommend heading over to my Remember Me Beanie pattern where I have a photo tutorial to help you.
5. Once the ribbing is added to the bottom of your gloves you will fold the glove in half and seam the edge leaving a hole for the thumb. Now repeat for glove #2 for a matched set!
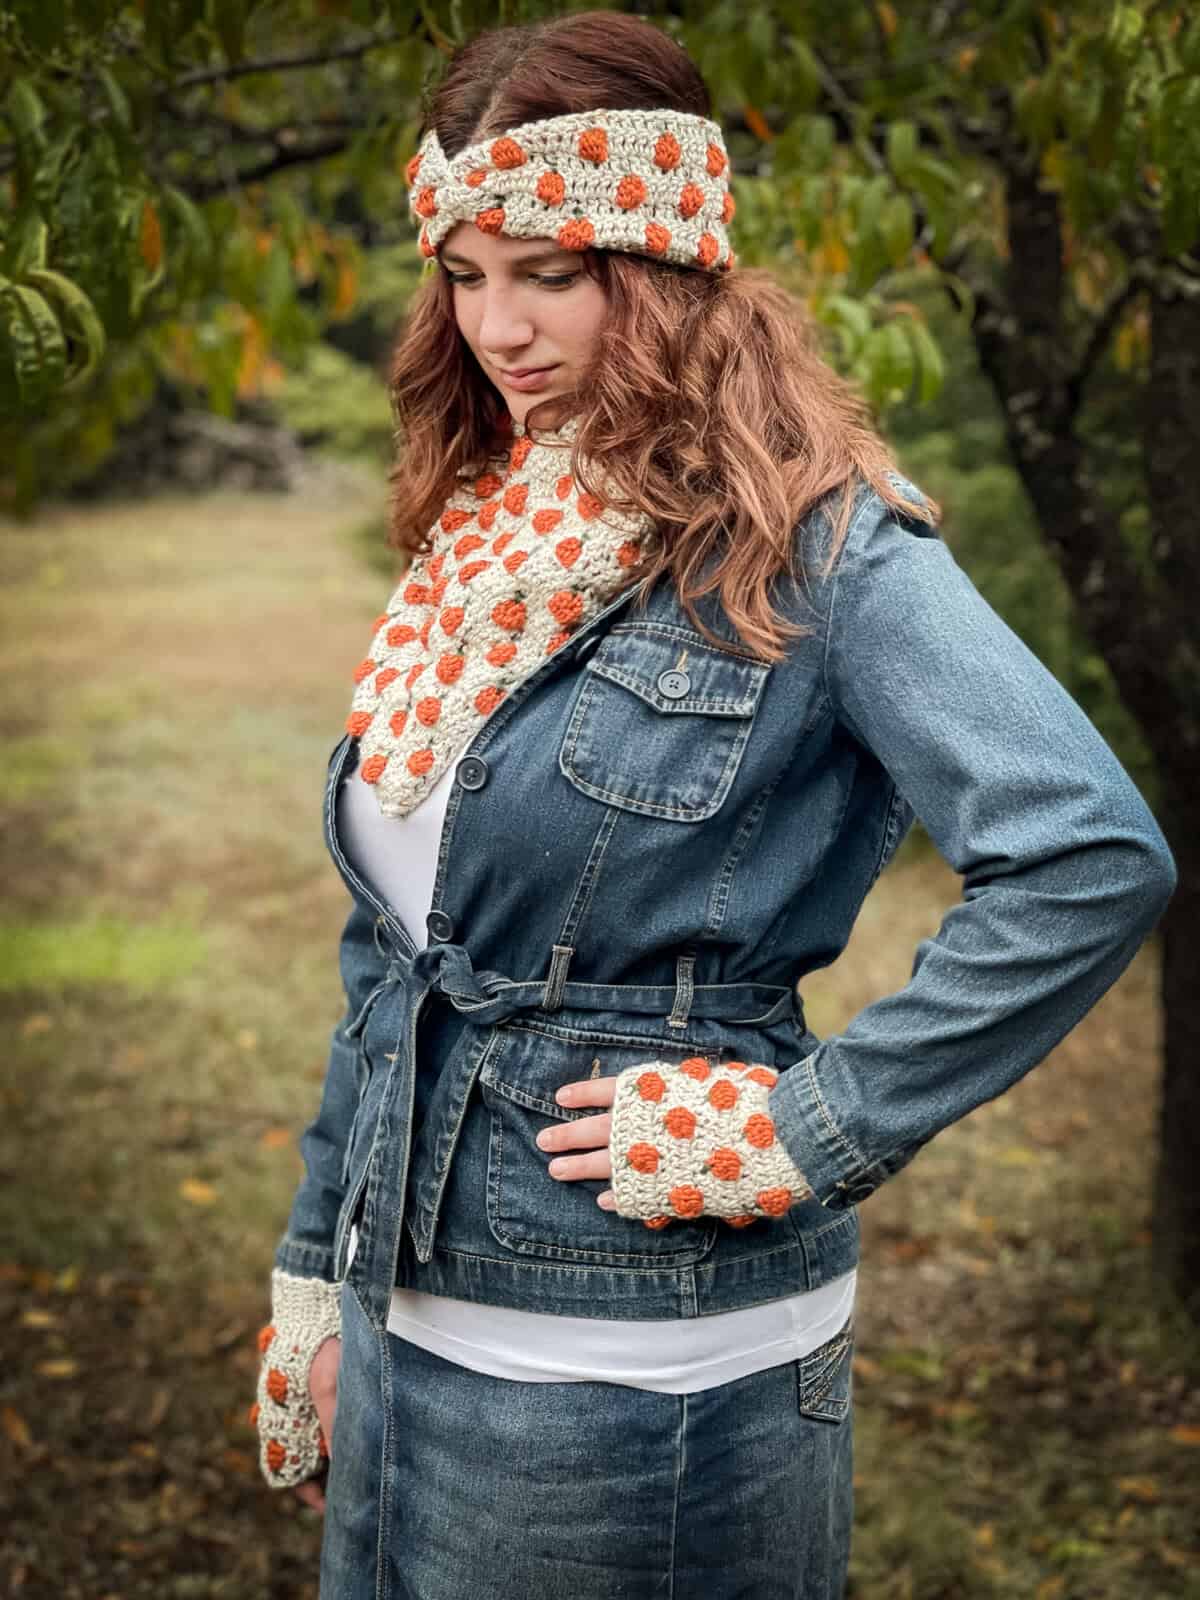
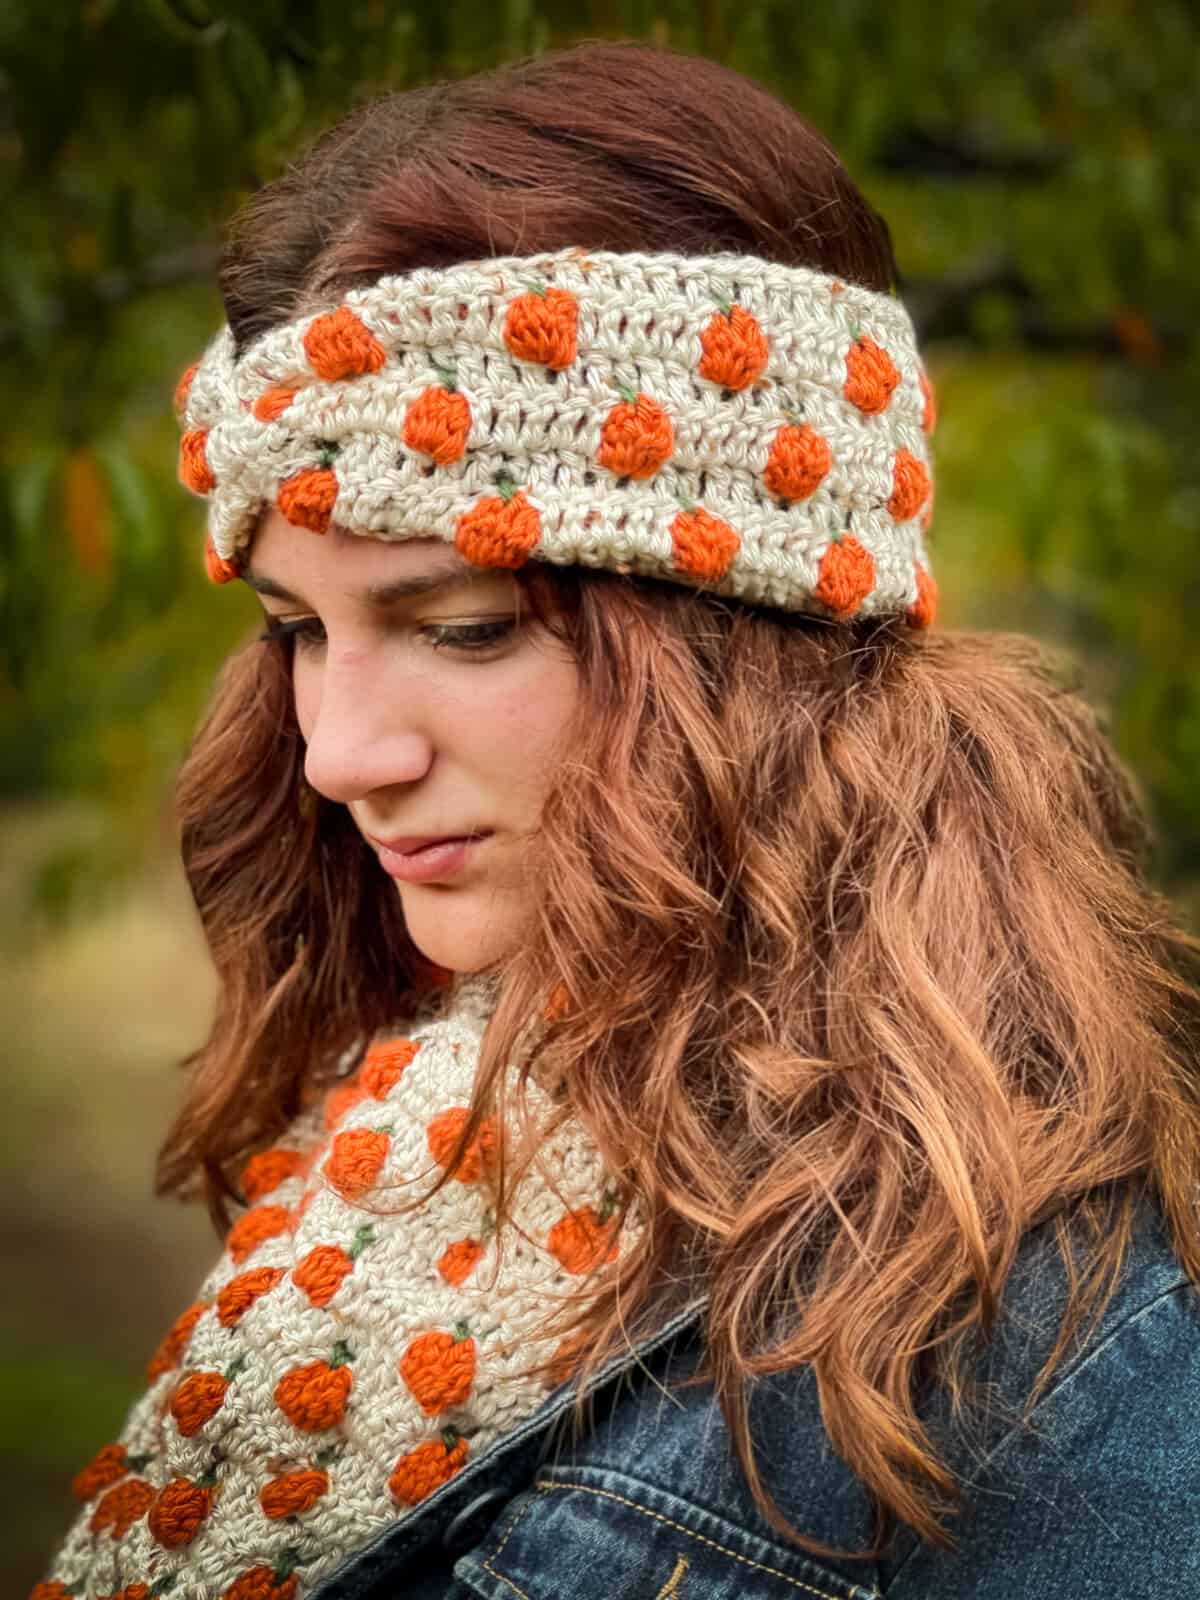
I hope you love your new Pumpkin Fingerless Gloves and be sure to check out the matching Pumpkin Patch Cowl and the Pumpkin Patch Headband – now all three crochet patterns are available on the blog!
Supplies for the Pumpkin Patch Crochet Fingerless Gloves pattern
*This post contains affiliate links. You can click on any yarn or material highlighted to purchase. I will receive a small commission if you purchase but it won’t cost you any extra! As an Amazon Associate I earn from qualifying purchases.
I used Caron Simply Soft Tweeds in Off White for the main color of my crochet gloves – I just love the tweedy look for this set of pumpkin patterns.
For the pumpkins I used Simply Soft solids in pumpkin color way and dark sage for the stems.
Both yarns are a medium worsted weight yarn with a soft lovely sheen – one of my personal favorites. You could easily substitute another worsted weight yarn – these crochet gloves are a great stash busting project!
If you plan on making all three patterns in the Pumpkin Patch pattern series you will need a total of 9 oz / 432 yards (2 skeins) Caron Simply Soft Tweeds in Off White, 4 oz / 212 yards of Caron Simply Soft Solids in Pumpkin, and 1.4 oz / 75 yards in Dark Sage.
If you can’t get enough of the fun Pumpkin Patch crochet stitch, check out the Pumpkin Patch Series Bundle! This exclusive collection includes all three patterns in the series for one convenient download.
Purchase the ad-free PDF
You can purchase the ad-free PDF of this Crochet Pumpkin Fingerless Gloves pattern for a small fee. You can purchase the individual pattern, or if you love PDFs, you might want to check out my Lifetime Membership. It’s an awesome deal! Never pay for one of my PDFs again!!


If you would like daily crochet inspiration be sure to follow me on Facebook, Instagram, Pinterest, YouTube, and Twitter.
To get notified of my free crochet patterns and future giveaways, sign up for my newsletter. I never share or sell your information to third parties — it stays private!
You may also like the following free crochet patterns:


- Mountain Trail Arm Warmers free crochet pattern
- Patchwork Revelry Scarf free crochet pattern
- Pumpkin Patch Headband free crochet pattern

Pumpkin Patch Fingerless Gloves free crochet pattern
Pattern written in US crochet terminology
Supplies:
- Caron Simply Soft Tweeds, Weight 4 / Medium (97% acrylic / 3% viscose)
- (1) Color Off White (MC) 2.0 oz / 96 yards
- Caron Simply Soft, Weight 4 / Medium (100% acrylic)
- (1) Color Pumpkin 0.5 oz / 26 yards
- (1) Color Dark Sage 0.2 oz / 11 yards
Crochet hook size H (5 mm)
Stitch Marker
Scissors
Tapestry Needle
Approximate finished size: 6 1/2” tall x 7 1/2” wide before folding and seaming
One size fits most teens/women
Gauge: 14 dc sts x 13 rows = 4” x 4”
Abbreviations:
- MC = main color
- ch(s) = chain(s)
- RS = right side
- dc = double crochet
- sl st = slip stitch
- sc = single crochet
- bob = bobble (see special stitches section below)
- hdc = half double crochet
- sk = skip
- CL = cluster (see special stitches section below)
Special Stitches:
Bobble: (Yo, insert hook into stitch, yo, pull up a loop, yo and pull through 2 loops on hook) three times (4 loops on hook), yo and pull through all 4 loops on hook.
CL (cluster): (bob, ch 1, bob) all worked in the same st.
Pattern Notes:
- Resize width by working foundation chain in multiples of 6 + 7. Add or subtract rows for resizing height.
- Chain 3 at beginning of row counts as first st.
Recommended Tutorial:
Pattern Instructions
Make 2
With MC, ch 31.
Row 1: (RS) Dc in fourth ch from hook (skipped chs count as first st) and in each ch to end. Do not fasten off, place stitch marker in loop to hold stitch. Turn. (29)
Row 2: Join orange to first st with sl st, ch 6, sk next 4 sts, CL in next st, *ch 6, sk next 5 sts, CL in next st,* repeat from * to * to last 5 sts, ch 6, sk next 4 sts, sl st in last st. Fasten off orange. Do not turn. (4 clusters)
Row 3: Insert hook into loop of MC, ch 3, working behind chs and into skipped sts from previous row, dc in next 4 sts, *ch 1, sk over CL, dc in next 5 sts,* repeat from * to * to end. Do not fasten off, place stitch marker in loop to hold stitch. Turn. 25 dc sts + 4 ch-1 sps
Push pumpkin clusters through to RS of glove.
Row 4: Join green to first st with sl st, ch 6, sk next 4 sts, *sc into ch-1 sp from cluster of row 2 and over ch-1 sp from previous row, ch 6, sk next 5 sts,* repeat from * to * to last st, sl st in last st. Fasten off green. Do not turn.
Row 5: Insert hook into loop of MC, ch 3, working in front of chs and into skipped sts from previous row, dc in next 4 sts, *hdc in sc st from previous row, dc in next 5 sts,* repeat from * to * to end. Do not fasten off, place stitch marker in loop to hold stitch. Turn.
Row 6: Join orange to first st with sl st, ch 2, sk next st, CL in next st, *ch 6, sk next 5 sts, CL in next st,* repeat from * to * to last 2 sts, ch 2, sk next st, sl st in last st. Fasten off orange. Do not turn. (5 clusters)
Row 7: Insert hook into loop of MC, ch 3, working behind chs and into skipped sts from previous row, dc in next st, *ch 1, sk over CL, dc in next 5 sts,* repeat from * to * to last CL, ch 1, sk CL, dc in last 2 sts. Do not fasten off, place stitch marker in loop to hold stitch. Turn. 24 dc sts + 5 ch-1 sps
Push pumpkin clusters through to RS of glove.
Row 8: Join green to first st with sl st, ch 2, sk next st, *sc into ch-1 sp from cluster of row 6 and over ch-1 sp from previous row, ch 6, sk next 5 sts,* repeat from * to * to last CL, sc in ch-1 sp from cluster, ch 2, sk next st, sl st in last st. Fasten off green. Do not turn.
Row 9: Insert hook into loop of MC, ch 3, working in front of chs and into skipped sts from previous row, dc in next st, *hdc in sc st from previous row, dc in next 5 sts,* repeat from * to * to last 3 sts, hdc in next st, dc in last 2 sts. Turn.
Rows 10 – 17: Repeat rows 2 – 9.
Fasten off, leaving a long tail for sewing. Weave in remaining ends.
Ribbing
Join MC to bottom RS corner of glove.
Ch 7.
Row 1: Sc in second ch from hook and in each ch to end, now working in unused loops from foundation ch, sl st in next two sts. Turn. 6
Row 2: Skip 2 sl sts, working in BLO of sc sts from row 1 of ribbing, sc in BLO of each st to last st, sc in both loops of last st. Turn. 6
Row 3: Ch 1, sc both loops of first st, then sc in BLO of each st to end, sl st in next two sts of foundation ch. Turn.
Rows 4 – 29: Repeat rows 2 – 3.
Fasten off leaving a long tail for sewing.
Seaming
Fold the glove in half with right sides (RS) together, aligning the side edges from the ribbed cuff to the top edge. This will create a tube shape with the seam along one side. Pin the edges together if needed to prevent shifting during seaming.
Thread a yarn needle with the long tail left from the ribbing (or attach a new length of matching yarn if the tail is too short). Starting at the bottom edge of the cuff, sew the ribbing edges together using a whip stitch or mattress stitch for an invisible seam. Work evenly through both layers, matching stitches as you go. Stop sewing once the ribbing section is fully joined—do not continue into the main body of the glove.
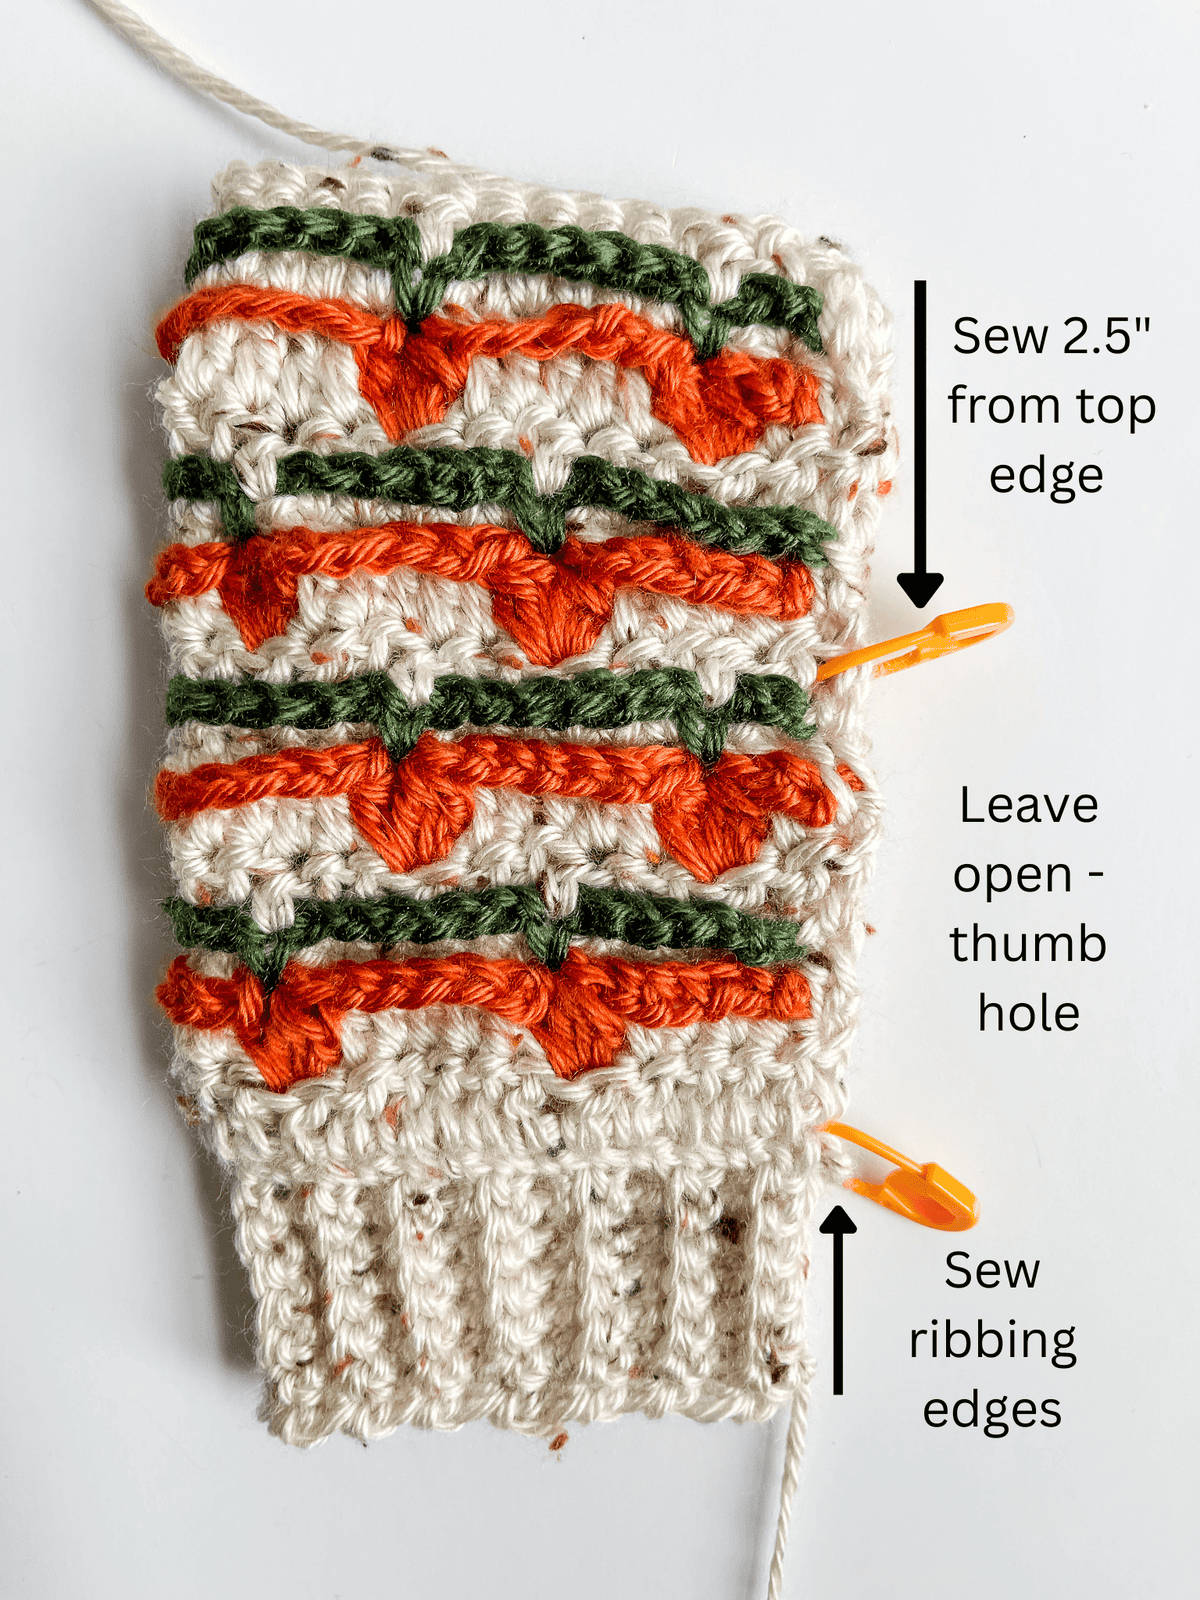
Thread a yarn needle with the long tail left from the main body of the glove (or attach a new length). Starting at the top edge of the glove, sew the edges together downward for approximately 2½ inches, using the same whip stitch or mattress stitch. This leaves an opening in the middle for the thumb hole (typically 1½–2 inches wide, depending on your gauge and hand size). Suggestion: Measure against your hand for fit—adjust the seam length if needed (e.g., 2 inches for smaller hands, 3 inches for larger). For a more precise fit, count rows instead of measuring inches. See photo below:
Weave in the seaming yarn ends securely along the inside of the seam to hide them. Turn the glove right side out to check the fit and ensure the thumb opening aligns comfortably (it should sit just above the thumb base when worn).
With the glove right side out, join the main color (MC) yarn to one edge of the thumb hole using a slip knot. Single crochet (sc) evenly around the entire thumb hole edge. Adjust as needed to avoid puckering. Slip stitch (sl st) in the first sc to join the round.
Fasten off and weave in all remaining ends.
Copyright 2025 Tonya Bush / Nana’s Crafty Home, LLC.
Social Media links:
Facebook: https://www.facebook.com/nanascraftyhome
Instagram: https://www.instagram.com/nanascraftyhome/
Pinterest: https://www.pinterest.com/nanascraftyhome/
YouTube: https://www.youtube.com/c/TonyaBush
Facebook Group: https://www.facebook.com/groups/829792060522798
Sign up for my Newsletter: https://nanascraftyhome.com/sign-up-for-my-free-newsletter/
 Hi! Thank you so much for being here! I am Tonya the designer behind Nana's Crafty Home. As a wife, mother, Nana of 9 & with 2 fur babies, my days are filled with love, laughter, hugs and yarn! Here you will find colorful and creative crochet designs for yourself or loved ones. My hope is that you will be inspired to learn and create along with me!
0 Comments